June 1, 2026
In this post, I am here to document my Allen & Heath SQ-5 setup. This is a very complex digital mixer and I have a very specific setup (that seems to evolve and grow in complexity daily!). Not only that, but the mixer does many things that require changes in the setup (recordering to DAW vs doing a virtual sound check for example), and I want to document the settings. At the same time, I am also learning about some of the features that I like and use. This document is not complete but as my setup evolves, I will add things here.
Here we go!
INPUT SETUP
Though the SQ-5 can handle 48 inputs, there are a total of 23 physical inputs on this mixer. Other inputs are made available with the addition of a stage box. The Allen & Heath DX168 is an example of an excellent stage box that would offer an additional 16 ins and 8 outs.
This is a list of the devices currently physically plugged in to them:
Input # —- Device Name
1 – EMPTY
2 – EMPTY
3 – NW-800 Condenser mic
4 – EMPTY
5 – Beltuna Leader V Acoustic Accordion Left channel
6 – Beltuna Leader V Acoustic Accordion RIGHT channel
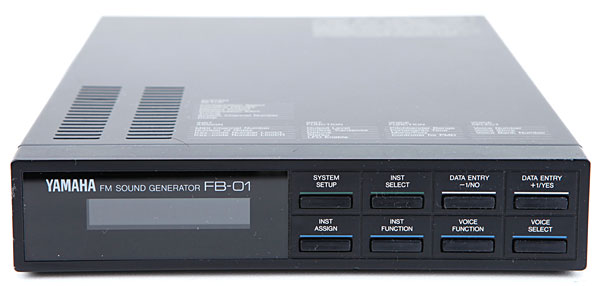
7 – Yamaha FB-01
8 – Petosa Acoustic Accordion transmitter Left channel
9 – Petosa Acoustic Accordion transmitter Right channel
10 – Ketron X4 right hand orchestral instruments and effects
11 – LEKATO Wireless transmitter Left (for FR-8x)
12 – LEKATO Wireless transmitter Right (for FR-8x)
13 – BgMicL (SE Electronics SE4400a Condenser mic)
14 – BgMicR (SE Electronics SE4400a Condenser mic)
15 – SmallMicL (NW-410 Condenser mic)
16 – SmallMicR (NW-410 Condenser mic)
17 – ST1 L – BK-7m Left channel (ST1 is stereo, uses a single fader)
18 – ST1 R – BK-7m Right channel (ST1 is stereo, uses a single fader)
19 – ST2 L – Ketron X4 Arranger Left channel (ST2 is stereo, uses a single fader)
20 – ST2 R – Ketron X4 Arranger Right channel (ST2 is stereo, uses a single fader)
21 – ST3 L – EMPTY (3.5mm stereo input jack on top of mixer)
22 – ST3 R – EMPTY (3.5mm stereo input jack on top of mixer)
23 – EMPTY, (reserved for the TalkBack mic located to the left of input 16)
FADER POSITIONS
This is a digital mixer, I can place any input or any odd/even stereo pair on any single fader. On top of this, the mixer permits up to 6 layers, so each layer can have a different layout or function.
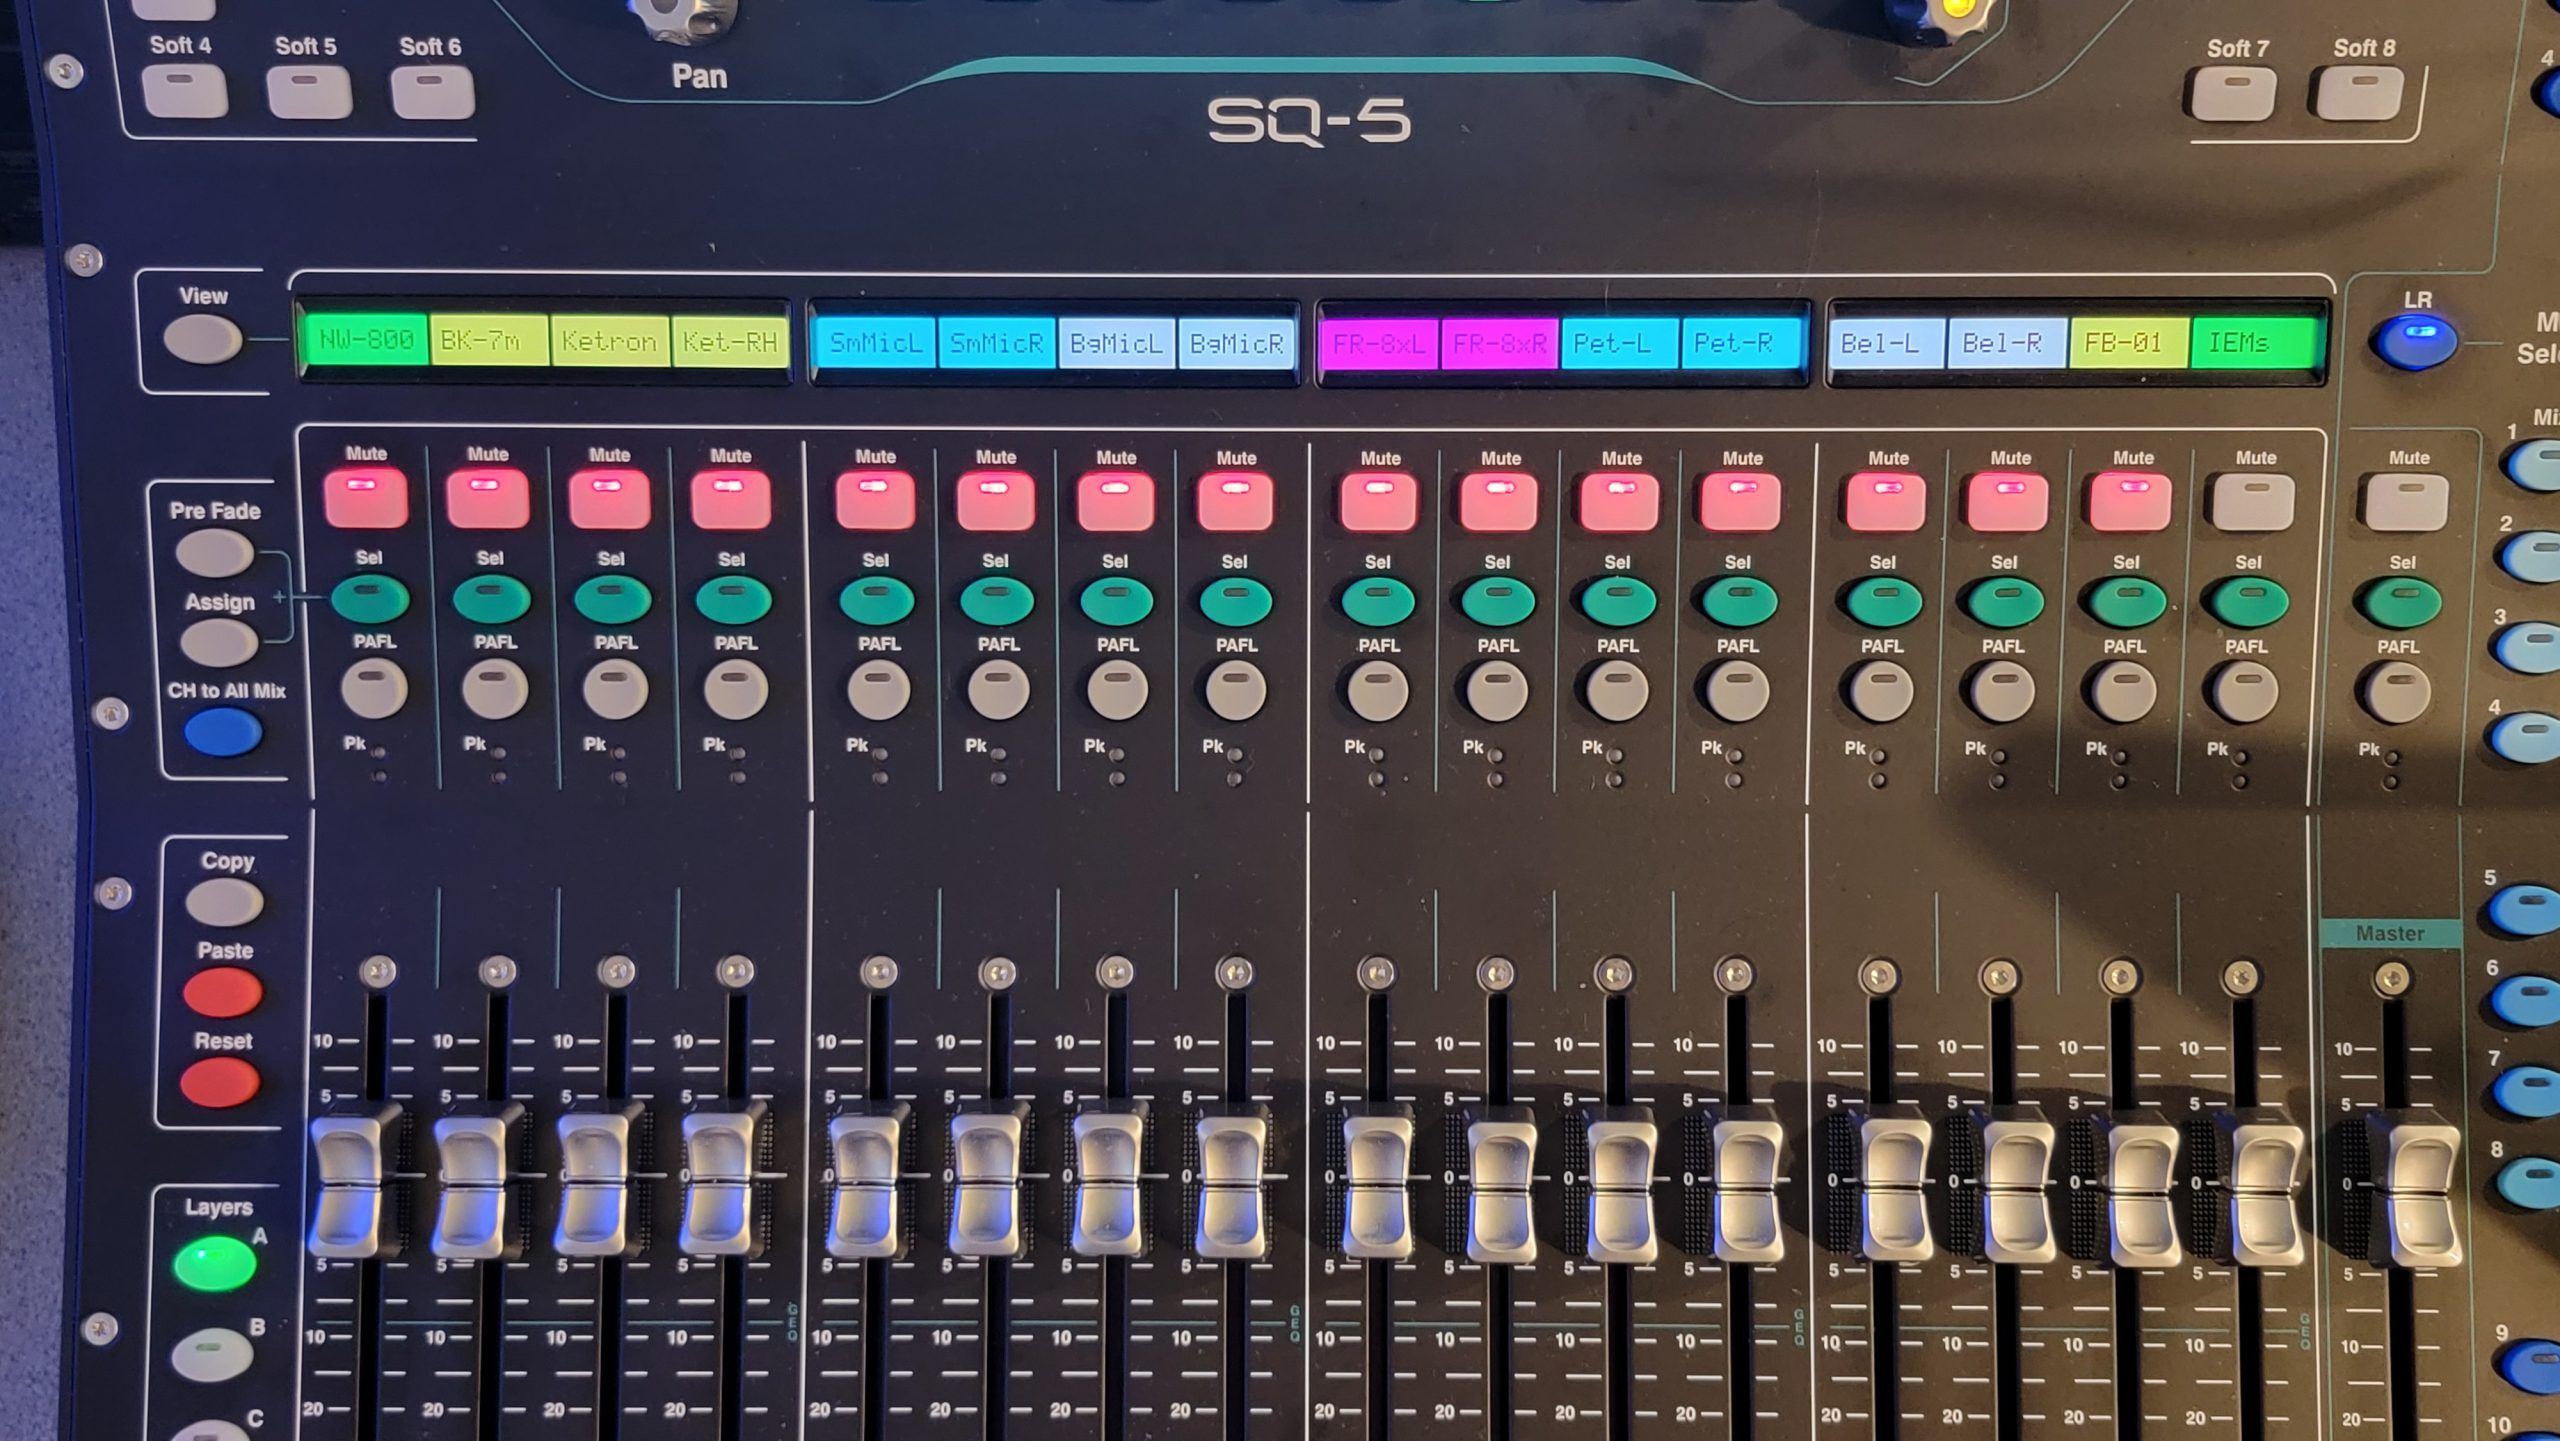
My setup currently mostly uses either Layer “A” or Layer “F”. On Layer “A”, I place things in a logical manner that makes things easy for me to use. On Layer “F” I have reserved all faders for the use of MIDI controlling REAPER (my DAW). It can control unlimited channels thanks to the BANK-UP and BANK-DOWN functions of the softkeys #7 & #8, or whatever channel I select in my DAW. Layers “B” through “E” are factory original settings. The mixer has 17 motorized faders, this is how LAYER “A” is layed out:
Fader# —- Device Name
1 – NW-800 Condenser mic
2 – BK-7m L/R channels
3 – Ketron X4 Arranger L/R channels
4 – Ketron X4 right hand instruments
5 – SmallMicL (NW-410 Condenser mic)
6 – SmallMicR (NW-410 Condenser mic)
7 – BgMicL (SE Electronics SE4400a Condenser mic)
8 – BgMicR (SE Electronics SE4400a Condenser mic)
9 – FR-8x Wireless transmitter Left channel
10 – FR-8x Wireless transmitter Right channel
11 – Petosa Acoustic Accordion transmitter Left channel
12 – Petosa Acoustic Accordion transmitter Right channel
13 – Beltuna Leader V Acoustic Accordion Left channel
14 – Beltuna Leader V Acoustic Accordion Right channel
15 – Yamaha FB-01
16 – Stereo AUX 1 – Used for my IEM volume control
17 – MASTER Fader – output control depending on if I am on any one of the the main, AUX or Matrix outputs.
SOFTKEYS
The SQ-5 has eight softkeys where I can configure many things to. By default, they are set to turn on or off any of 8 possible Mute Groups. Currently I only use 3 softkeys, #1, #7 and #8.
Softkey 1 – My “Panic Mute”. By hitting it, I activate MuteGroup 1 and turn off all sound.
Softkey 2 – Default
Softkey 3 – Default
Softkey 4 – Default
Softkey 5 – Default
Softkey 6 – Default
Softkey 7 – MIDI BANK DOWN
Softkey 8 – MIDI BANK UP
Recording to Reaper
In previous versions, on the SQ-5 we had to choose where we wanted to record, the thumb drive or the USB-B output. The latest firmware now changes this and we can literally record on either or both at the same time, should one wish. I tend to prefer to record to my DAW (Reaper). If one happens to be on a gig and no DAW is available, recording to the USB is always a good option.
Make sure that Reaper is properly configured to use the ASIO driver from the SQ-5 and that all channels (1 to 32), both in and out, are selected and enabled.
Bring up one of the templates that I created and Reaper is ready to record any of my inputs that I connect to the mixer, PLUS a main stereo L/R channel and the USB output from the PC can also be heard and recorded.
We need to be sure that the SQ-5 routing is properly set up and I actually created *two* library presets for different results.
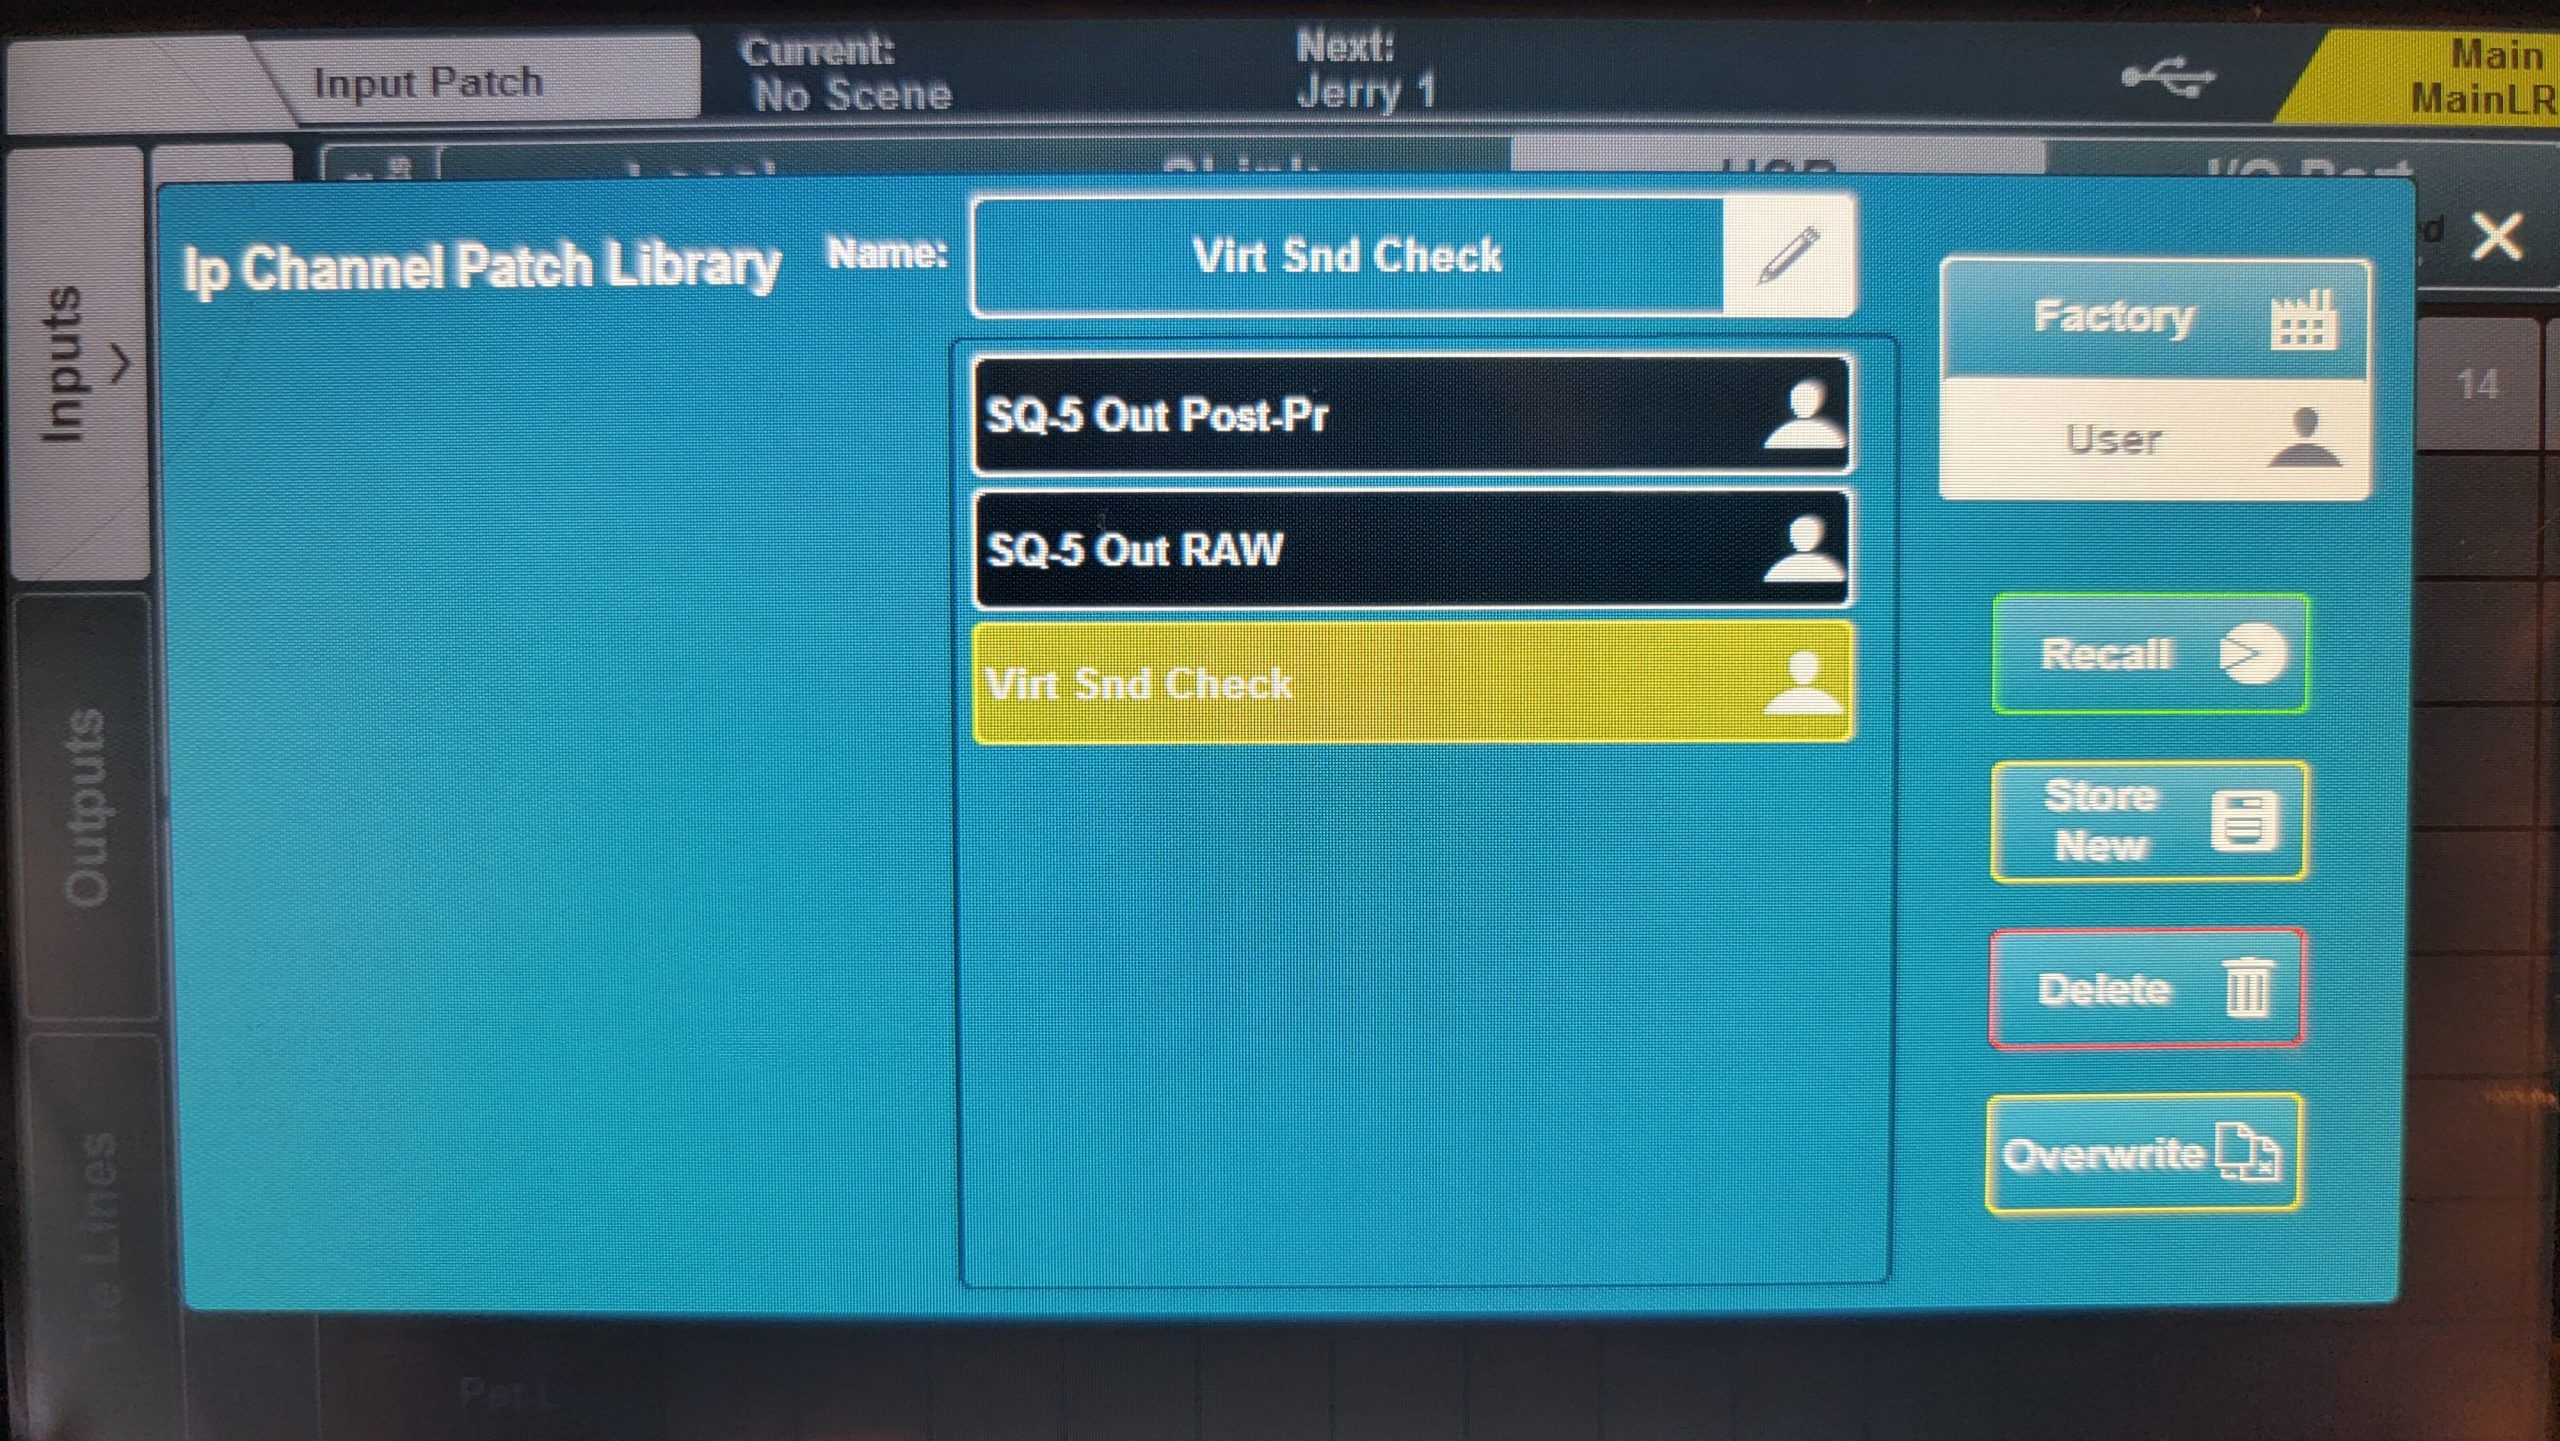
The first one is called “SQ-5 Out RAW”. I use this preset for the times I want to send the raw UNPROCESSED sound directly out to Reaper. These files are used for the times I want to do a VIRUAL SOUND CHECK (more on that below) and/or when I want to make the audio file changes in Reaper.
The second one is called “SQ-5 Out PostPr” and stands for “SQ-5 Out Post Processed”. This is for the times that I want to record the output from my SQ-5 to Reaper and it has all the effects I have “activated” burned to the files and then recorded to a file in Reaper.
We are now ready to record on all my connected inputs in 2 different ways… with no processing in their raw original sound as they are captured at the inputs directly. The second way using the template called SQ-5 Out Post-Pr”, a fully processed output, meaning that the sound from the fader output is captured, including all effects like EQ, noise gate, compression, reverb, etc…
SQ-5 Virtual Sound Check
This is VERY COOL!
How it works is that once I have all the tracks recorded, I can reset the inputs from the physical devices attached inputs to individual channels from the DAW via USB using the “Virt Snd Check” template and it reconfigures the SQ-5 to send each track from the DAW back to the same channel on the SQ-5 that it was captured on, straight out from Reaper and I can apply any of the mixer effects that I do on the mixer (gain, fader levels, EQ, compression, reverb, etc…), which are heard and can be modified and immediately hear the effects of the changes that I make on the mixer. This is ideal to setup channel templates for settings, performance scenes and more or to re-output the modified channels to the main output and record the final results with all effects and modifications I do on the mixer to a final track in Reaper to export or record straight to the USB drive.
To be able to do this, we need to change the routing and again (instead of hearing my real physical instruments from the mixer as I play, we hear the output of the files from Reaper) and again, I have created a preset called “Virt Snd Check” that references these needed changes.
Now anything played through Reaper gets sent out to the same channel it was recorded on and I can make adjustments on the SQ-5 as if I was performing at a venue or recording at home and I have the choice of burning effects to the files on Reaper’s channel 31/32 or the SQ drive, which has my 256gb SSD on it instead of a thumb drive (or record both at the same time!).
NOTE: Gain staging is very important. Too high and we can potentially have distortion. Too low and our signal to noise is so low that we introduce noise in to the recording. The best way to gain stage is to solo the given channel (PAFL in Allen & Heath talk!), and use the meters to set gain levels so that the maximum peaks never exceed 0db on the mixer’s LED meters.
At the 0db level on the LED meters will result in a -18db recorded signal in the file captured on Reaper. This is perfect, as it is the best level for maximizing headroom vs low noise and we also don’t push any VSTs which are optimized to use a -18db to -12db signal for best performance. This method is best for recording and what I do so far 100% of the time.
I call this the “RECORDING METHOD“.
Live performance is different and uses different rules as the goals are different. Here we less wish to worry about maximum headroom but rather want to push the gain levels to a maximum level *just* under distortion to maximize the highest volume levels we can attain without distortion, as maximum volum is the goal here. This means that we may consistemtly touch the +12db lights on the meters as a maximum. I call this the “LIVE PERFORMANCE METHOD“. Unless I am at a live event, I *never* do this!
That said, depending on the venue and setup, many sound engineers may decide to keep things around the 0db (zero) levels as their speakers and amplifiers are giving them all the volume they need at these levels without straining any part of the system.
I make sure that each of my instruments maxes out at the “0db” (zero) level on the meters with the fader set to “UNITY” when I gain stage my instruments and I can control volume with the master fader to push to +12db or less, based on what needs the circumstances of the live event demand.
Windows 11 SOUND Setup
The influence of Voicemeeter is evident here and it is important to set up in this manner.
In Window 11’s “Sound Settings”In the OUTPUT section, select VOICEMEETER INPUT. In the INPUT section, select VOICEMEETER OUT A1.
In Window 11’s “More Sound Settings”, in the PLAYBACK TAB make sure that VOICEMEETER INPUT is set as the Default Device and that the SPEAKERS is VB-AUDIO VIRTUAL CABLE is set as the Default Communication Device.
In Window 11’s “More Sound Settings”, in the RECORDING TAB make sure that the CABLE OUTPUT – VB-AUDIO VIRTUAL CABLE is set as the Default Communications Device and that VOICEMEETER OUT A1 is the DEFAULT DEVICE.
Voicemeeter Potatoe Setup
Voicemeeter Potatoe is a crucial part of the setup. This application decides where what goes and it boosts audio levels that get sent to the Zoom Meeting stream. It also eliminates feed back because I can then remove all USB audio output on the AUX used by the stream and inject either PC audio or application audio like audio from a YouTube video without introducing echo. I can also control what devices or AUX outputs get what additions and at what levels. It’s setup is very specific.
I have specific AUXes on my SQ-5 set up for specific functions. The MAIN L/R sounds go to my main external speakers (monitors). AUX 1 is dedicated for my in ear monitors (IEMs), AUX 2 is dedicated to everything that gets sent out to my ZOOM MEETINGS and AUX 3 is dedicated to sending audio to OBS.
This means that:
- I can turn down or off the MAIN L/R mix, instantly eliminating all potential for feedback. I can hear everything (incoming and outgoing sounds from my mixer and Zoom meeting stream) in my IEMs, on MIX 1 (aka AUX 1).
- I can remove all incoming sounds from the USB on Mix 2 (aka AUX 2), eliminating all echo and send exactly everything out from my mixer and even add in Youtube via voicemeeter.
- On MIX 3 (AUX 3), I send everything incoming and outgoing to OBS but at a lower level for more headroom and all audio gets captured in stereo.
It is all about control… EXACTLY what gets sent where, at what levels and with which effects.
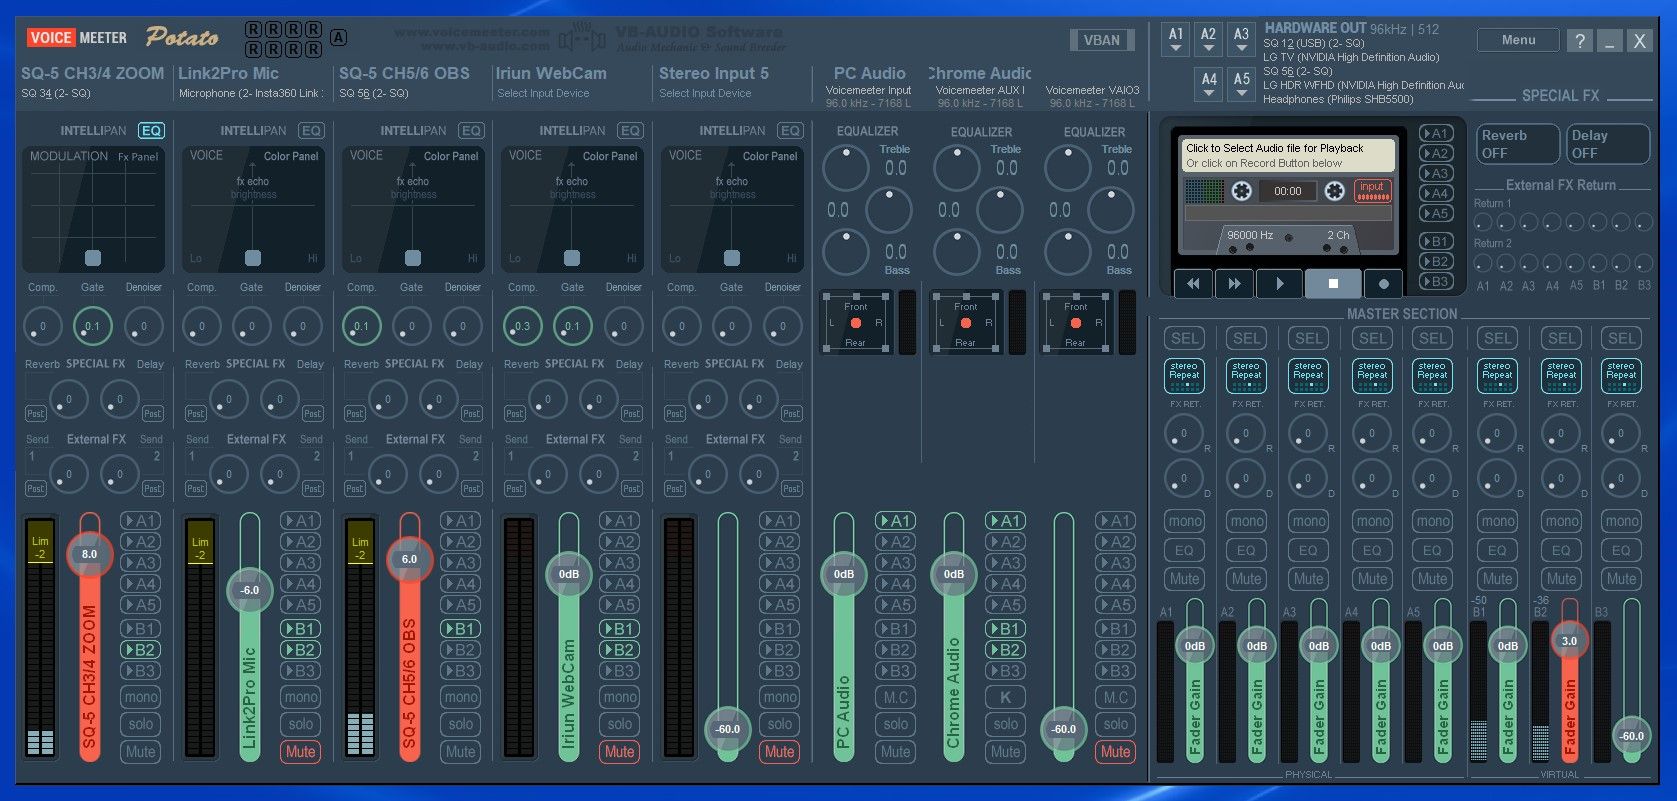
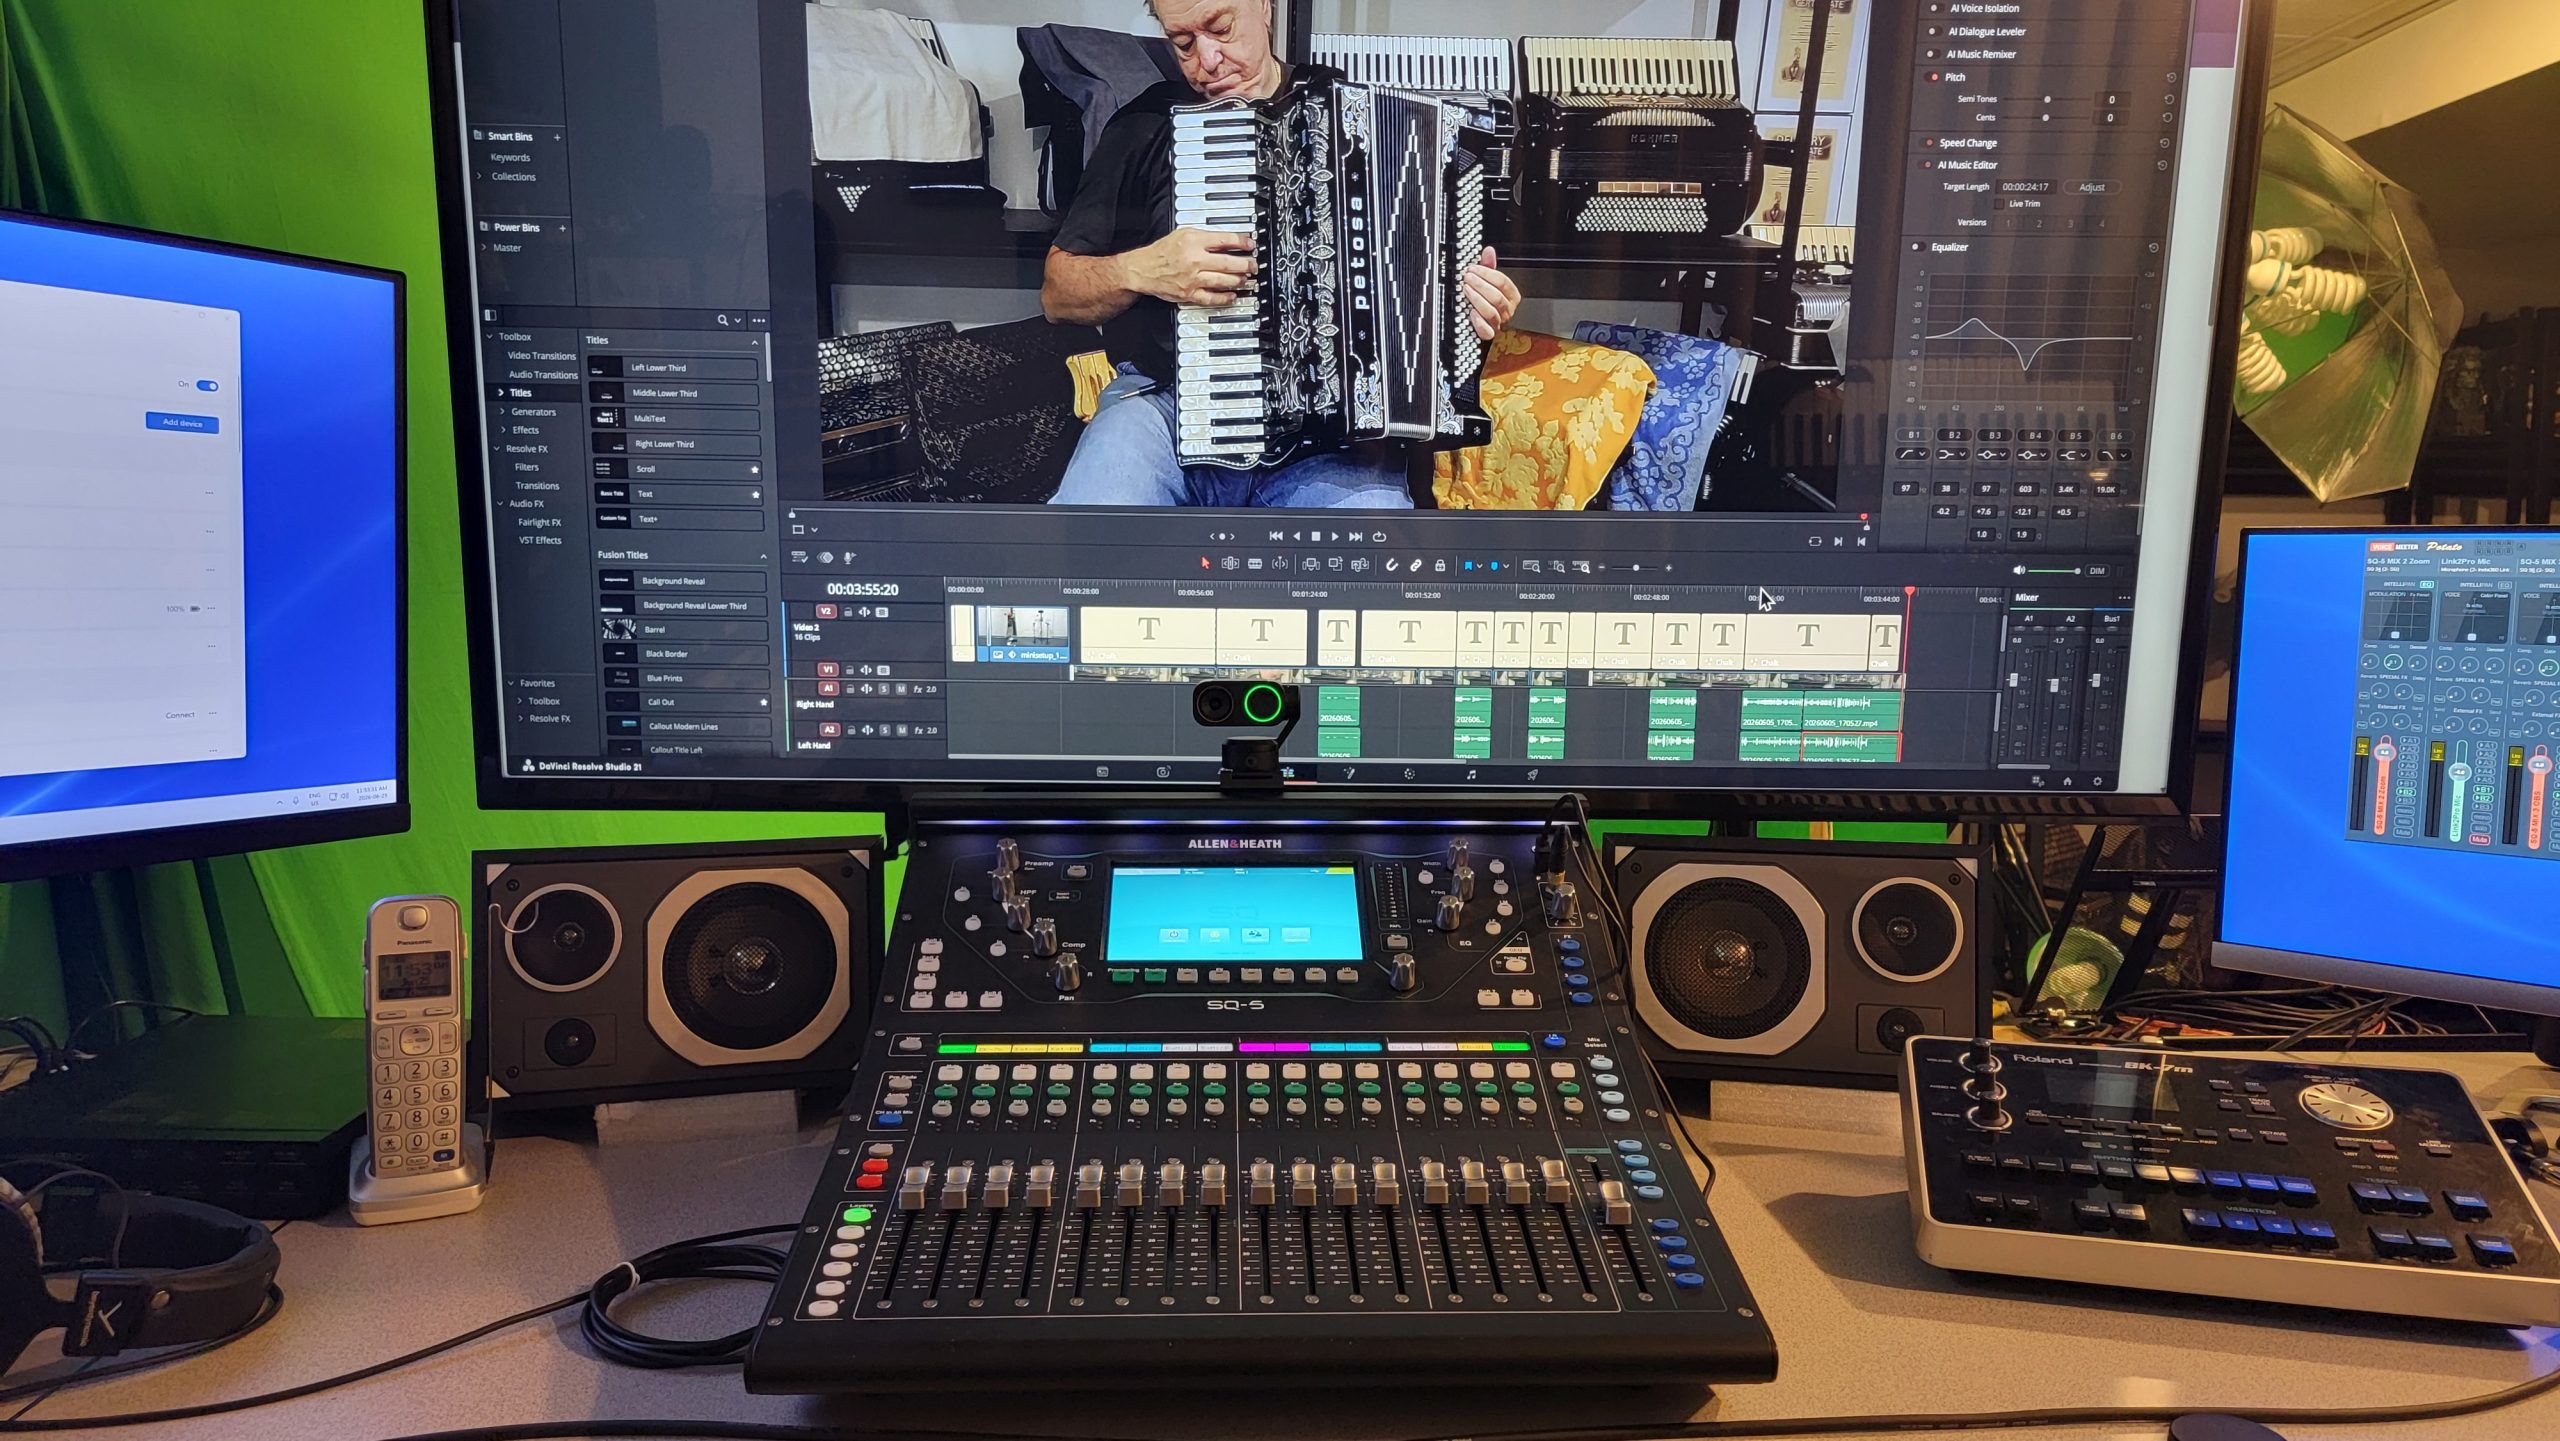
Input #1: Looking at the image above, and starting from left to right on the Voicemeeter interface, the first item we see is my mixer’s AUX 2 which displays as “SQ-5 CH3/4 Zoom”. The signal is output to “B2”.
Input #2: Moving one input to the right, we see the Link2Pro microphone which gives me a choice to use the mixer mic or the webcam’s mic for times when ultimate sound quality is not required. This signal is set to send to “B2 and B3”.
Input #3: Moving another step to the right we see my mixer’s AUX 3 which is identified as “SQ-5 CH5/6 OBS”. This channel is sent only to OBS. The signal is output to “B1”.
Input #4: The following option is the audio from my cellphone camera thanks to the Iriun app. I can grab my cellphone and walk around and have it’s audio pushed into the mix and OBS. This signal is set to send to “B2 and B3”.
Input #5 is currently not used.
So while anything labeled with a “B” is an input, I can also send signals to specific locations, and those are the physical outputs labeled as “A”
Physical output A1 goes to SQ-5 AUX 2
Physical output A2 goes to SQ-5 AUX 1
Physical output A3 goes to my 55″ LG TV monitor
Physical output A4 goes to my 31″ widescreen LG monitor
Physical output A5 goes to a wireless Bluetooth headset (Phillips SB5500 or whatever out physical devices I deem appropriate, like my SHOKZ headset)
Using the “A” outputs let’s me hear computer audio during times when the mixer output is cut or unavailable like during Virtual Sound Checks and so I can hear (for example) PC audio through one of my monitors as a backup or use my Phillips SB5500 headset as an alternate “listening source”.
Extra Notes:
Addendum: May 31, 2025:
Today I spent a couple hours making some custom wires for my setup… they are made to fit between the mixer and the 2 sets of wireless Lekato wireless transmitter/receivers. One set for my FR-8X and one for accordions that have microphones built in them (The Beltuna Leader V and Petosa Antico). This way I can just swap accordions and boom, I am ready to record or use in a zoom meeting. Basically each one is dual male XLRs leading to a female 1/4″ stereo plug that mates to the 1/4″ male plug on the wireless receiver.
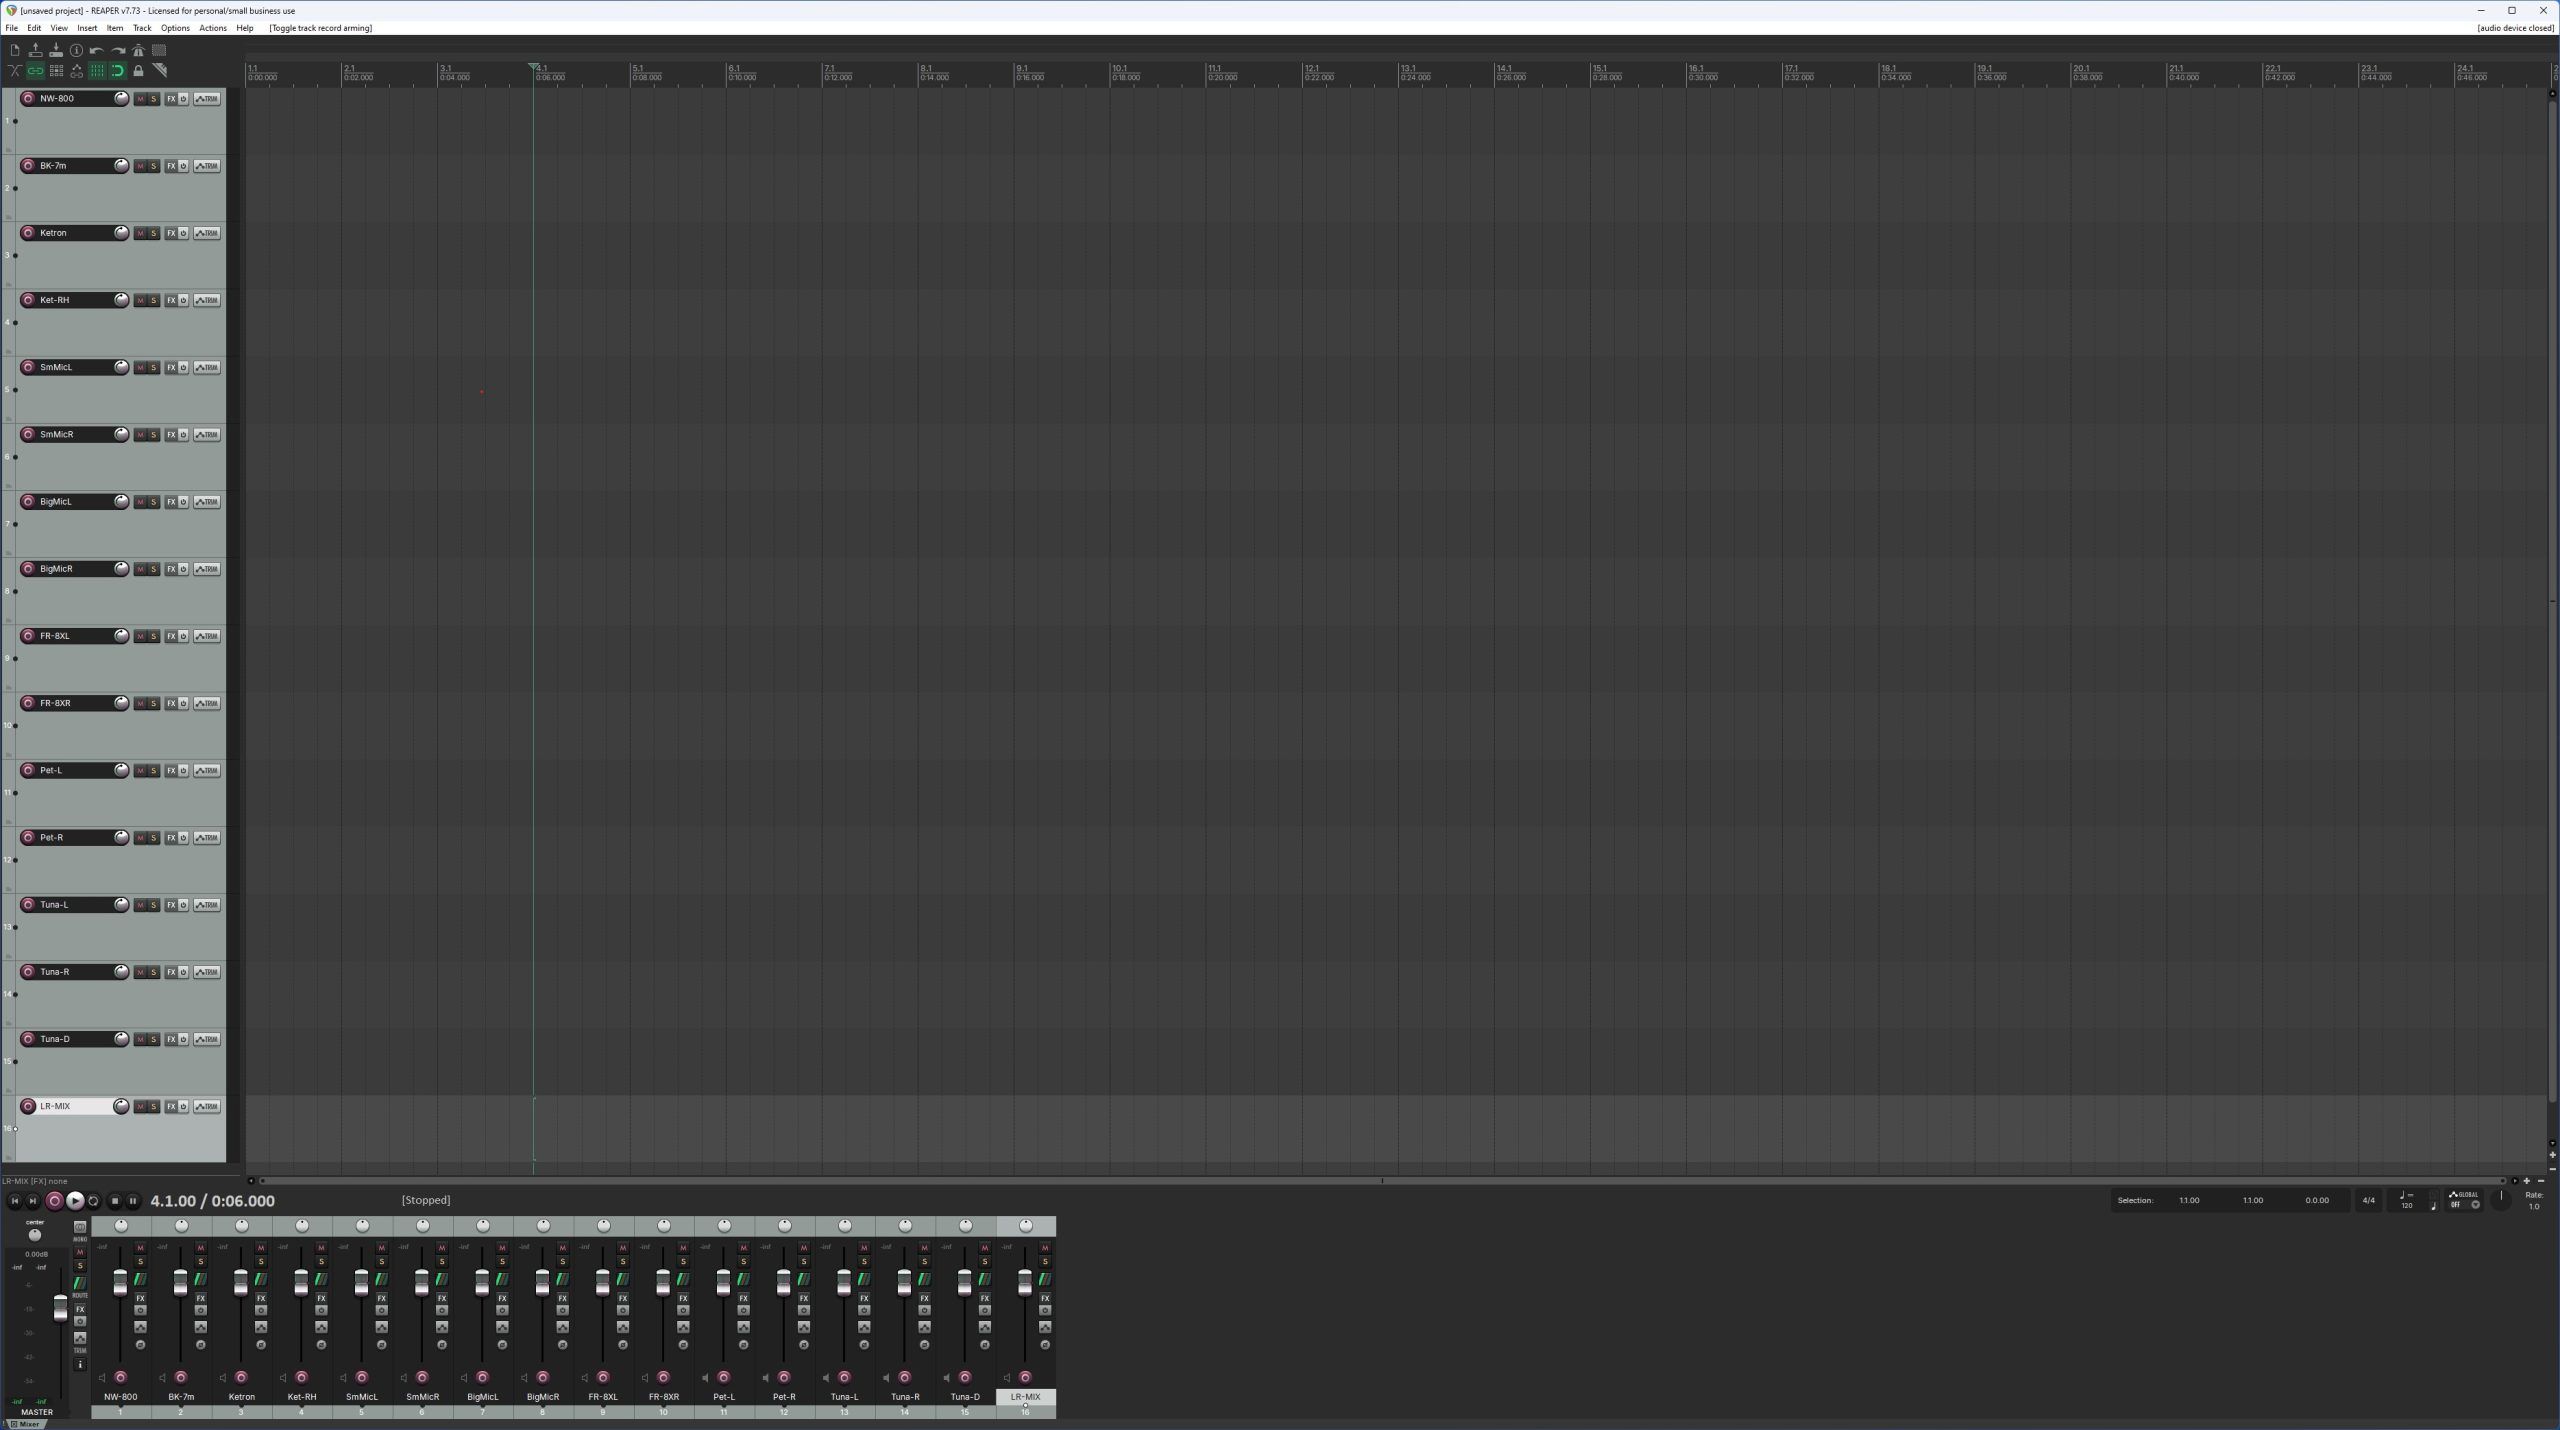
Addendum: June 4, 2026
The Reaper setup is evolving to match the mixer changes… here is what it looks like:
Addendum: June 10, 2026
I did some fun things today! I practiced a little and spent time dialing in the sound of the Beltuna’s internal mics. It sounded good before, now it sounds fantastic!
I also brought back an old friend in to the game, my vintage Yamaha FB-01, it sounds GREAT on the SQ-5… more sounds and sound effects to play with and that is always a guaranteed good time!
Addendum: June 11, 2026
Yesterday I pulled the old Yamaha FB-01 out of retirement and integrated it in to the setup. It was fun hearing the old sounds again. At first I connected it via a MIDIJack, but it was giving me a little too much latency. By wiring it in with a MIDI cable through the Ketron X4, latency was eliminated. I plan on using it only in mono as additional tracks in any possible future multitrack recordings. It was fun to use back in the 80’s and it is now back again in service!
June 14, 2026
Just noticed I had no setup info on Zoom. Here is the audio setup for when I use the full mixer in it:
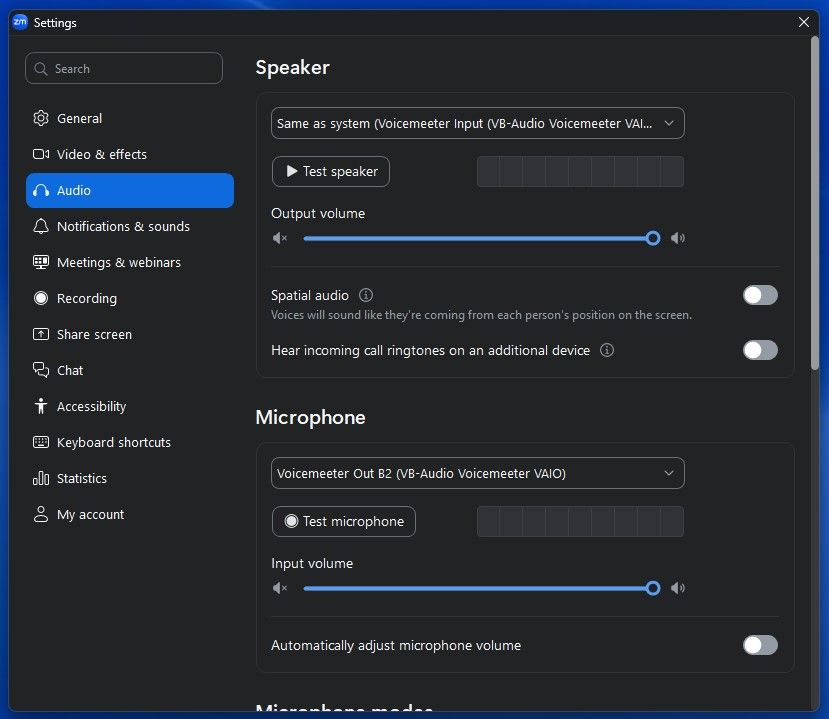
If I want something barebones easy and simple I can use either the USB headset or for a wireless solution, the ShoKz headset and point Zoom to it in the speaker and microphone sections.
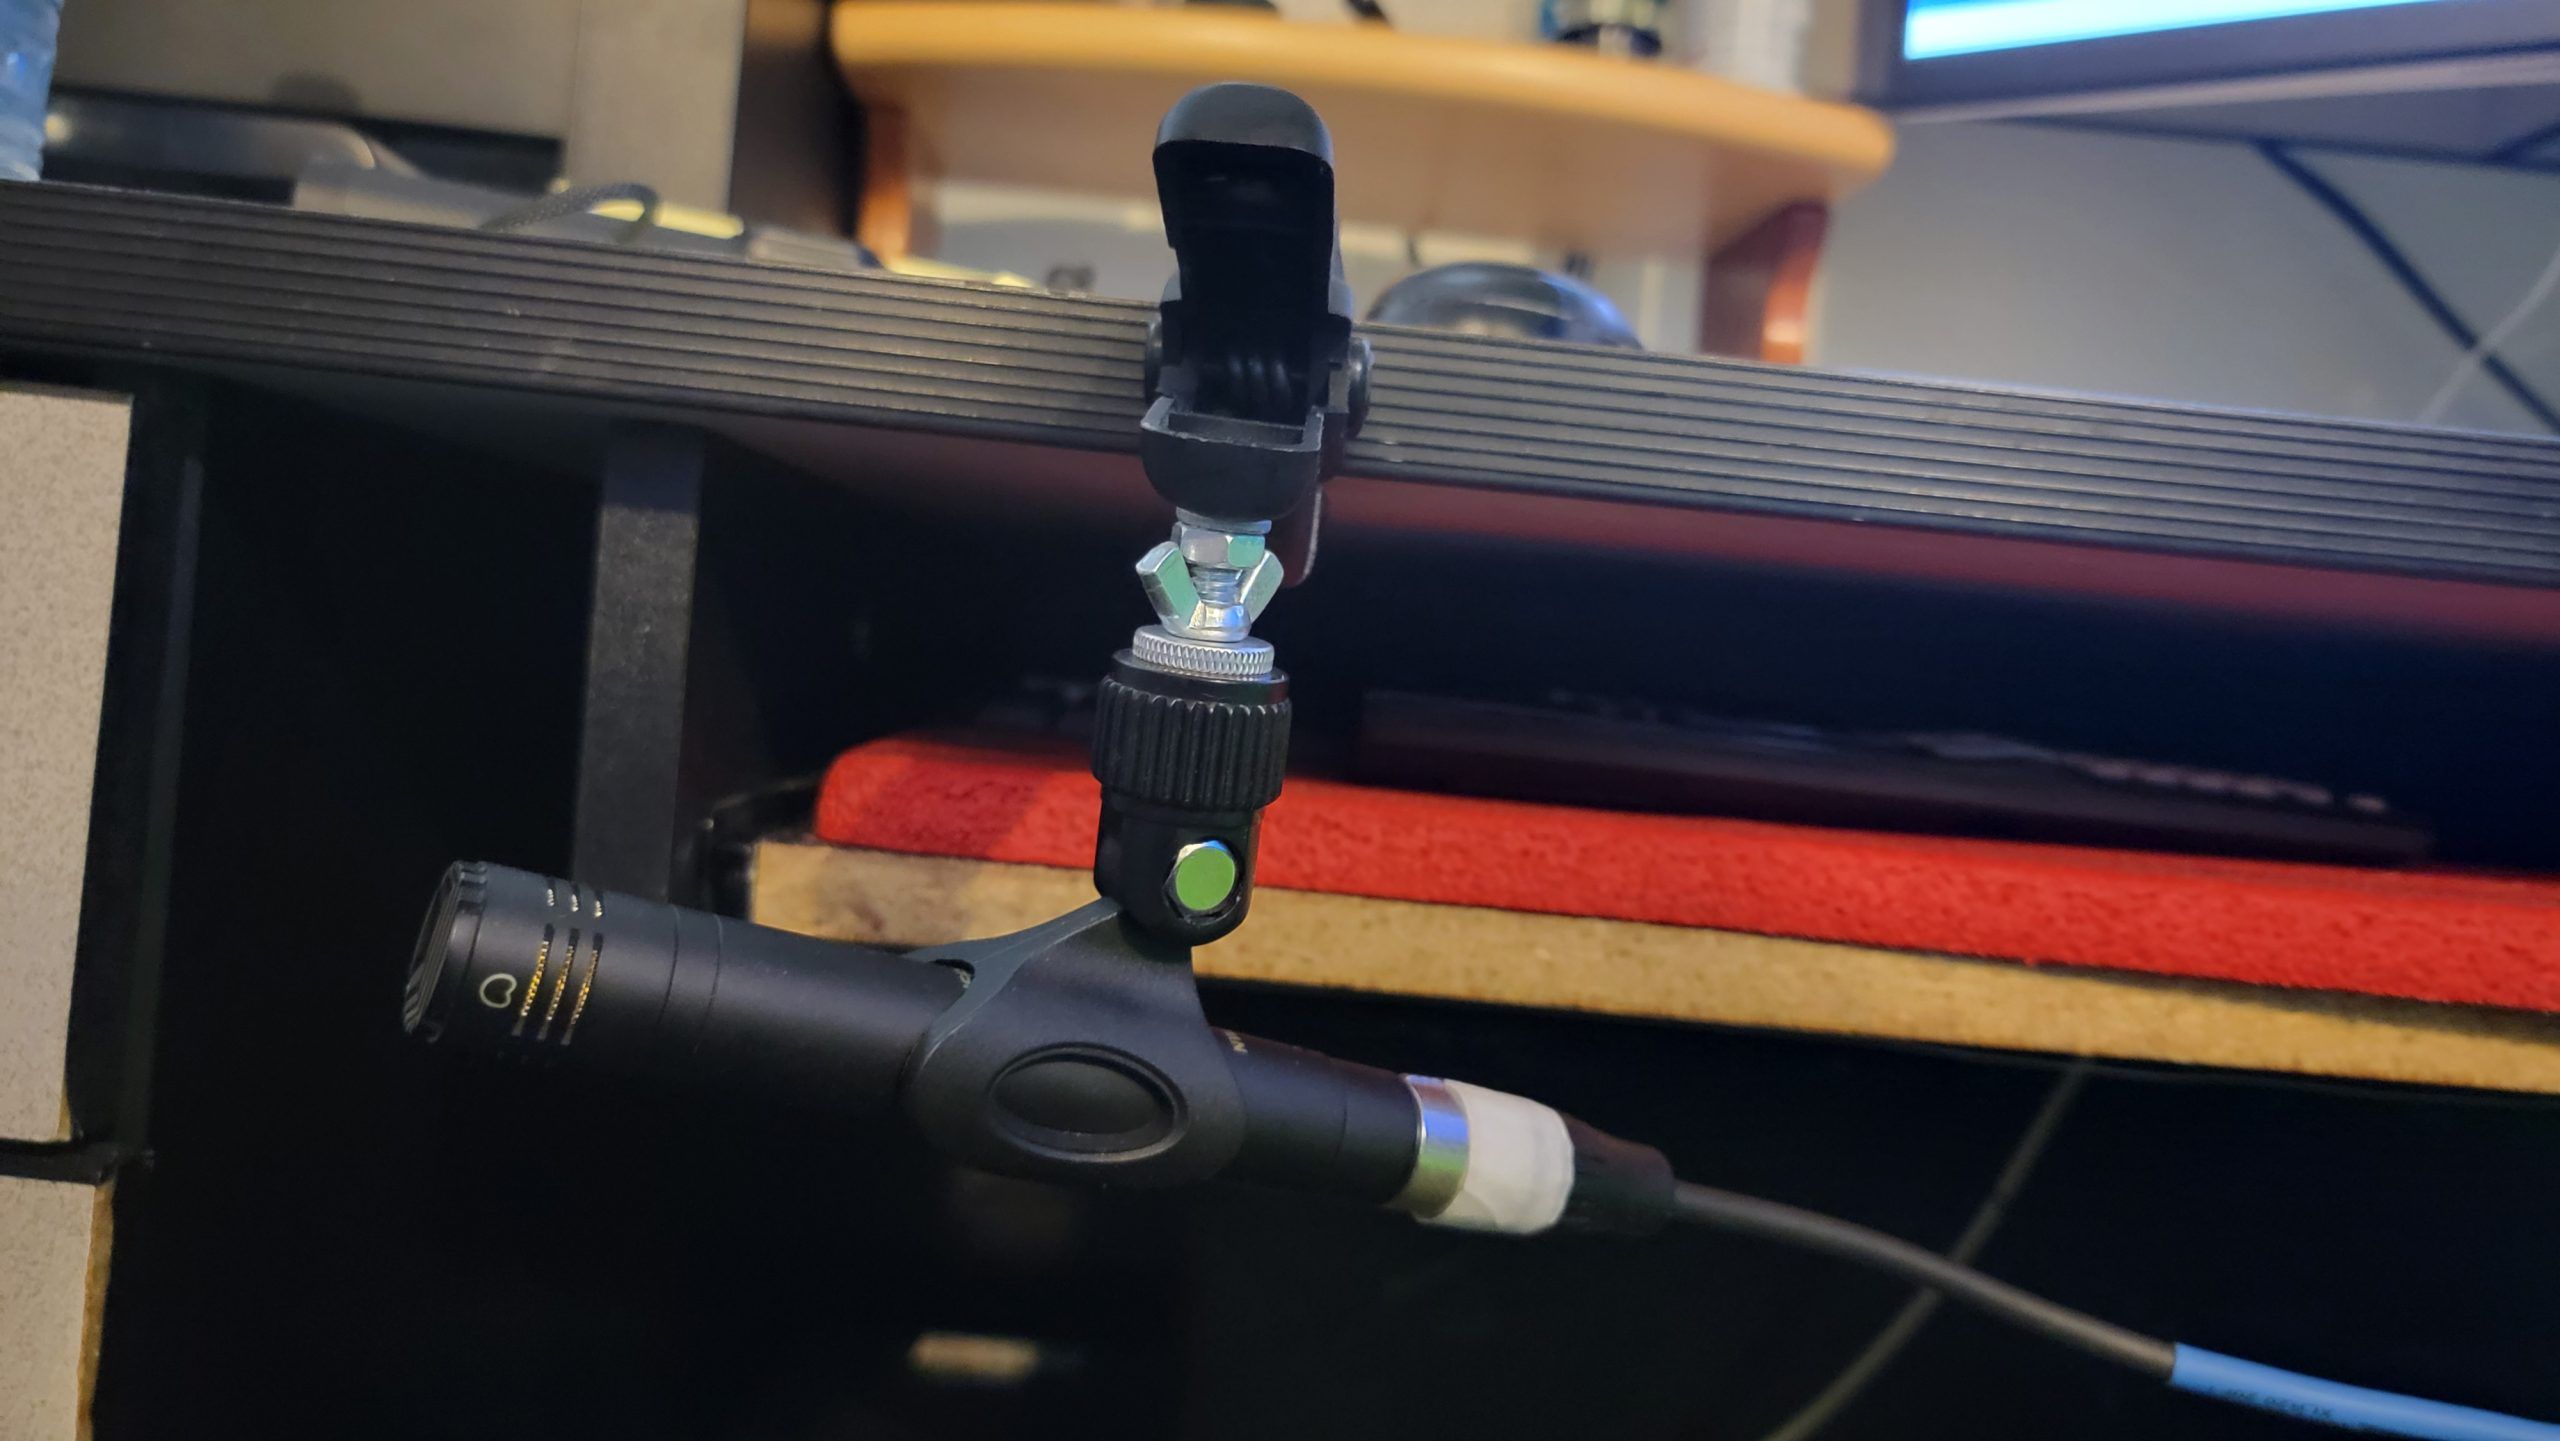
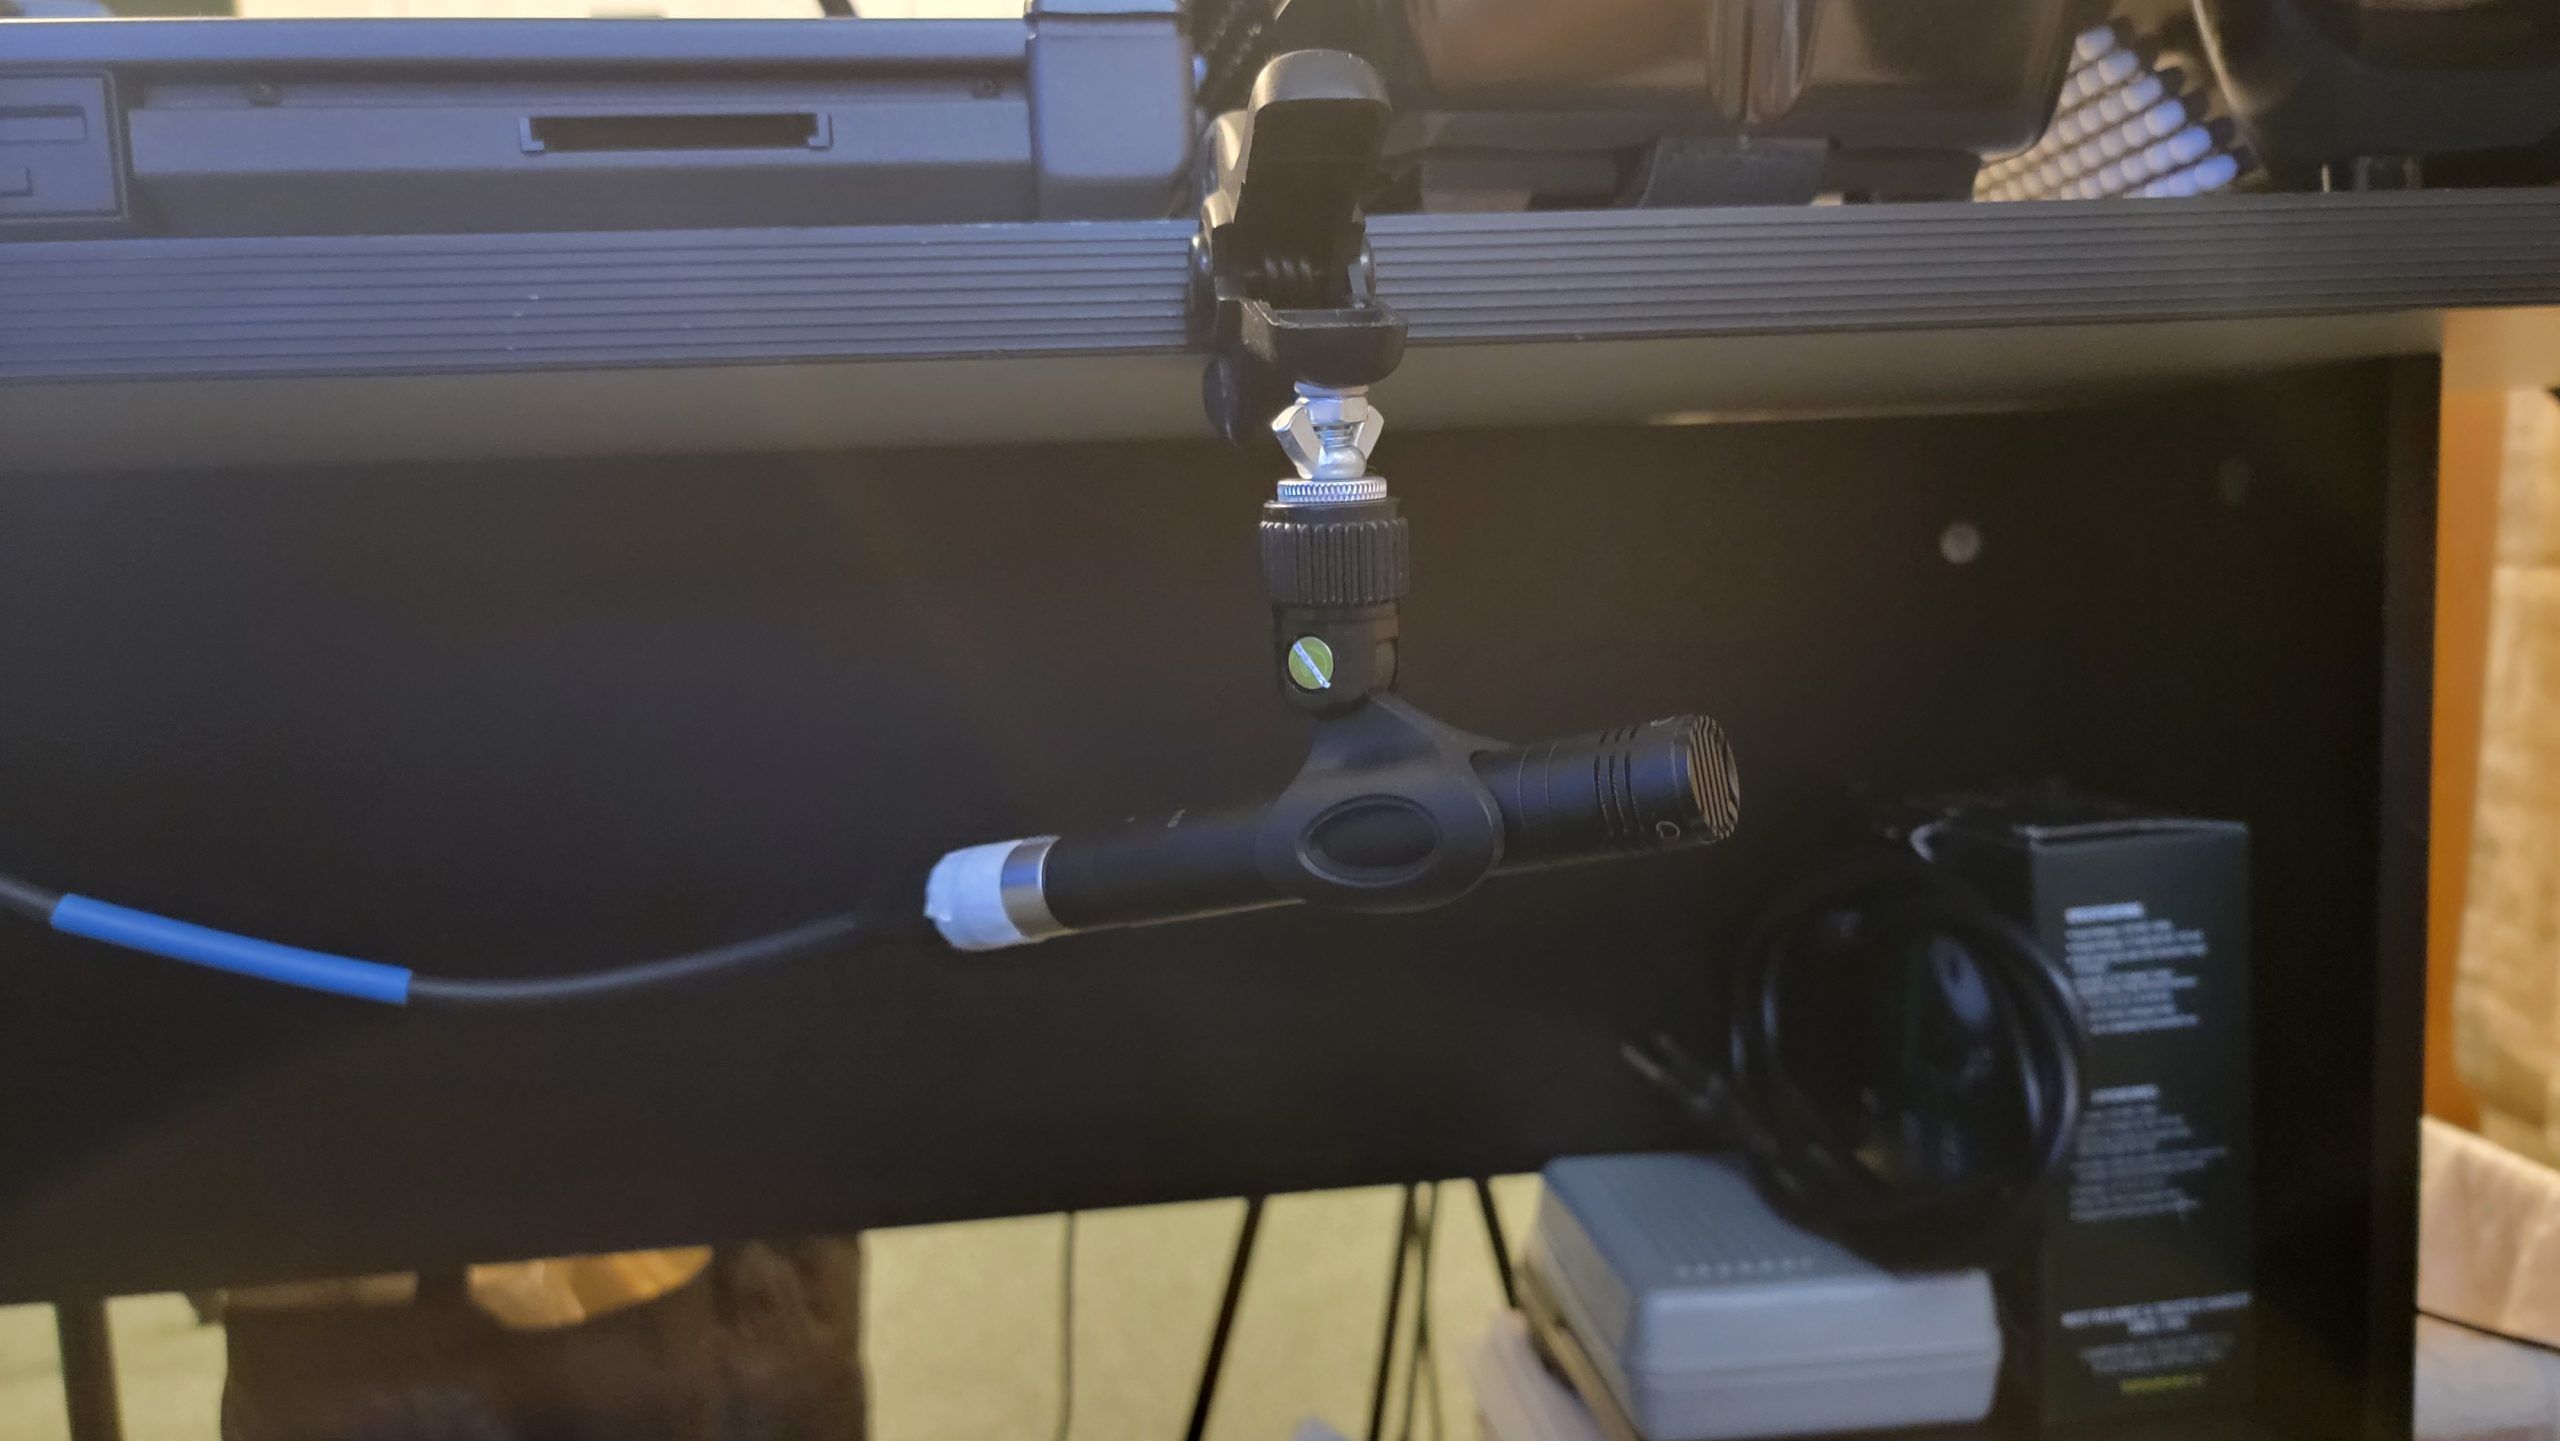
Addendum June 15, 2026
I liked my little selfie sticks but I also saw they were a little extra work to setup and let’s be honest, it had the same challenges that my other mic stands had… if left there, they eventually got under foot and the potential was there for me to knock them over and with smaller tripod feet, they were more susceptible to being kocked over, so I found a better solution… a pair of clamps, some 1/4-20 screws and bolts and 2 wingnuts and I can now clamp my two NW-410 condenser mics to the desk and it takes about 10 seconds to setup both sides! The selfie sticks still do have their place (we all know how I love to have the right tools for the right job!), especially in travels or in situations where small/light/unobtrusive is important.
Addendum June 24, 2026
Well, today I made another little change to my setup. I added a 2nd pair of speakers to my setup. This means that I have a pair of speakers 36″ apart pointing right at me when I am facing the 55″ TV and the SQ-5 mixer, so that means that when my ears are 36″ behind the TV screen (like when I am sitting at the keyboard), I am in that sweet spot, the “triangle of sound perfect image”. It sounds really nice. The speakers are a fair quality 3-way setup… no, they are not pro quality monitors (I may do that again one day but I won’t get another set of Focals ever again, those are a bit of a rip-off), but they are good speakers and I have them angled so that they kind of point up at an approximate 20-25 degrees. A nice addition to the setup and not only do they sound good, they look great!
Addendum June 26, 2026
Today I spent a few minutes setting up a subwoofer for these two small speakers. There is a perfect spot for my 12″ home sub under my desk on my left. I am a little too busy today to complete the task and, silly me, I seem to have misplaced the power cord for the sub… so now I need to find it or a replacement and other things creeped in as well (I did a very cool 2 hour webinar course on Davinci Resolve and several other things were happening today), so I will be likely completing this task later. I am eager to see how a nicely subtle addition of some low bass helps my sound setup! More to come later.
Addendum July 3, 2026
Today I learned that it might be possible to do the settings for a virtual sound check, record RAW and record post faders all via separate scenes. I’ll need to check it out sometime very soon. The idea of getting it done via scenes seems pretty interesting! I also still have not completed setting up the subwoofer.
Addendum July 12, 2026
I’ve set up the scenes and it works far better than using the library feature to make this work… I really like it! I’ve made 3 scenes that actually enhance the setup and I may be making a few customizationsm such as no matter what scene is used, the mic stays in it’s fully customized setup. In a couple days I will add some pics and extra details. I’ve made the raw part of a video that shows/explains the scenes, I need to complete them and make them in to 3 spall separate files for my blog here.
Addendum July 14, 2026
I’ve made a couple videos of my scenes:
RAW 2 DAW:
PROCESSED 2 DAW
VIRTUAL SOUND CHECK
REAPER SETUP
What a mixer… the more I learn about this mixer, the more I like it and the more I enjoy using it!
That is it for now. As mentioned above, this is is a very fluid document that changes as my setup evolves and grows, so I will add the new stuff here.
Enjoy!