June 1, 2023
Purpose:
To help me get to better understand the LIMEX MIDI and mic MPR3 system that is installed on my Beltuna Leader V.
First, LIMEX is an Austrian company (that’s Austrian, not Australian!). They are makers of a really nice high quality MIDI and microphone system for accordions. They’ve been around for decades and have an interesting system and good reputation.
At first this page is going to be a bit of a mess. I’ll just post pieces of info that discover and later on I will organize things a bit better and perhaps even design a bit of a tutorial. A lot of my info comes from HERE, but I will extract portions and expand on things when needed.
The Start:
Where to begin? How about with the process to connect the setup!
Turn down the master volume knob on your amplifier and speakers.
Plug the angled plug of the control cable into the bass side of your instrument.
Connect the straight plug to the adapter cable supplied.
Attach the 5-pin plug of the adapter cable to the MIDI-IN jack of your sound expander or keyboard.
Connect the power adapter cable to the corresponding plug on the adapter cable.
Turn your LIMEX MIDI system on by plugging the power supply into a power outlet.
Turn on your sound expander or keyboard.
Turn the volume knob on your mixer to the preferred volume.
A few links:
Microphone system – Analog sound outputs:
The 3 stereo jacks transmit the audio signals and effects of the microphone system. Connect these with the LINE inputs of your mixer or active speaker.
CONFIGURATION DBV + R “STANDARD”
Note: Only the reverb effect may be used in this configuration!
The black and gray jacks are used in stereo (so likely it is best to set the pans to full left and full right). All the microphone signals are mixed together on the black and gray jacks.
The bass microphones and the vocal microphone are in the middle; the treble microphones are transmitted in full stereo on both jacks.
This configuration allows you to separately control the reverb effect for the treble mics and for the vocal mic.
The purple jack transmits the Send Effect signal such as reverb.
I know that there are other potential configurations, and I may look in to them a little later after I get to know the system a bit better.
Addendum June 2, 2023
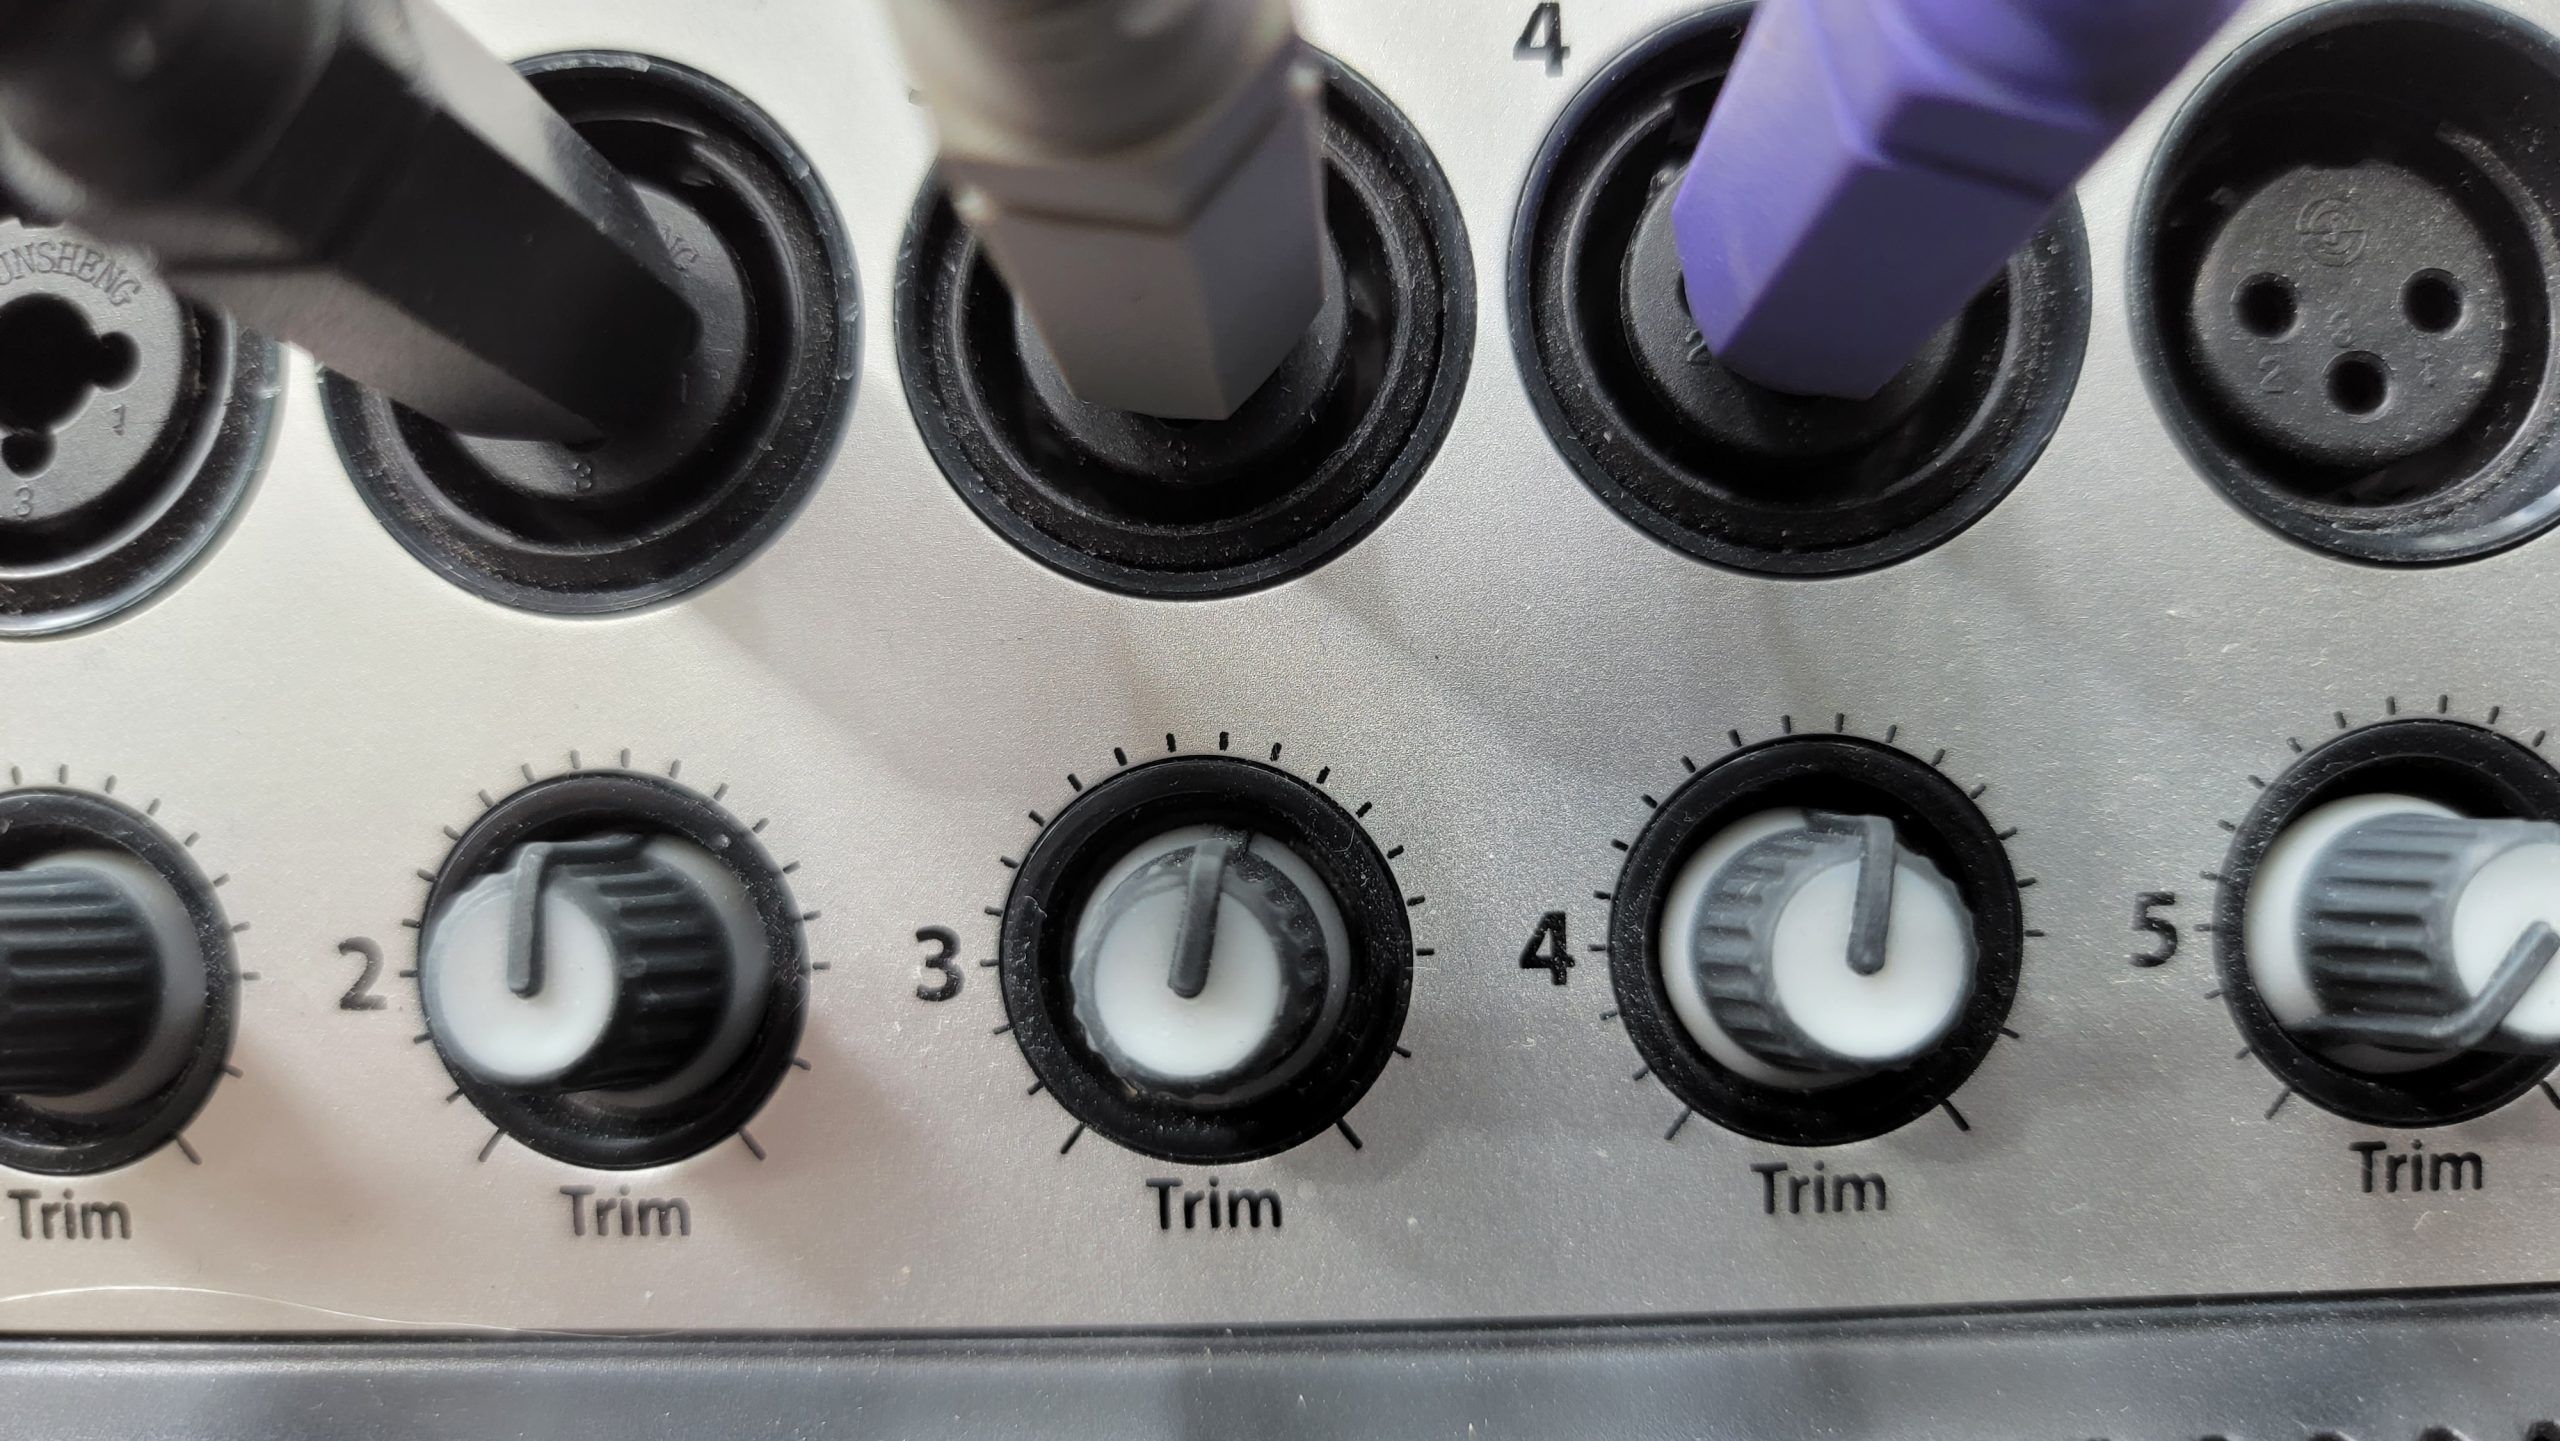
I started by connecting the outputs of the LIMEX MIDI setup in to my ASC digital mixer in this manner:
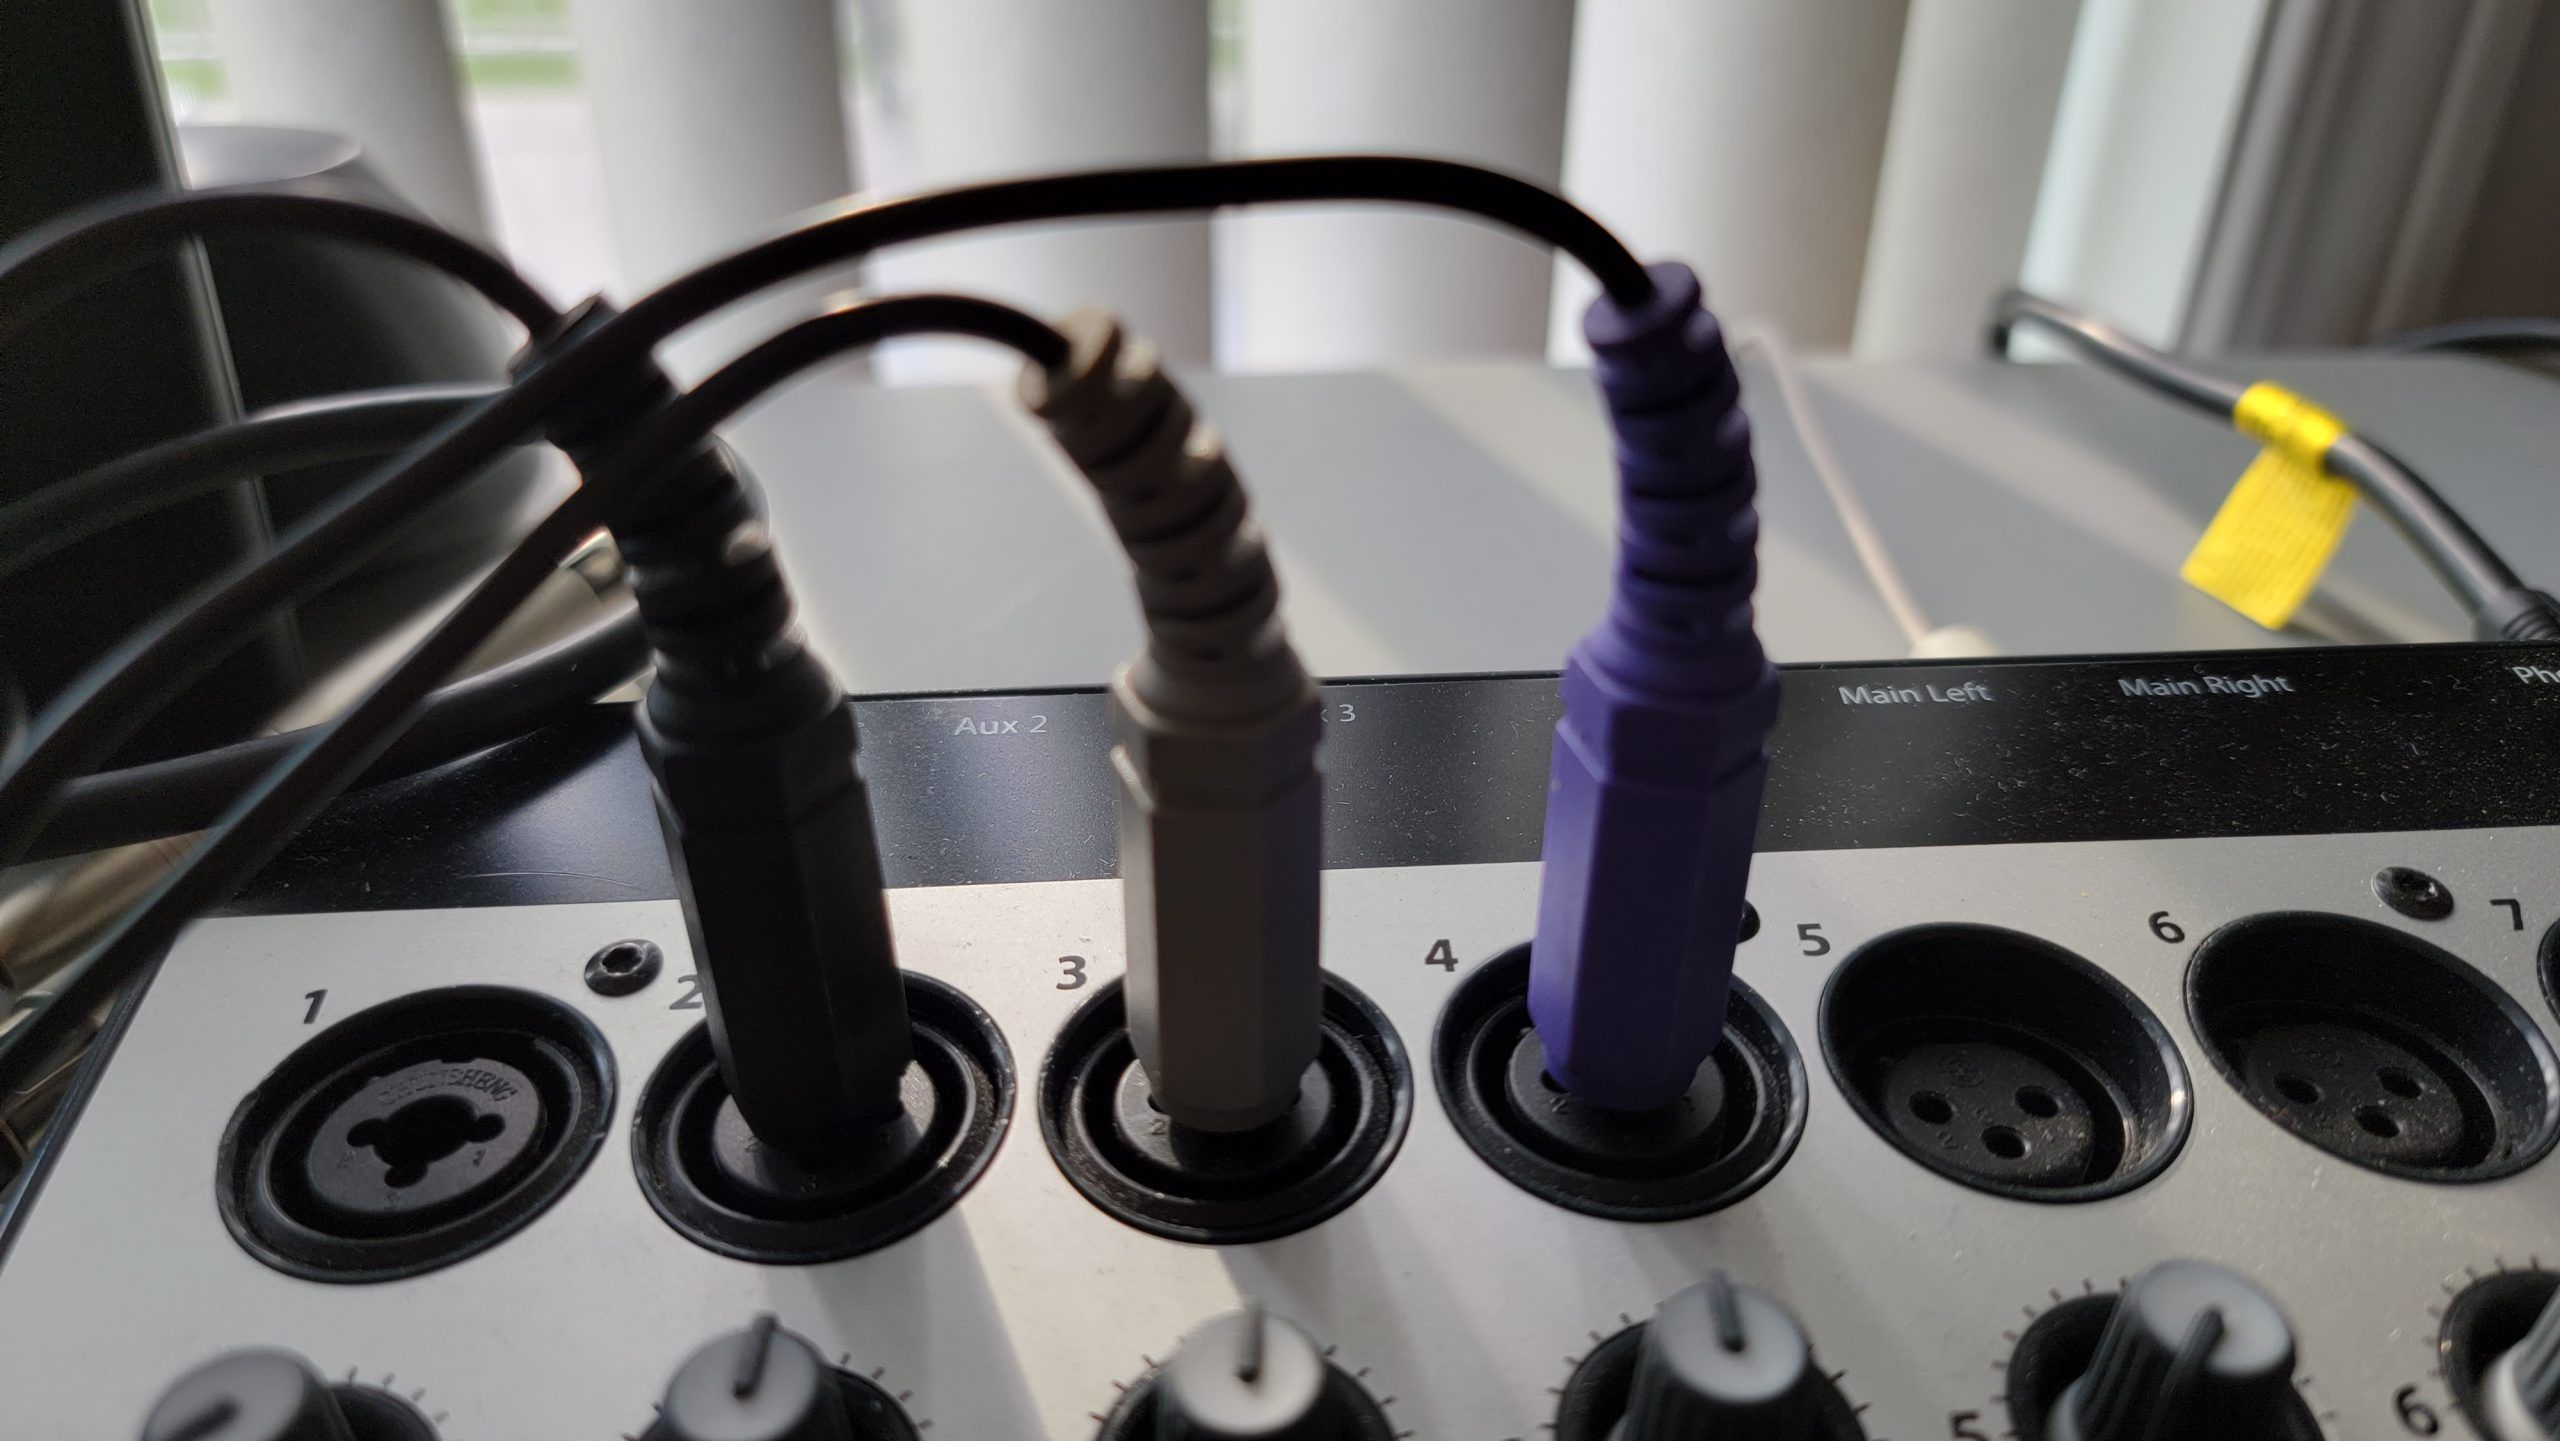
Back in input #2 – Left side (hard pan left)
Grey in Input #3 – Right side (hard pan right)
Purple in input #4 – LIMEX effects only (pan set to center position)
I then set up the mixer so that I panned the black 100% left, grey 100% right and the purple dead center. Finally I set the GAIN knobs of the mixer to a LITTLE past the 12:00 o’clock position and added some reverb so that I could hear the mics a little better.
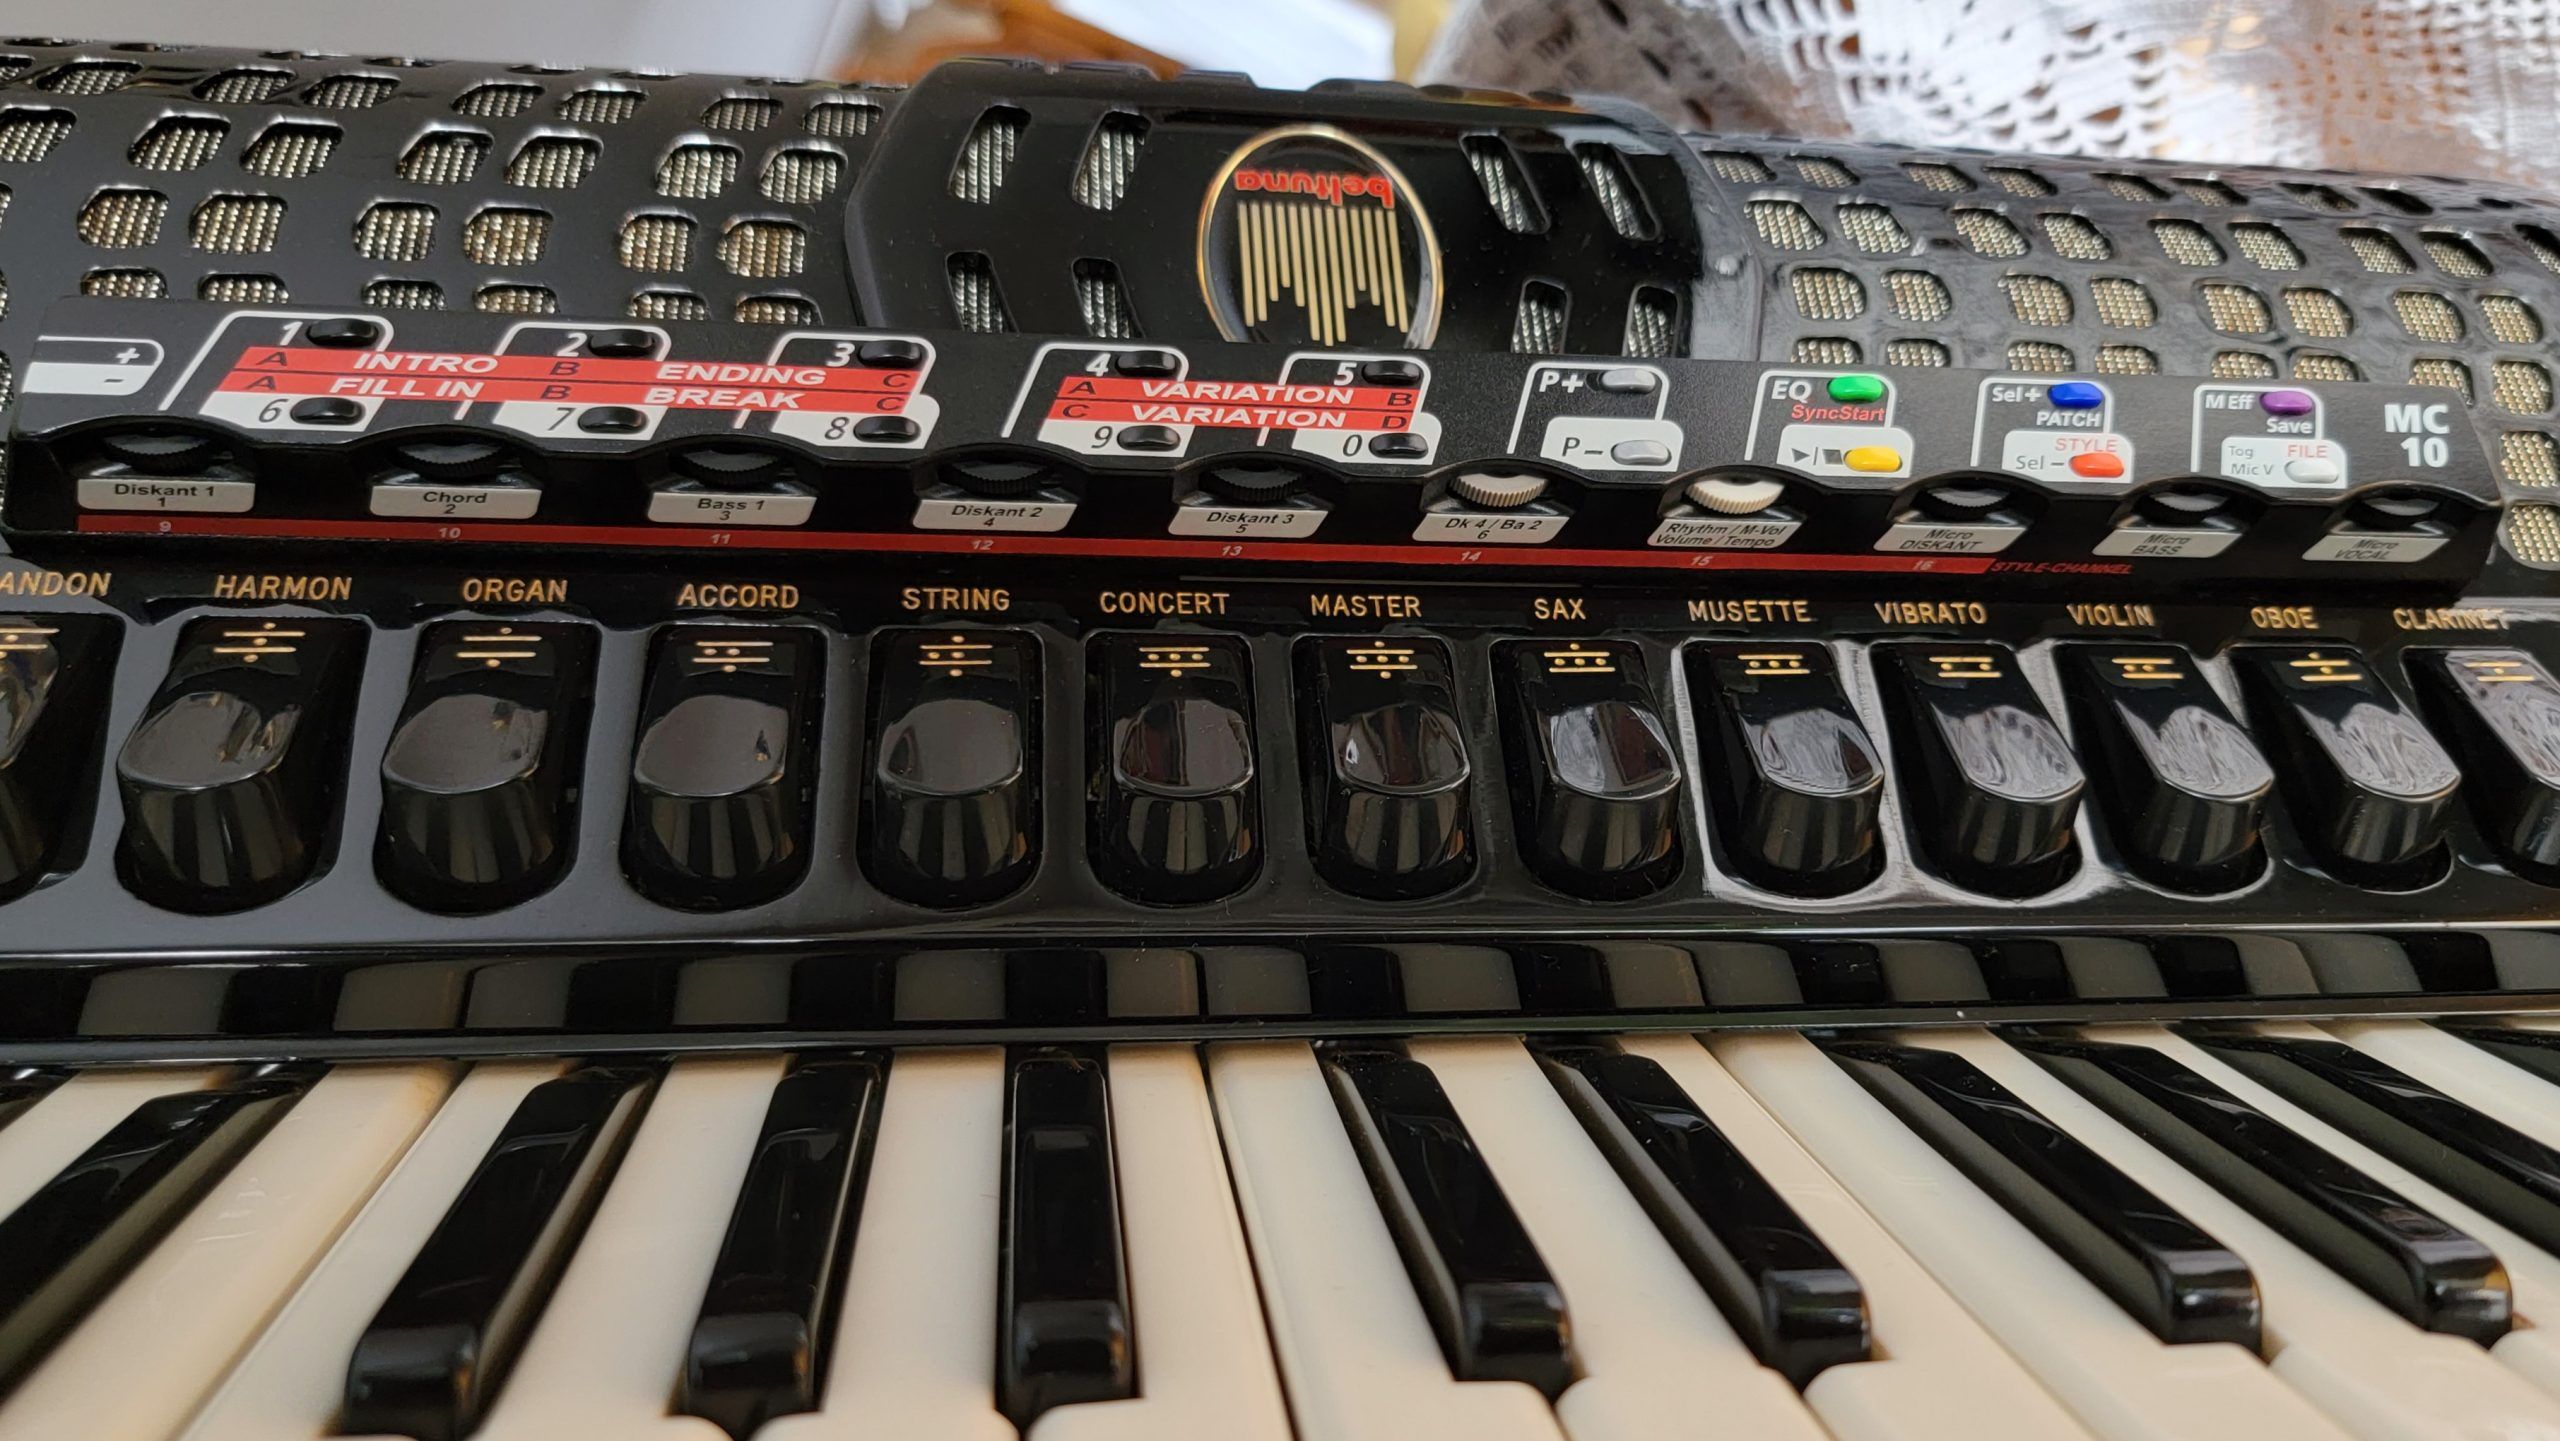
My next step, after plugging in the power to the LIMEX system and the mixer, was to zero out all 10 circular/rotary dials on the LIMEX controller. The following were all set to “0”
- Diskant 1
- Chord
- Bass 1
- Diskant 2
- Diskant 3 / Diskant 4 / Ba 2
- Rhythm / M-Vol / Volume / Tempo
- Micro Diskant
- Micro Bass
- Micro Vocal
You can see to rotary knobs below:
Next, we need to check and see that the mics for the BASS and TREBLE (“Micro Diskant”) are turned on.
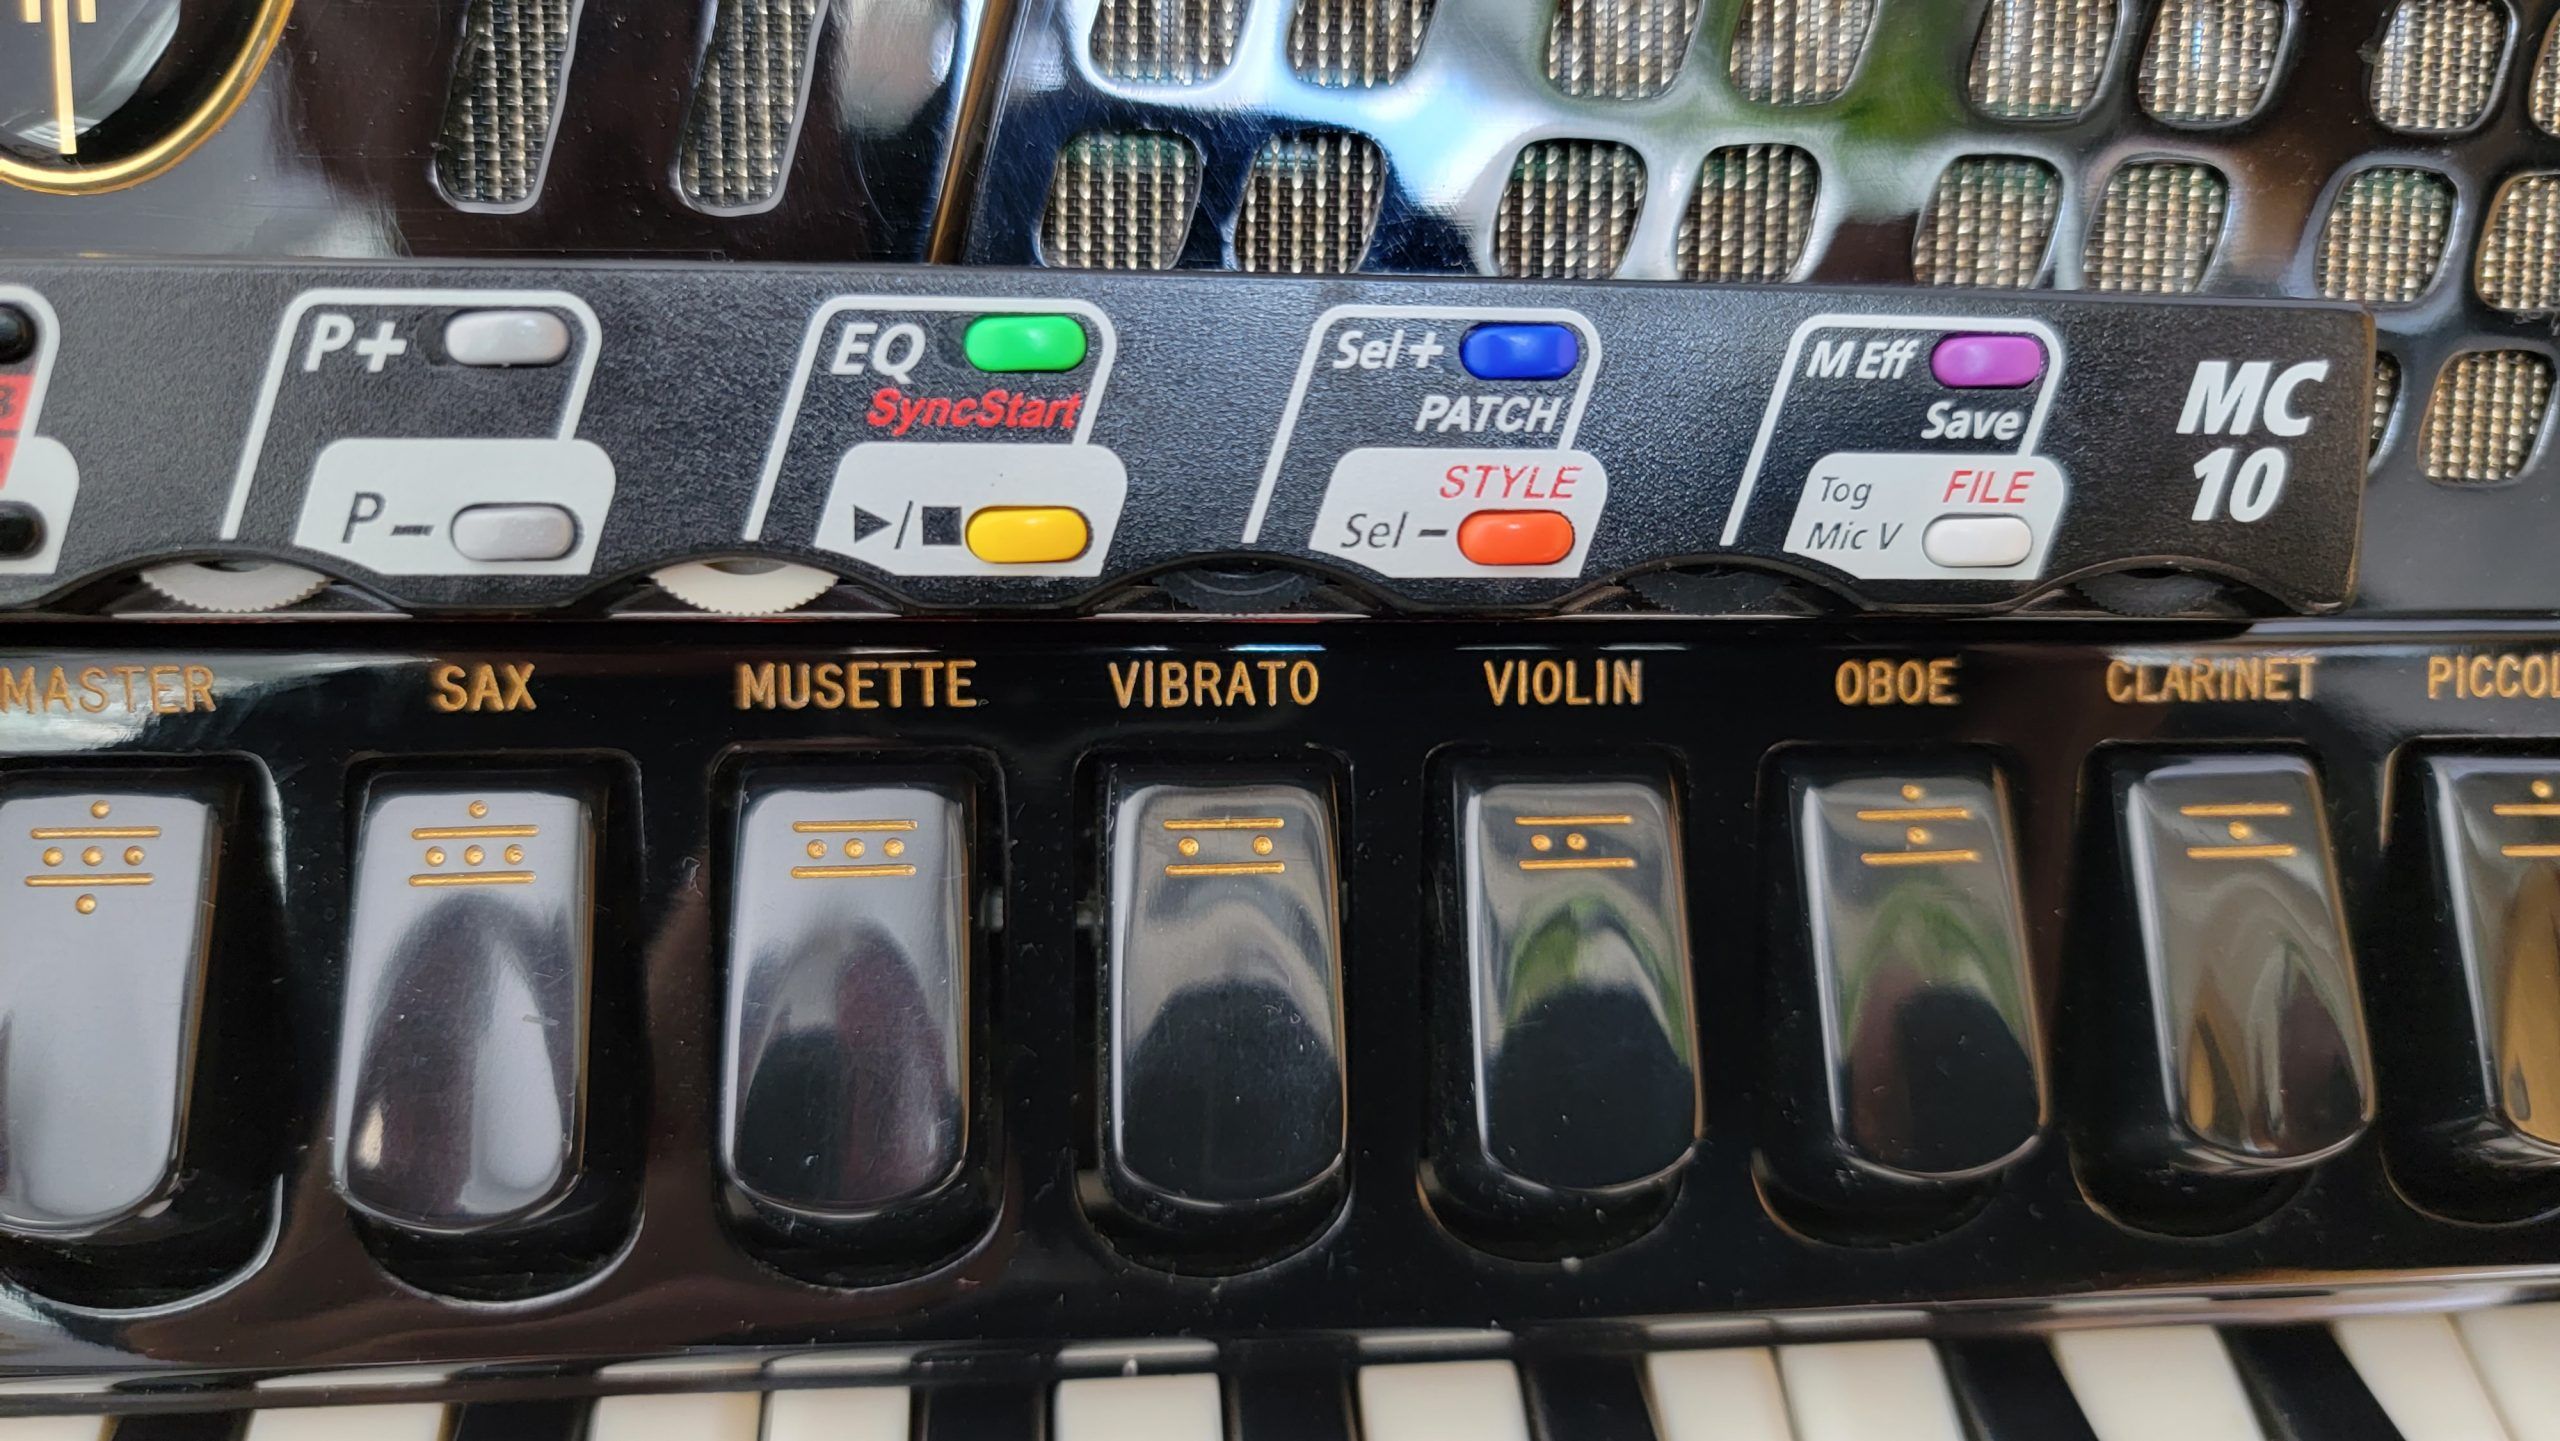
Referencing the picture above, let’s look at the far right side of the MC10 controller. The white button, when pressed and held for 2 seconds toggles off or on the VOCAL mic. The orange button, when pressed and held for 2 seconds toggles off or on the BASS (left hand) mic. The yellow button, when pressed and held for 2 seconds toggles off or on the “DISCANT” or treble (right hand) mic.

Referencing the picture above, let’s look at the rotary volume control knobs of the MC10 controller.
On the far right (bottom) marked as “Micro VOCAL” is the volume control knob for the optional VOCAL microphone.
The rotary known just to the left of that, marked as “Micro BASS” is the knob to control the volume of the left hand acoustic bass mics.
To the left of that, marked as “Micro DISKANT” is the rotary knob to control the volume of the right hand acoustic mics. FYI: “DISKANT” is German for “TREBLE”.
Here is a bit of a sound engineer hint… we do NOT want any microphone to be cranked up to maximum for the simple fact that they will pick up extraneous noise and lower headroom. The volume can be set anywhere between 0 (turned off) to 127.
As a starting point I suggest somewhere between 60-75 for the volume settings of both the left and right hands. This gives us breathing room to control the dynamics of the left and right hands and you can raise or lower the knobs until you get a good balance of left and right hand volumes. That means that you will have to very likely raise the gain level a bit on the mixer you connect them to. In time, you will learn the right levels to set things at after one has had time to experiment.
At these levels, I have the trims or gain levels of my QSC mixer set to just a touch past the 50% levels to peak at the yellow levels on the output of the digital meters. I’d like to suggest that these are good starting points, but will likely all need a little adjustments up or down based on varying conditions.
More to come soon!