May 5, 2018
I am giving myself an early birthday present and this is a wonderful way to reward myself for all my hard work!
Now, in all honesty, this wasn’t supposed to happen at this time, but it came about as a result of feeling a lot of frustration, and though the timing may not be optimal, it happened anyway. Life never turns all the greens on for us at once, so take advantage of the ones that do come to advance through life every time you can!
About three weeks ago, I was playing around and trying to record a higher than average sound out of my $20 condenser mics. They were doing quite well and valiantly trying to keep up to me, but I was just not quite satisfied. In my head I had a specific sound and they were simply not putting it out, through no fault of their own. No matter the settings, I could not find those characteristics that would make me smile. At one point I was just fed up of moving the 15 feet back and forth between the mic location near the background, my mixer and my computer desk where the DAW is located carrying the accordion all this time. I must have gone back and forth between the background, mixer and computer desk at least 80 times over the course of a full weekend… recording, changing mic locations, mixer settings, DAW settings, and doing this process over and over. Often close but NEVER getting that sound I wanted.
I finally had to give up because the fact was that I was simply asking too much of the poor mics. They could not give me what I wanted. I also have several future projects where I will be recording outdoors, and I had no way that I could bring the mixer to connect to the mics out there, so… the decision was made.
There had to be a recording method that would let me record anywhere… home, outdoors, at a friend’s place, in the park… ANYWHERE, and versatile microphones that would give me what I wanted in terms of sound characteristics. This frustration had to be met and defeated with a solution!
With goals simply and clearly defined I started a bit of a hard core research. My 3 areas/goals to attain were:
- A highly versatile, high-quality portable recording device.
- A set of highly capable and versatile condenser mics that met my needs.
- A set of nice microphone stands that would support these mics
- A set of cables that would transfer all this info to it’s fullest quality possible in a consistently reliable manner.
Once those goals were defined, I further sharpened the characteristics and traits that would help me find exactly the items I needed. If I showed the writings that I did, I would be showing you about 5 pages of hand written notes… how is that for detail? 🙂
So it began. Many hours of research were the menu of the weeks. How hard? Well, just in the microphone area, I listened and tested over 40 different dynamic and condenser mics (small, medium and large diaphragm sizes that were in the $100 to $1000 range a piece, but to be fair, I had kind of started this process a good month before I even bought my $20 Neewer condenser mics). I also looked at over 15 recording devices (in the $200 to $5000 range), narrowed it down to three, then tested those in person and found what I believe is the very best answers to my needs.
Mic Stands and Cables
The cables and mic stands were the easiest. What was needed were microphone stands that wouldn’t topple over, and they had to be weighted boom stands. The Euro Boom MS7701B microphone stand is one of the most popular mic stands and those came to mind rather quickly. The cables had to have high quality wiring and these were found from Pro Co. The reasons they were chosen were that Pro Co microphone cables have been the choice of professional studios and live sound engineers worldwide. They have a proven sound quality and the performance needed. The three specific reasons I chose these were:
- Smart cable design: Pro Co’s XLR cables use oxygen-free wire and substantial spiral shielding for optimum signal quality and noise rejection. This makes them both have the sound quality I need when recording, with the durability that stage use demands.
- Neutrik connectors: All Pro Co microphone cables use Neutrik connectors for reliable connections every time. These metal connectors are built to last, and eliminate cord problems due to damaged cable connectors.
- Guaranteed for Life: All Pro Co Sound brand cables carry a limited lifetime warranty to the original purchaser against defects in materials and workmanship.
Two of the 20 foot-long balanced mic/patch cables that are Male XLR to Female XLR with Neutrik connectors were bought to fill that need.
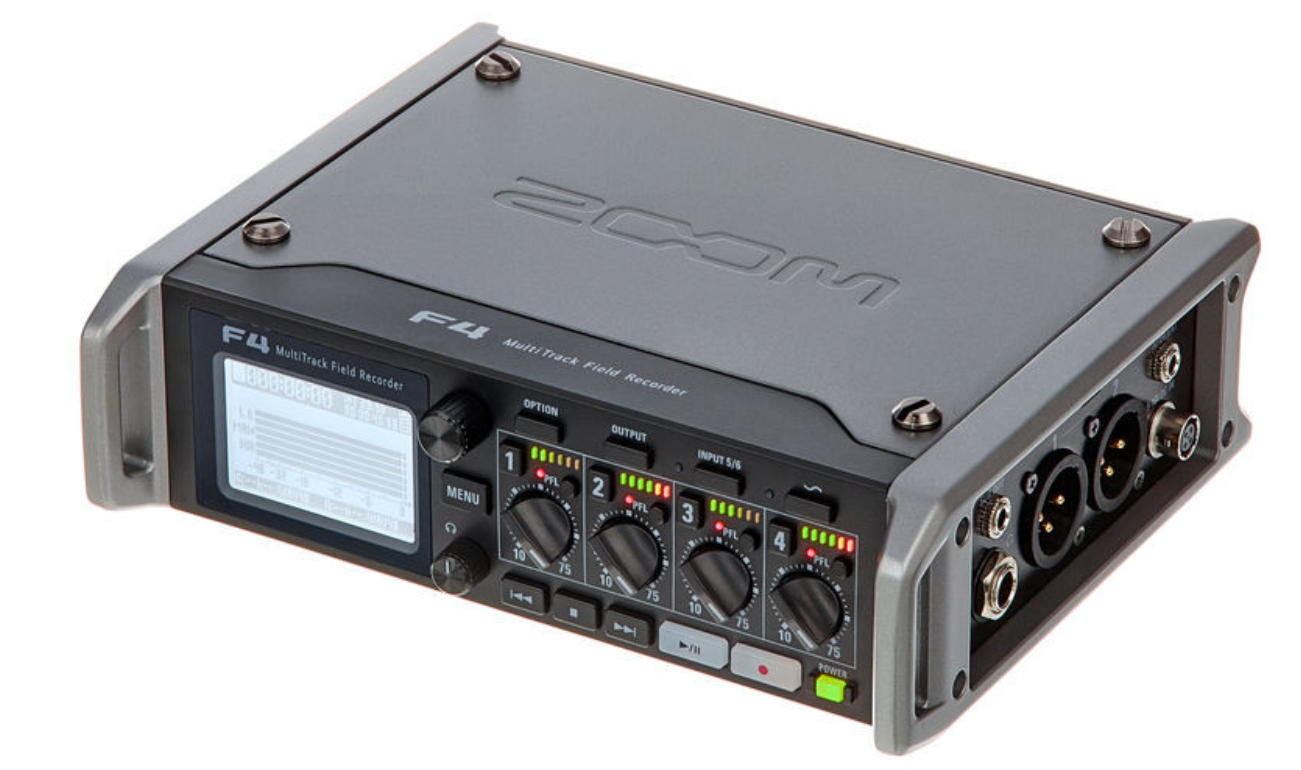
The Recording Device
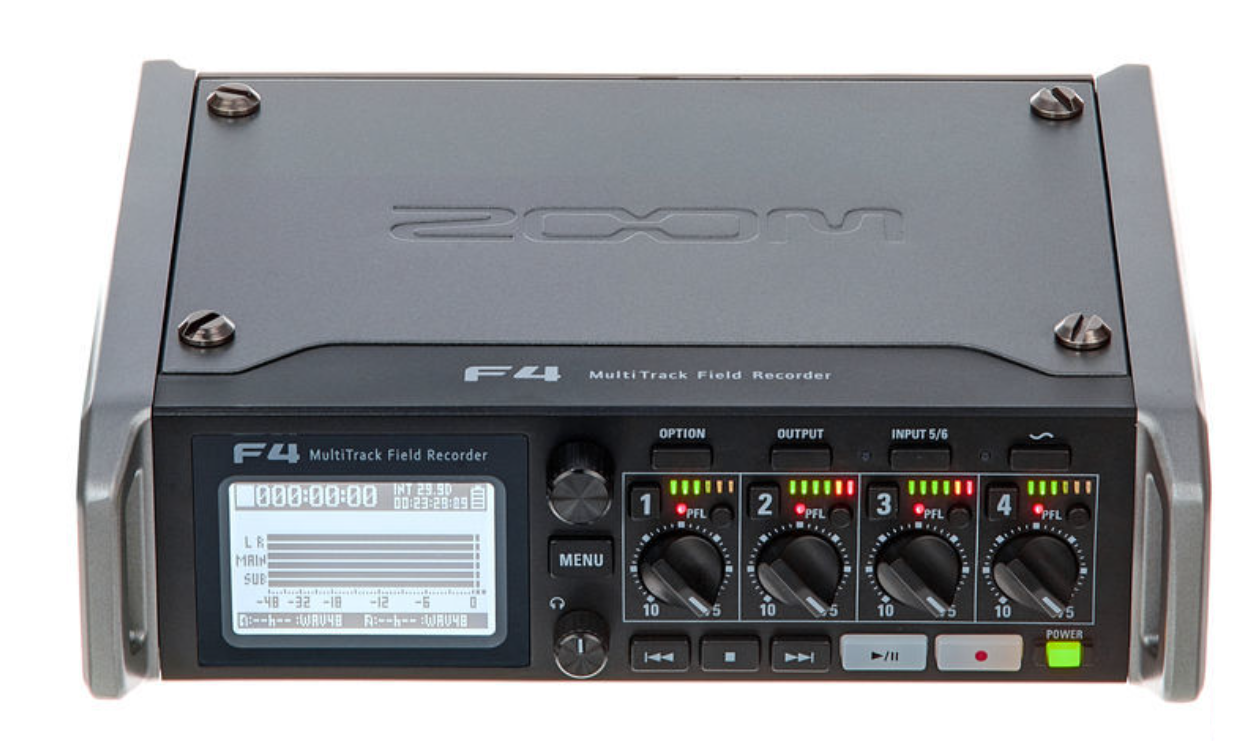
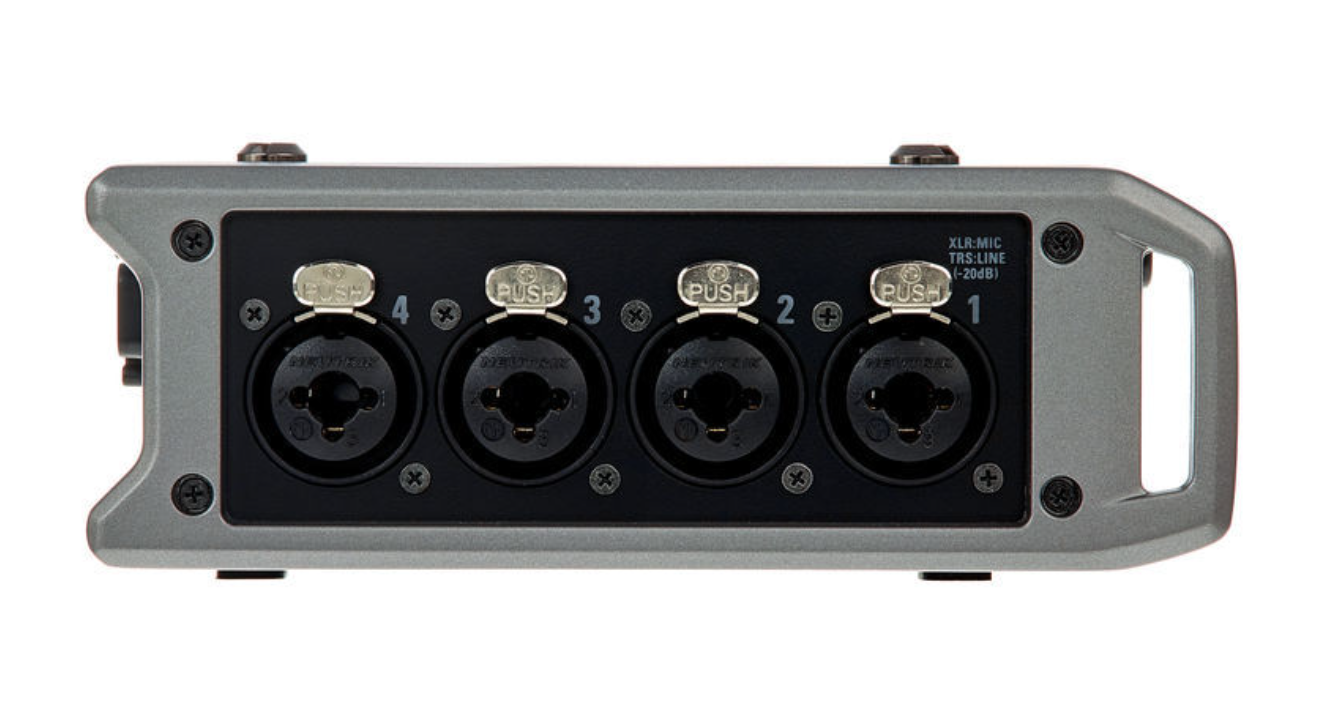
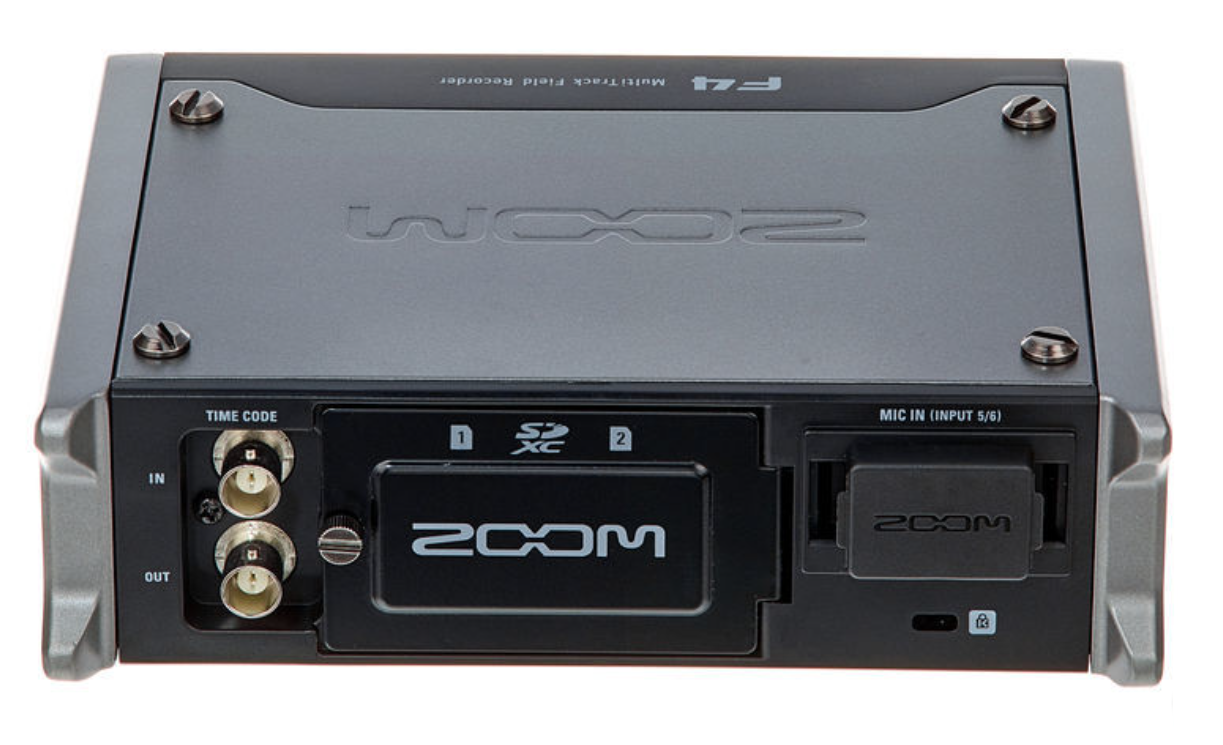
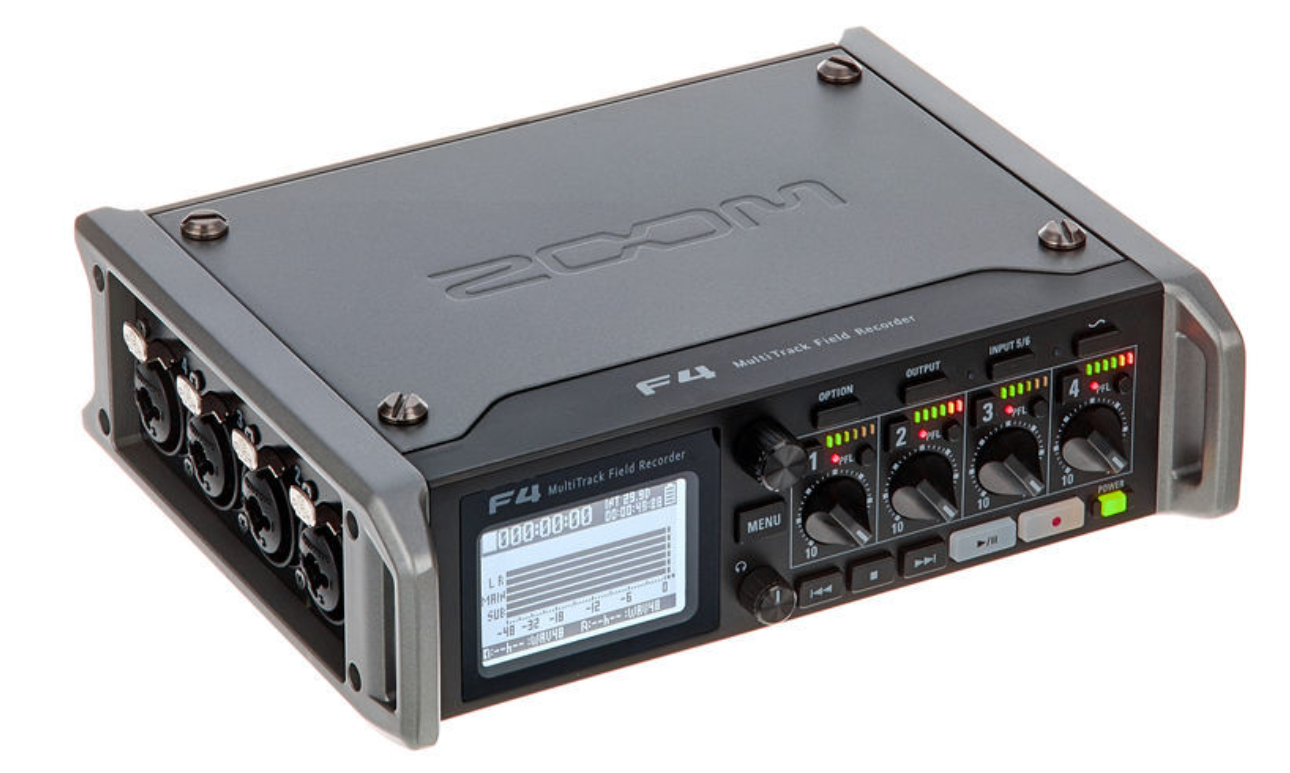
The second part of the puzzle was the recording device. First and above all it had to have very high quality recording capabilities. Second, because when recording outdoors, power outlets would be rare, so it had to have both AC and DC powering capabilities and if I could find one that had the ability to be powered by an external battery, this was a big plus. It had to have at least 4 inputs (more was better, but 4 was more than enough for my needs), it had to be light and portable and if this could be used as a digital audio adapter, that would be the cherry on top. It did take me a good amount of time to make a decision here. There were many options available, and one could have spent several thousand dollars on this, but I had to remain reasonable in that I am an amateur and don’t really need the most top of the line professional recorder on the market, so that $5000 Sound Designs portable recorder was not in my cards.
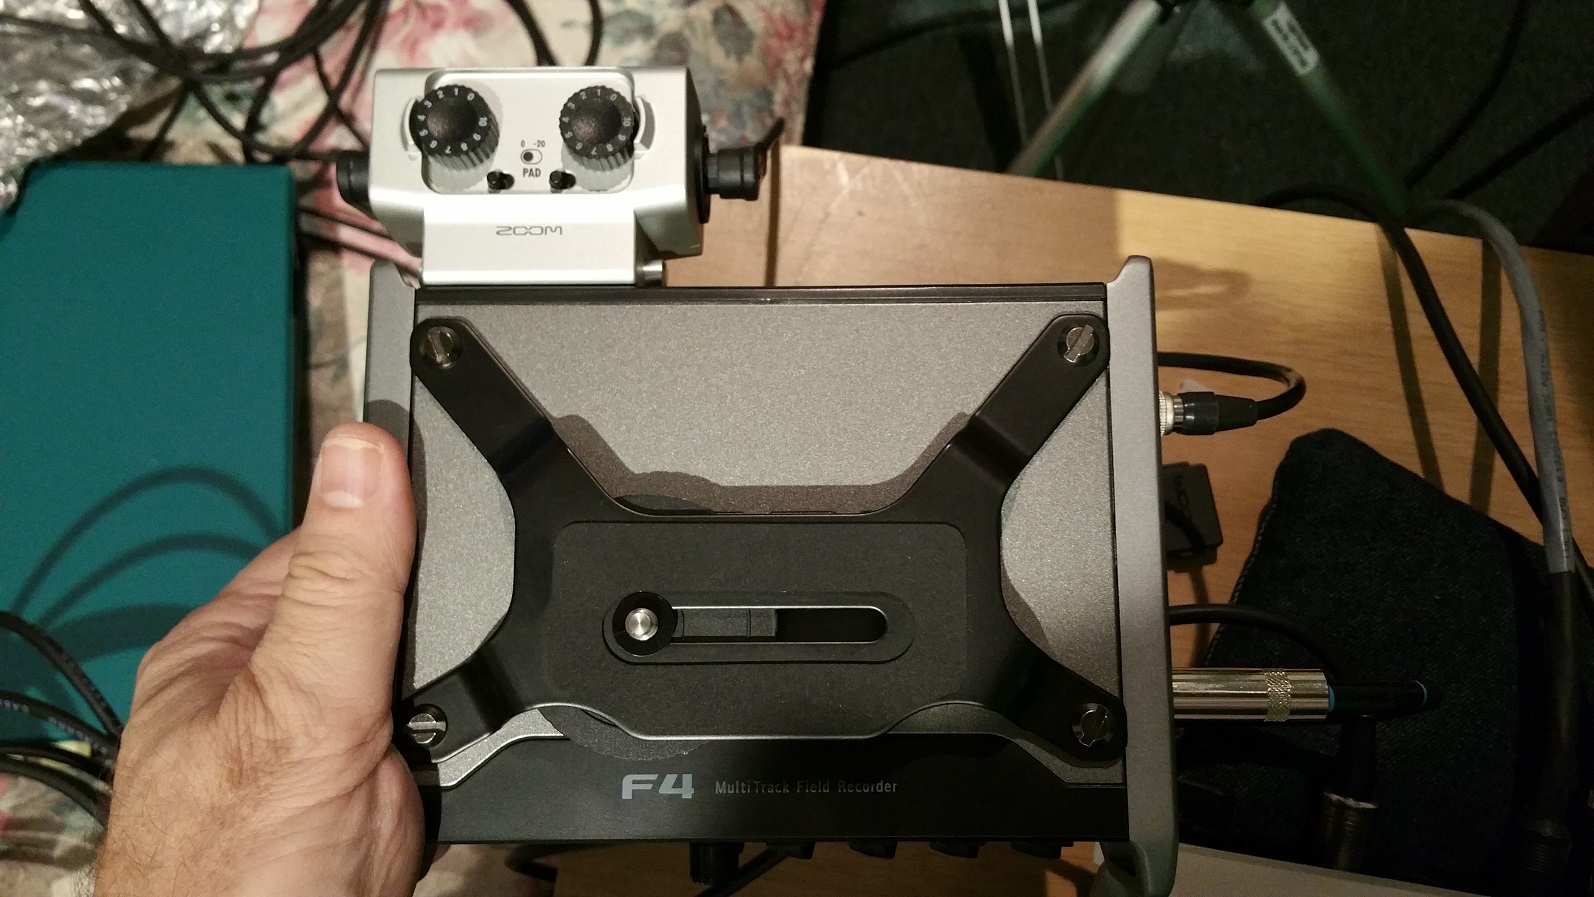
It basically came down to either the Zoom H6 or the F4. The F4 won out handily because of the higher quality recording capabilities and it being much closer to a professional or prosumer unit than the H6 with more features in it that I would actually use regularly in real life (quality before quantity! The F4 has much higher quality pre-amps with a way higher gain and higher quality recording options than the H6). The Zoom F4 pretty much hit the ball out of the park in all my wants and needs and was still a touch under my budget, so it got the nod as my portable recorder.
Here are a couple of pictures:

Here are a few videos of the Zoom F4:
This little piece of kit has a lot going for it and if you spend some time on YouTube, will see how versatile it is and all the little internal and external features that make it special. Also, at the time I made the purchase, I did not know how many more external battery options I had available to me, and there are quite a few! Suffice to say that it is easy to get several options to give you many functional hours out there in the field with it when there is no AC power around.
Zoom F4 Related PFD Files
The Microphones
The final and most important part of this puzzle… the part that caused me the most frustration, time and effort, was the choice of microphone. I had to decide between dynamic and condenser mics, small, medium or large diaphragm sizes, well known brands, off brands and brands I never even heard of before, and I spent a LOT of hours with an accordion in front of a LOT of these mics.
Then on top of everything else, I had this absolutely silly time reading tons of posts and listened to dozens of opinions from people about a rather simple topic… since I need two mics, should they be a matched pair or not? That one question even caused an argument between two people in one of the music stores that I was visiting… haha!
One thing that everyone did agree on was that a matched pair was never a bad thing, what they couldn’t come to a consensus on was just how good or valuable it was to have in real life use.
In the end, the question of whether to buy matched pairs or not was answered for me, so, I kind of wished I had never asked that question to some people. It would have avoided a lot of head banging and I will tell you why a bit lower down in this post.
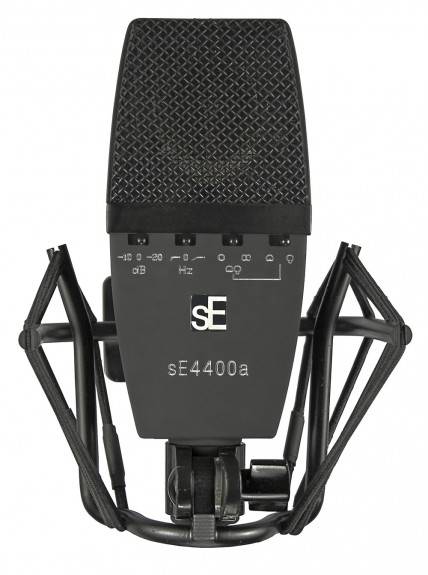
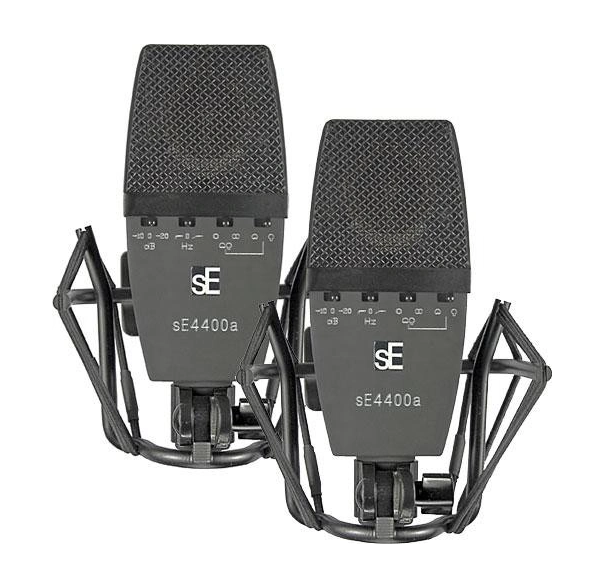
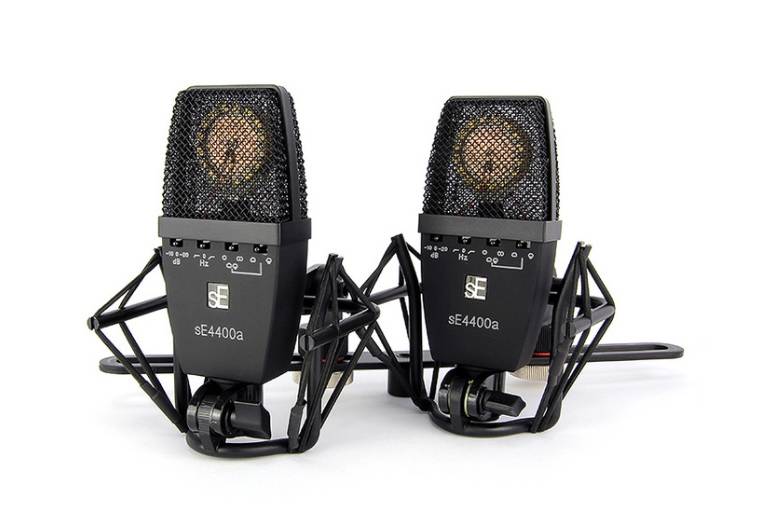
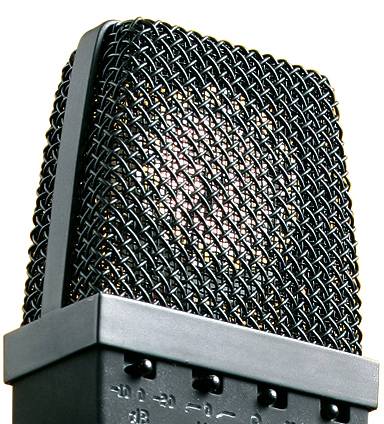
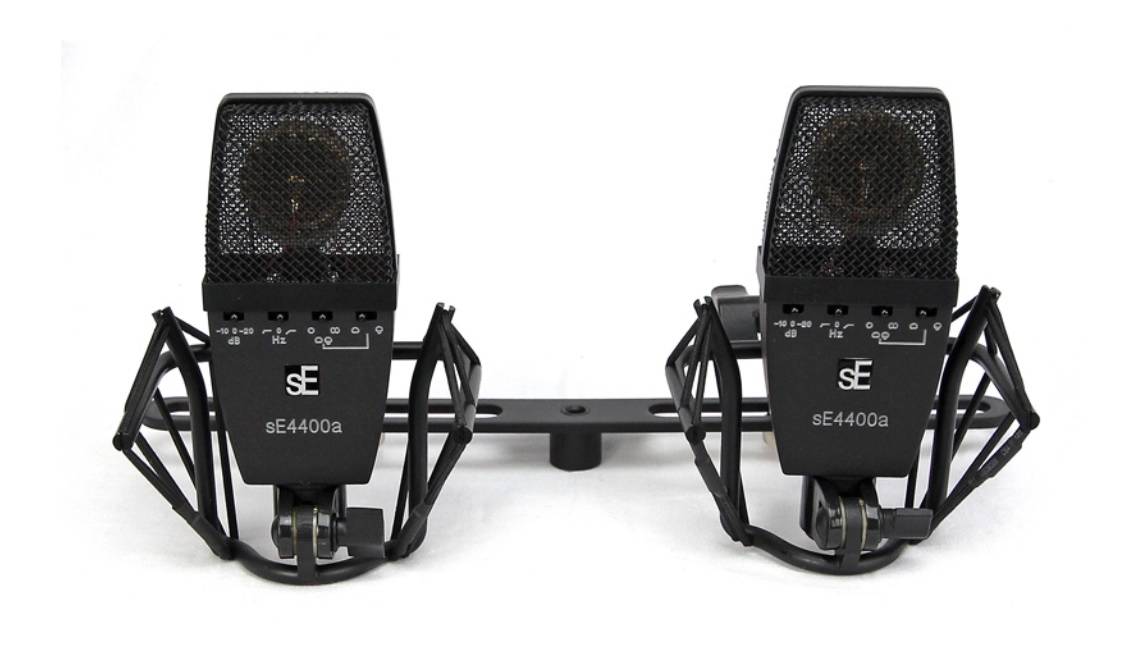
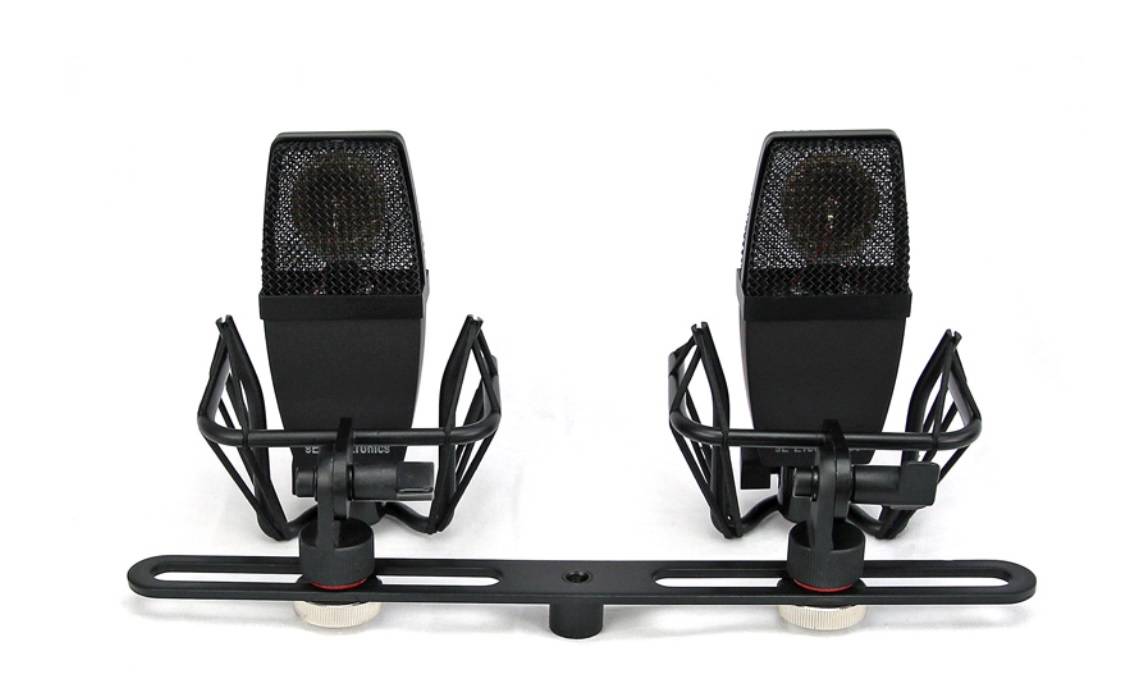
To end the surprise, the microphones that I ended up choosing are the sE Electronics sE4400a condenser mics.

I chose them because they sounded not “good” but super natural and gave me recordings that sounded exactly like what my accordion sounded like when I was playing it to my ears. They are the most natural sounding mics I have ever heard anywhere, and the resultant sound they produced was just so ready to accept whatever EQ, compression, reverb or whatever sound modification I tossed out at them and it always sounded SO SMOOTH and NATURAL and… AWESOME!
At one point I was listening really hard to the nuances to a recording I made and for some reason this thought jumped in to my head… “man I wish I was that good, this guy’s playing sounds so creamy smooth…”, and it WAS me! It just made any music I made sound like it was recorded in an expensive $500/hour pro studio, and I was in some back room of a music store at the time with people all around me!
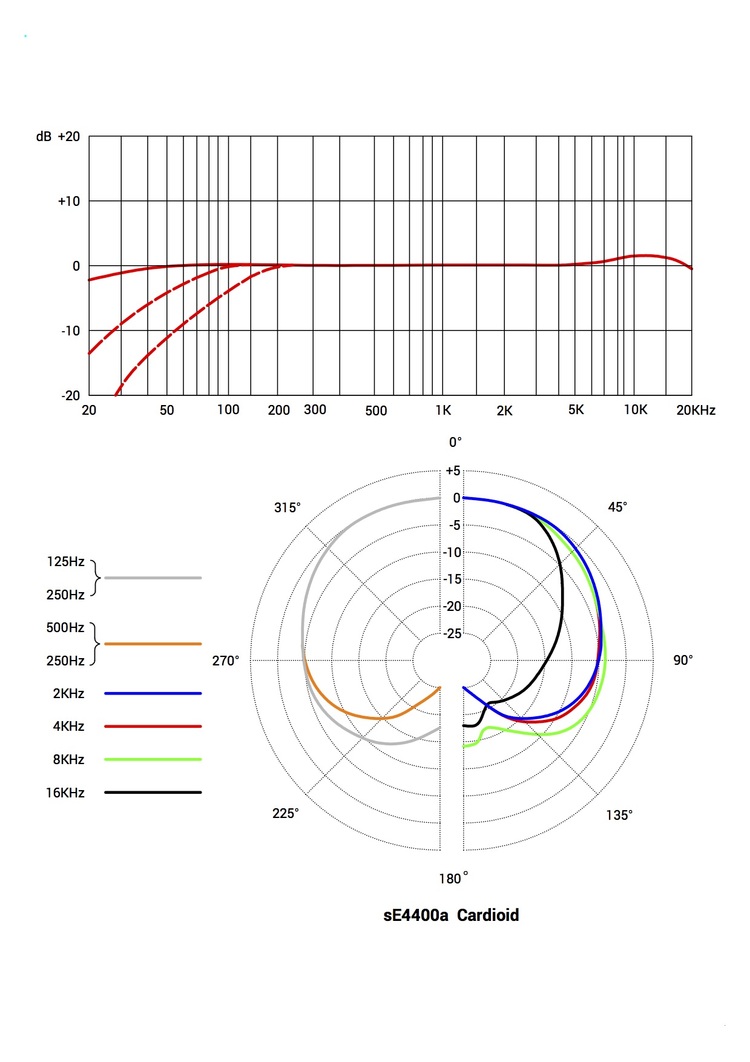
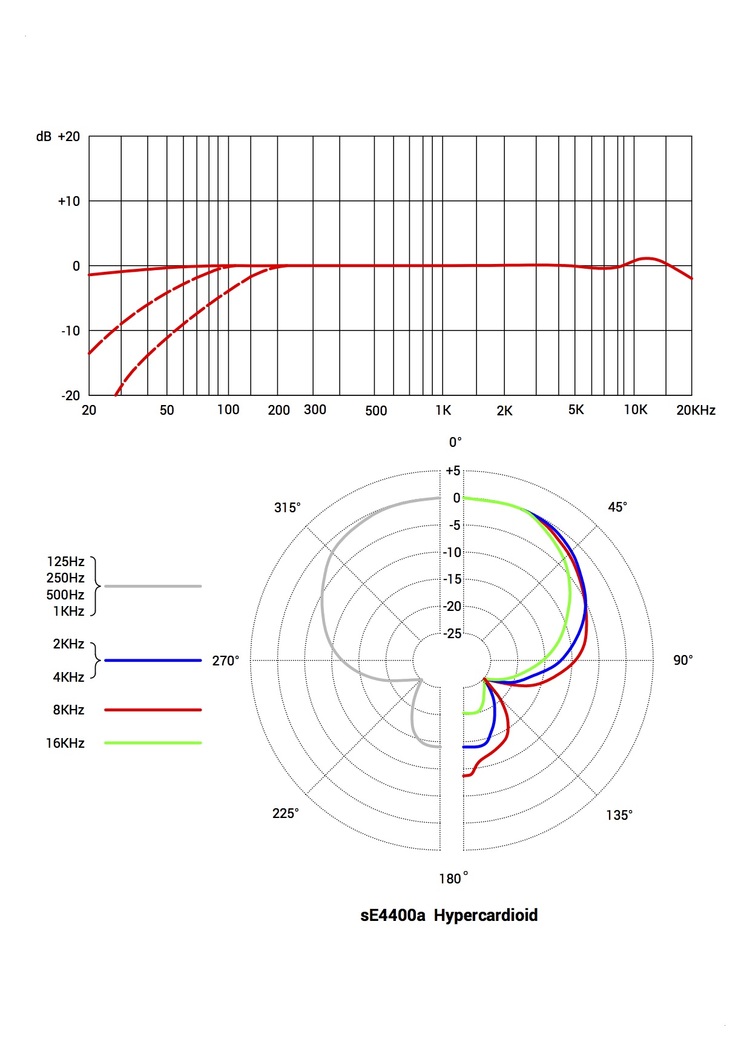
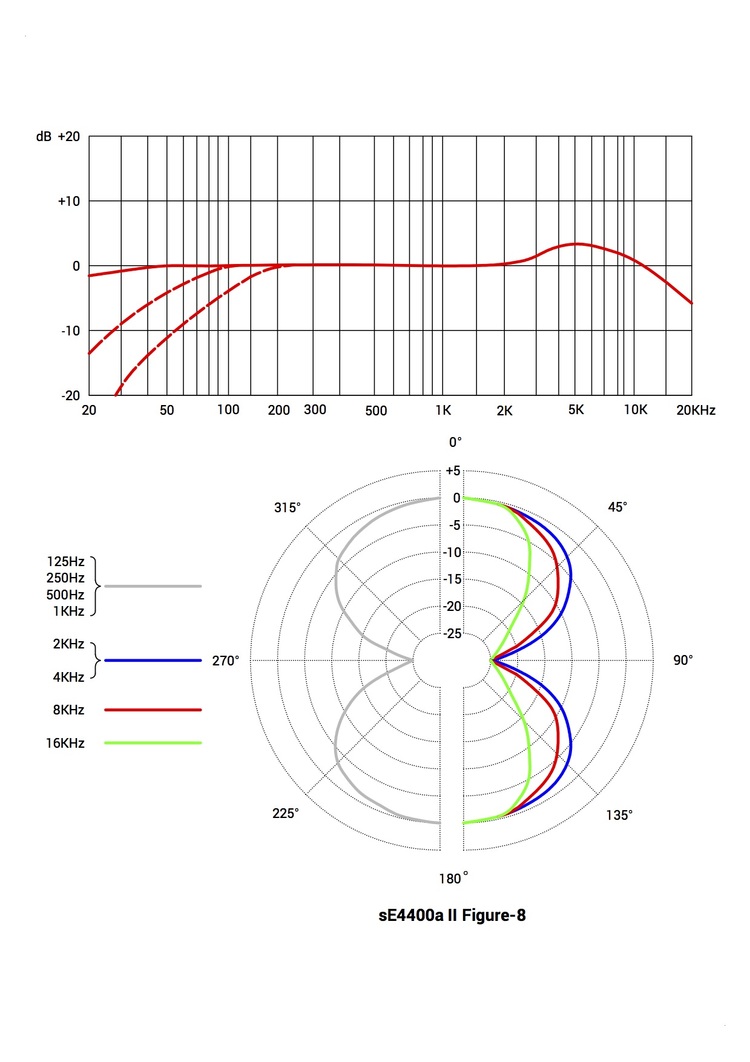
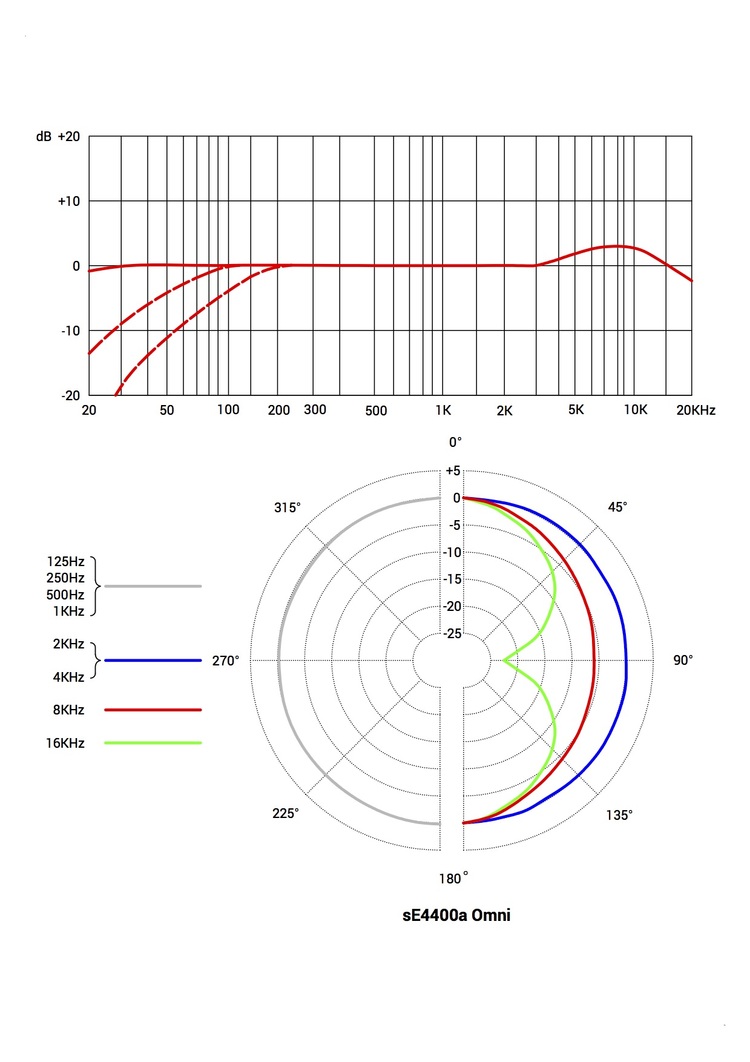
On top of that, these mics are extremely versatile. They have four available polar patterns: Cardioid, Omnidirectional, Figure-8 and HyperCardioid all in the same mic! Not to be outdone, it also has a -10db and -20db pad as well a 60hz and 120hz cut off “high-pass” option.
This mic just does it all!
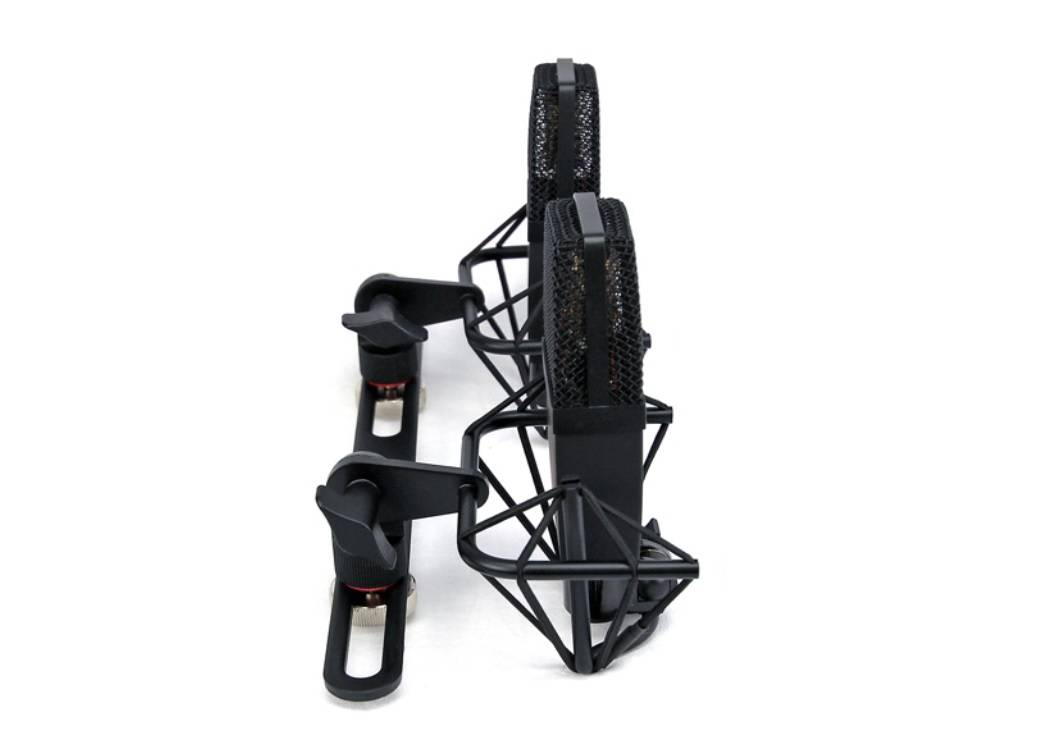
To add to the whole thing, these mics just happen to have the COOLEST and best thought-out shock-mounts in the industry (they’re actually called SPIDER-Mounts, because of the 4 elastic “legs” per side). These are the only ones anywhere that both provide a high level of vibration protection and enable the mics to sit “out in the open” with nothing blocking them like other mics that have a ring surrounding them, as well as offering the secondary choice of moving the mic IN FRONT of the shock-mount, letting you place the mic right up against whatever you want to record without restriction.
Now, getting to that question of getting “Matched Pairs” or not, that caused people to fall in to a huff and want to express their opinions almost aggressively…
First, let’s define what “Matched Pairs” means. For higher end mics, getting a matched pair means you get two mics that were first hand-chosen to be very similar sonically and then tweaked further to have the same volume output, noise characteristics and frequency response to it’s matched partner.
The reasoning is that the stereo image is made both more symmetrical and of a higher quality. Most companies charge a premium to get a matched pair. AKG for example, charges well over $200 for that privilege on their C214 (mics that, coincidentally many people compare the sE4400a mics to)
Above it was mentioned that the answer to the question about whether I would make a purchase of a sE4400a matched pair or not would be revealed, so here was my answer to that question. The price difference to purchase two unmatched mics versus a matched pair from sE Electronics was a mere $1US more.
But wait… there’s more! 😀
When you opt for the matched pair, you also get a bigger single case that holds both mics and accessories as well as something that is not included with a pair of single mics… a stereo mounting bar, something that other companies charge anything from $40US to $70US for, so it is actually CHEAPER to get that matched pair of sE4400a’s than two separate mics … so you KNOW that I JUMPED on that without hesitation and why all that discussion of “should I or shouldn’t I” was solved for me! I purchased the matched pair… obviously!
Here are a few pictures:
A few YouTube videos about the sE4400a:
HERE is a link to the SE Electronics website and the main page for this mic and HERE is a link to the PDF manual for these mics.
Below are some pics showing off the frequency curve which kind of explains why I loved the sound of these mics and why they sound so natural (can you say DAMN NEAR FLAT frequency response?). Click on each picture to see the info related to the sE4400a’s characteristics in each of it’s 4 mode patterns:
Addendum May 6, 2018
Wait, unboxing vid you ask? For sure… and here you go!
Also, here is a quick and short video I made about how to do a firmware update on the F4 moving from the factory V.1.0 to V.2.0 firmware!
Below we have a video on how to do the update for V.3 of the firmware:
Addendum July 20, 2018
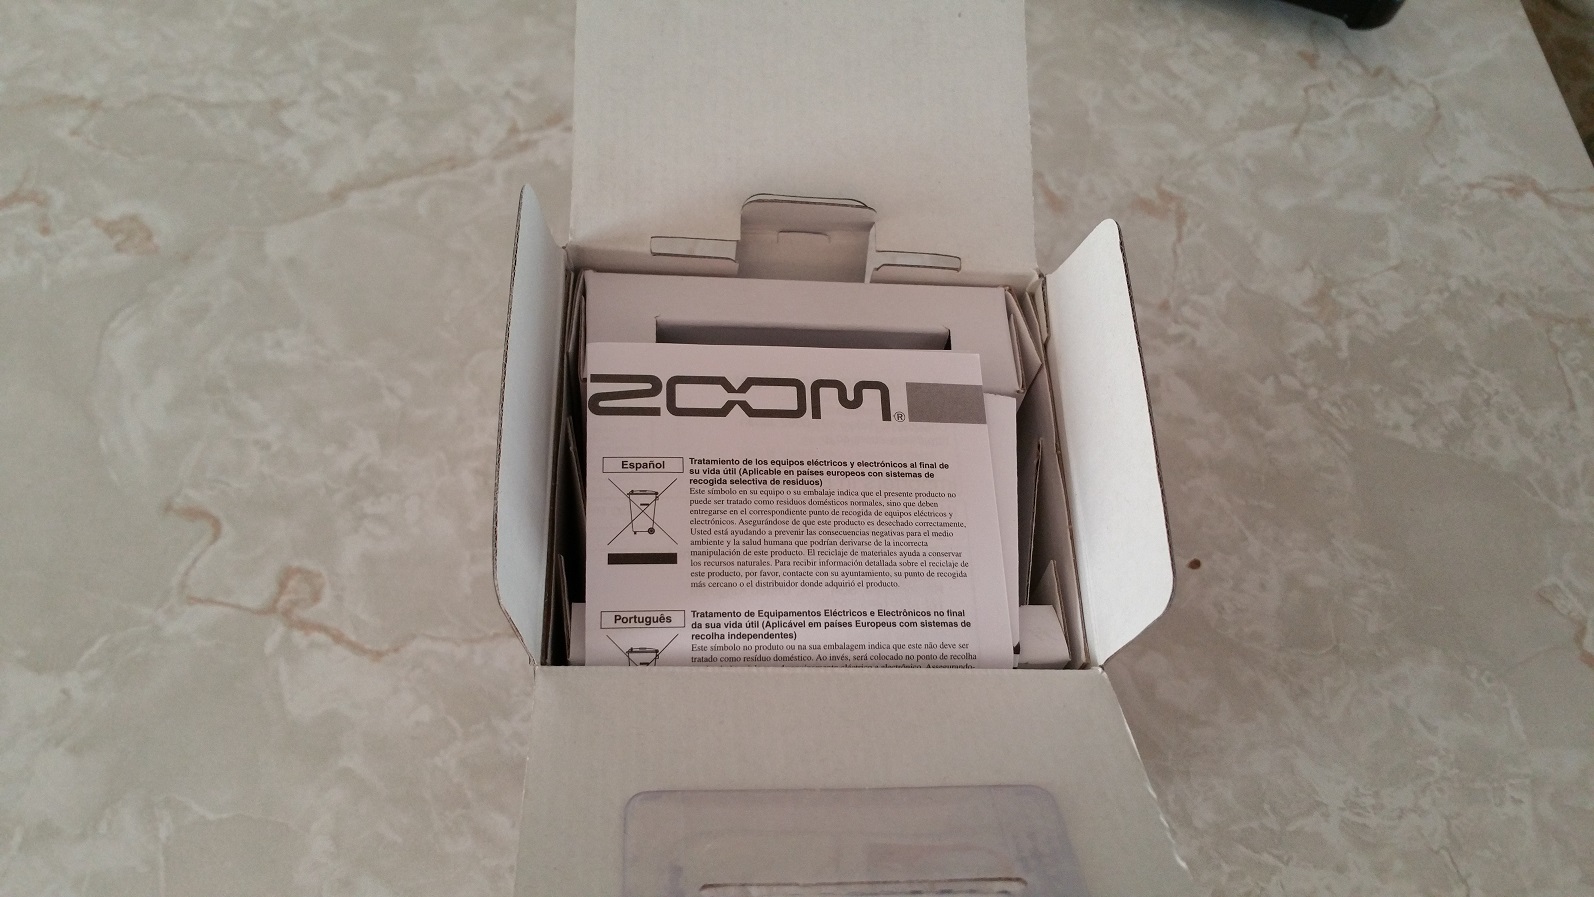
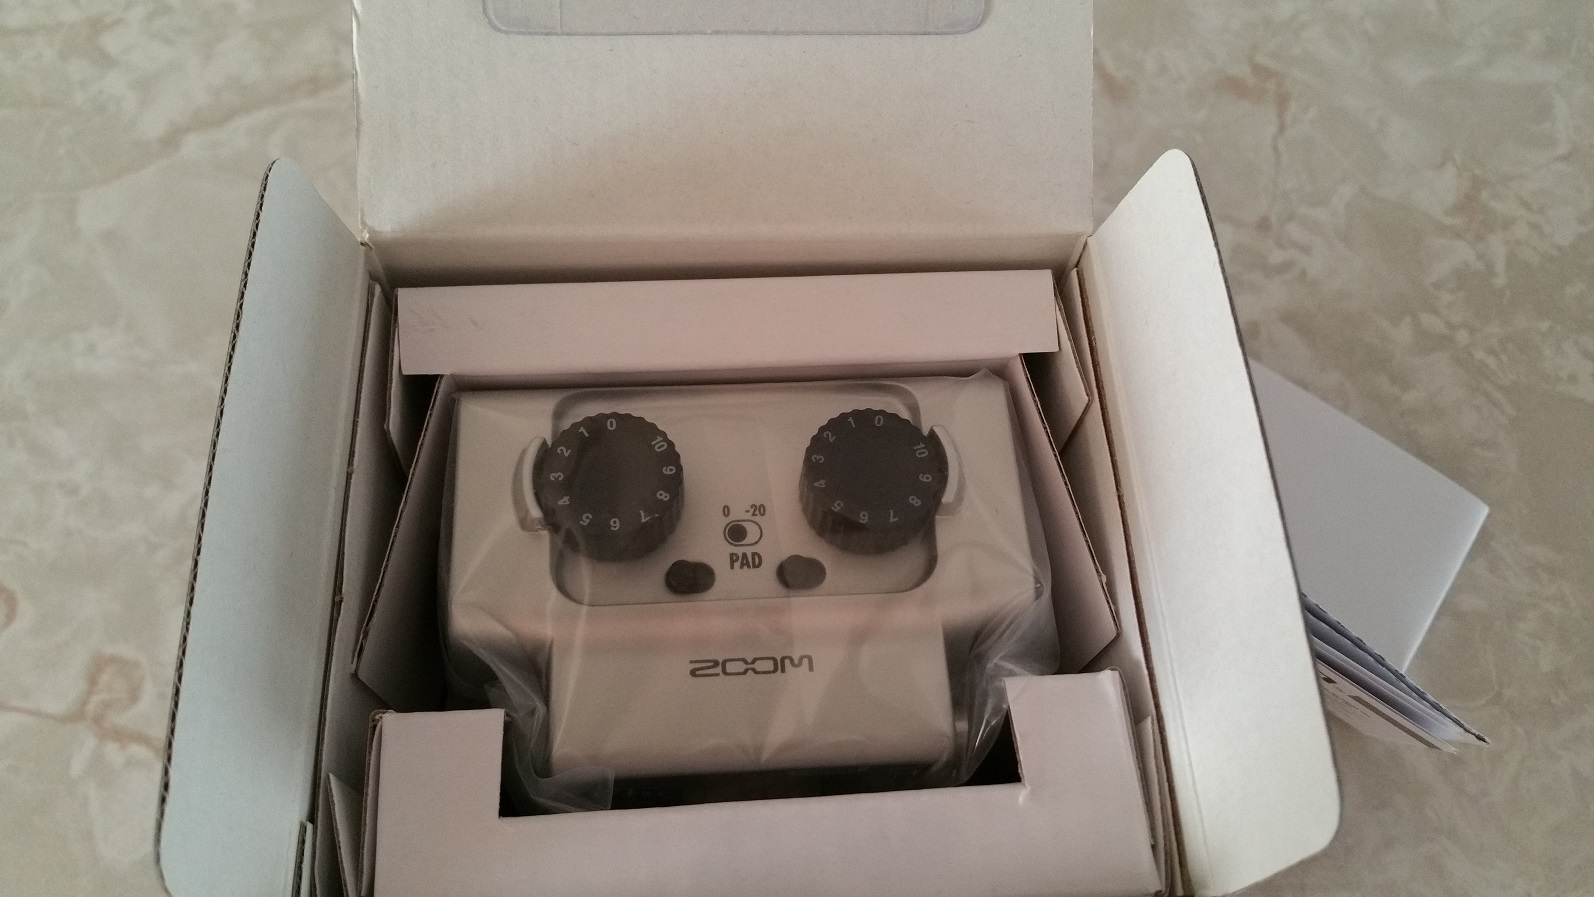
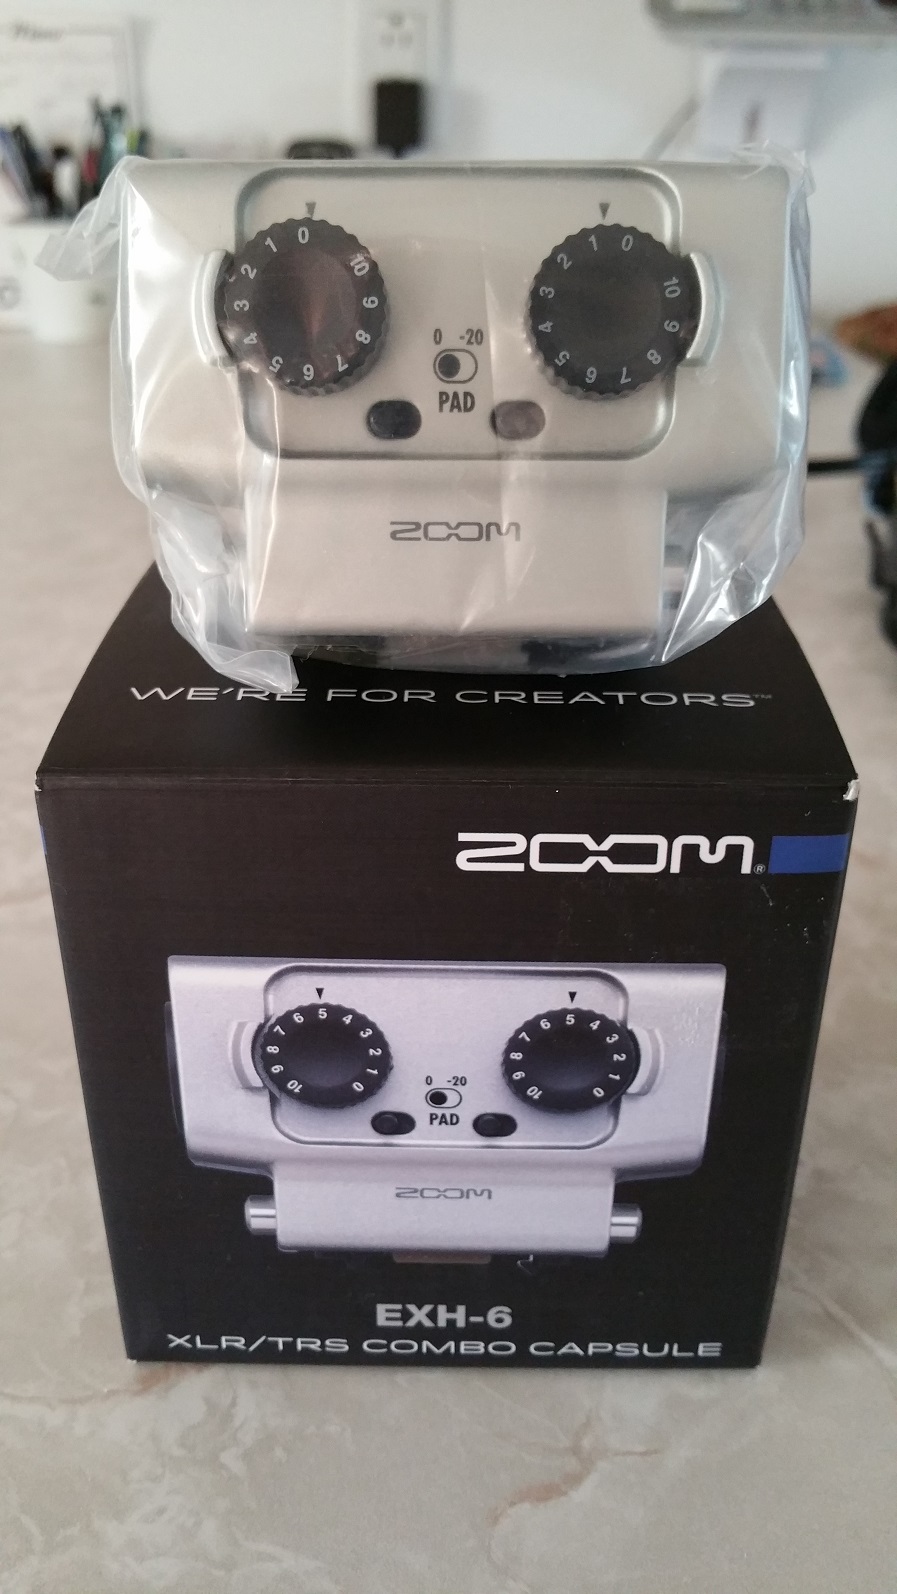
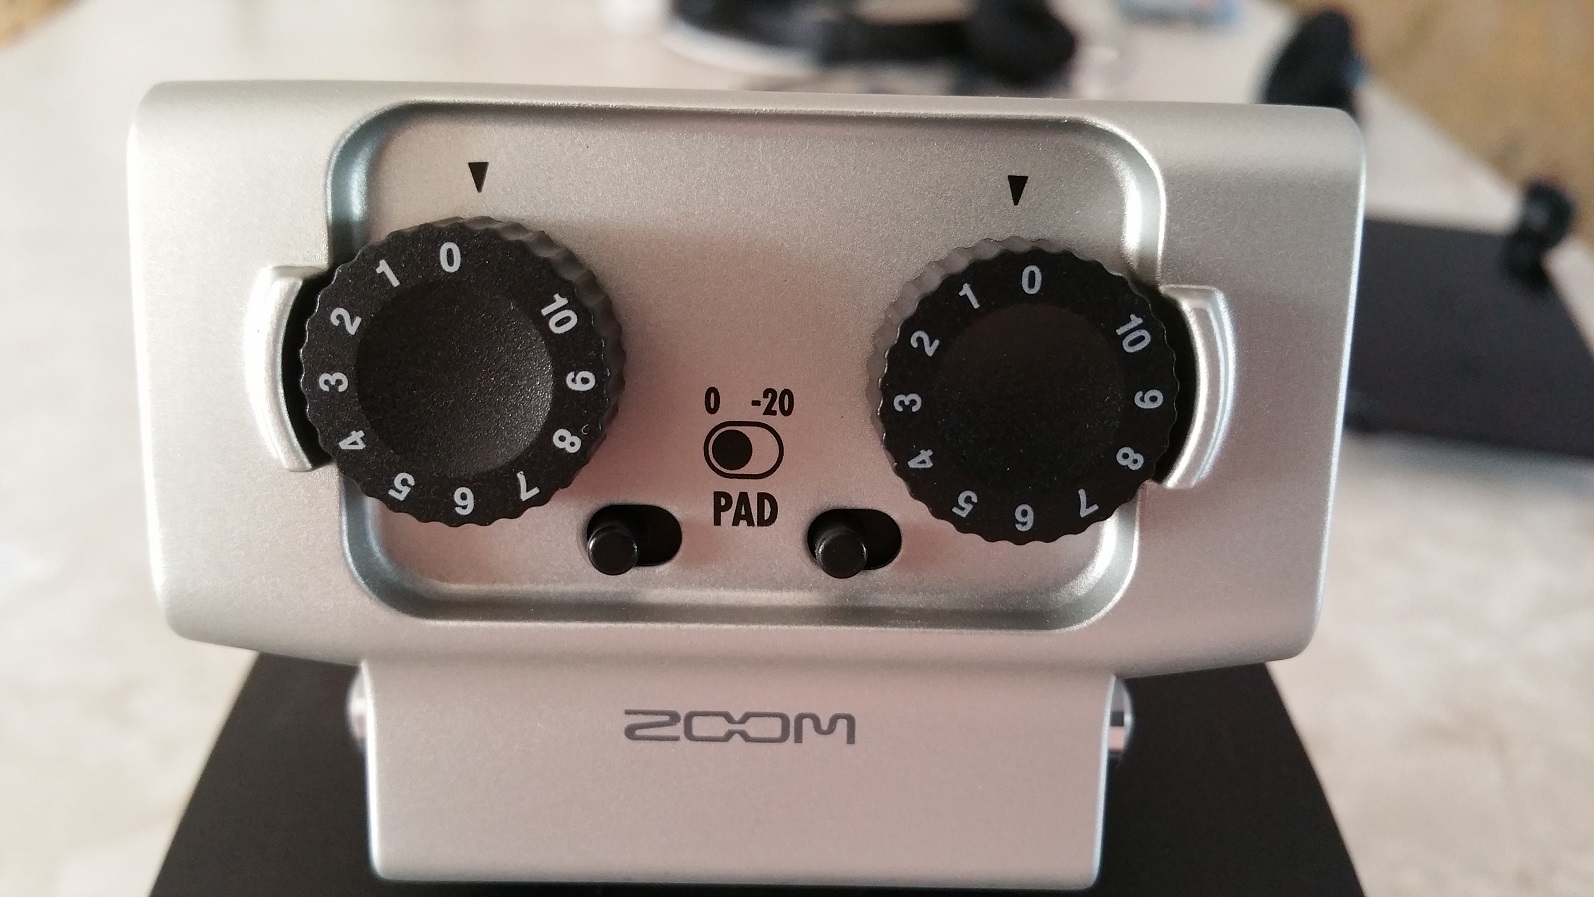
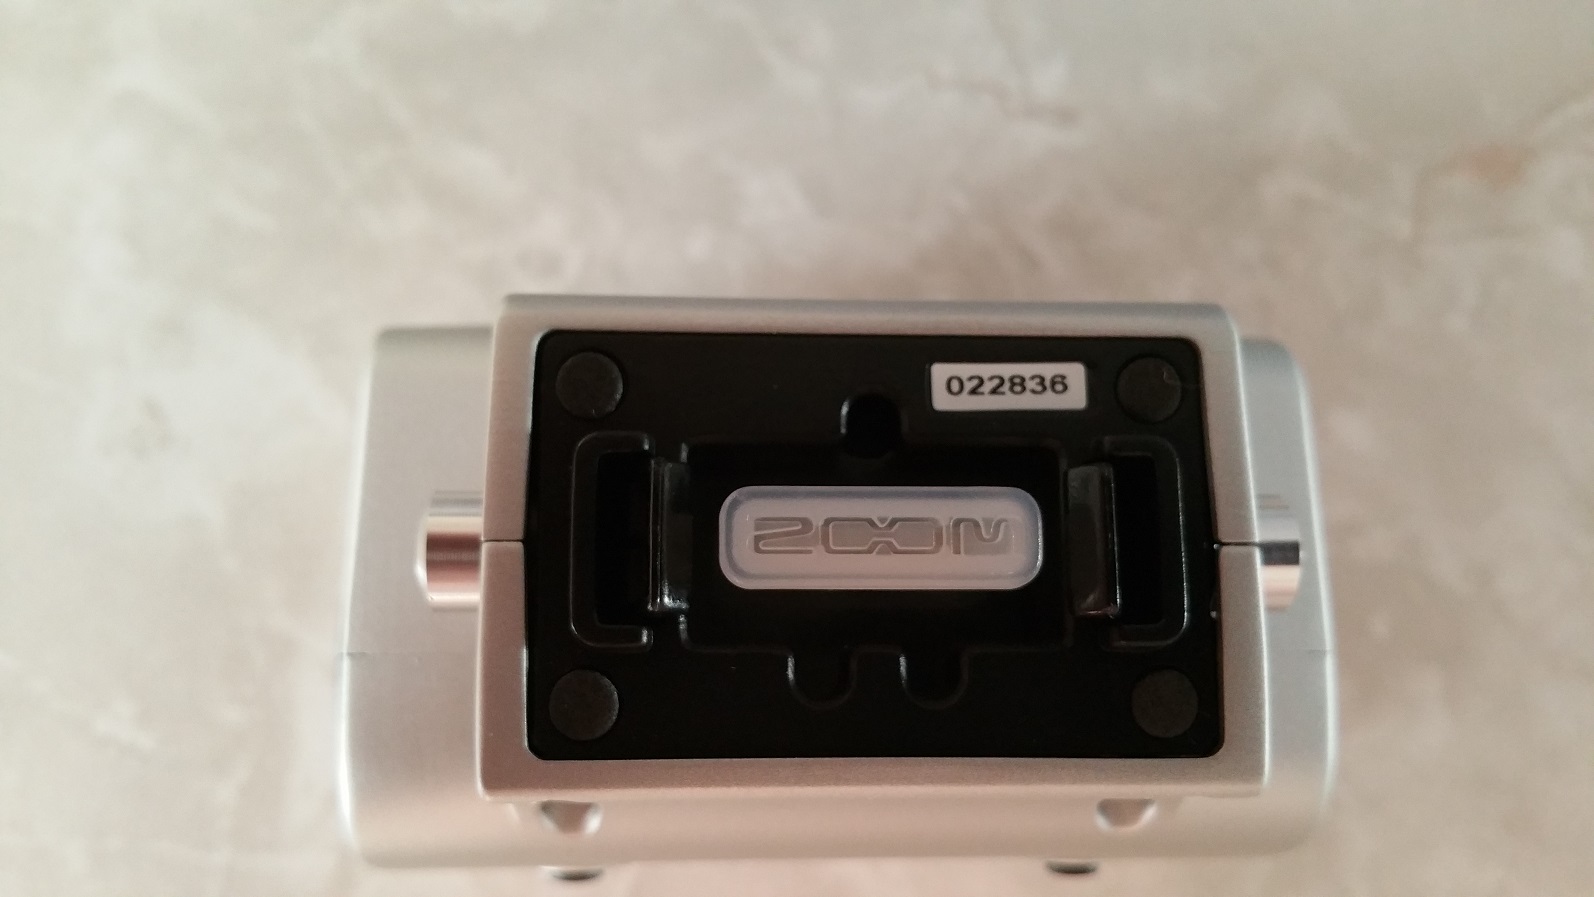
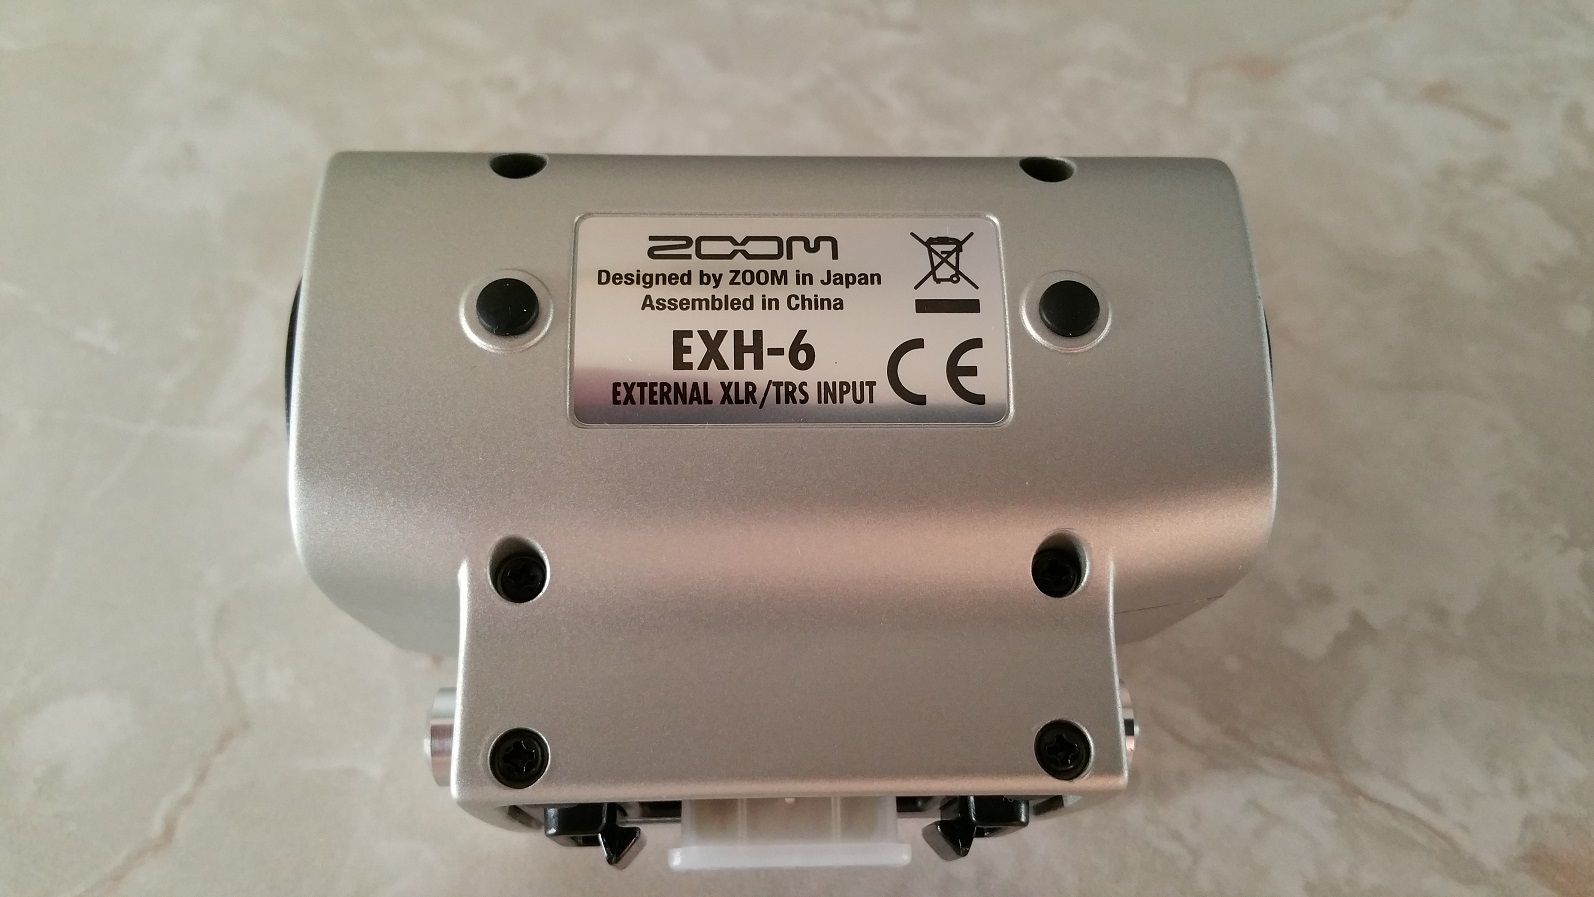
The missing part of the puzzle! Sure the F4 has 6 inputs, but as far as I am concerned, inputs #5 and #6 accessed via the 3.5mm input did not work to best effect. Via adapter cables, I could connect my BK-7m in to these inputs but at maximum output of the volume on the BK, I reached -18db on the meters. Useable… but not optimal.
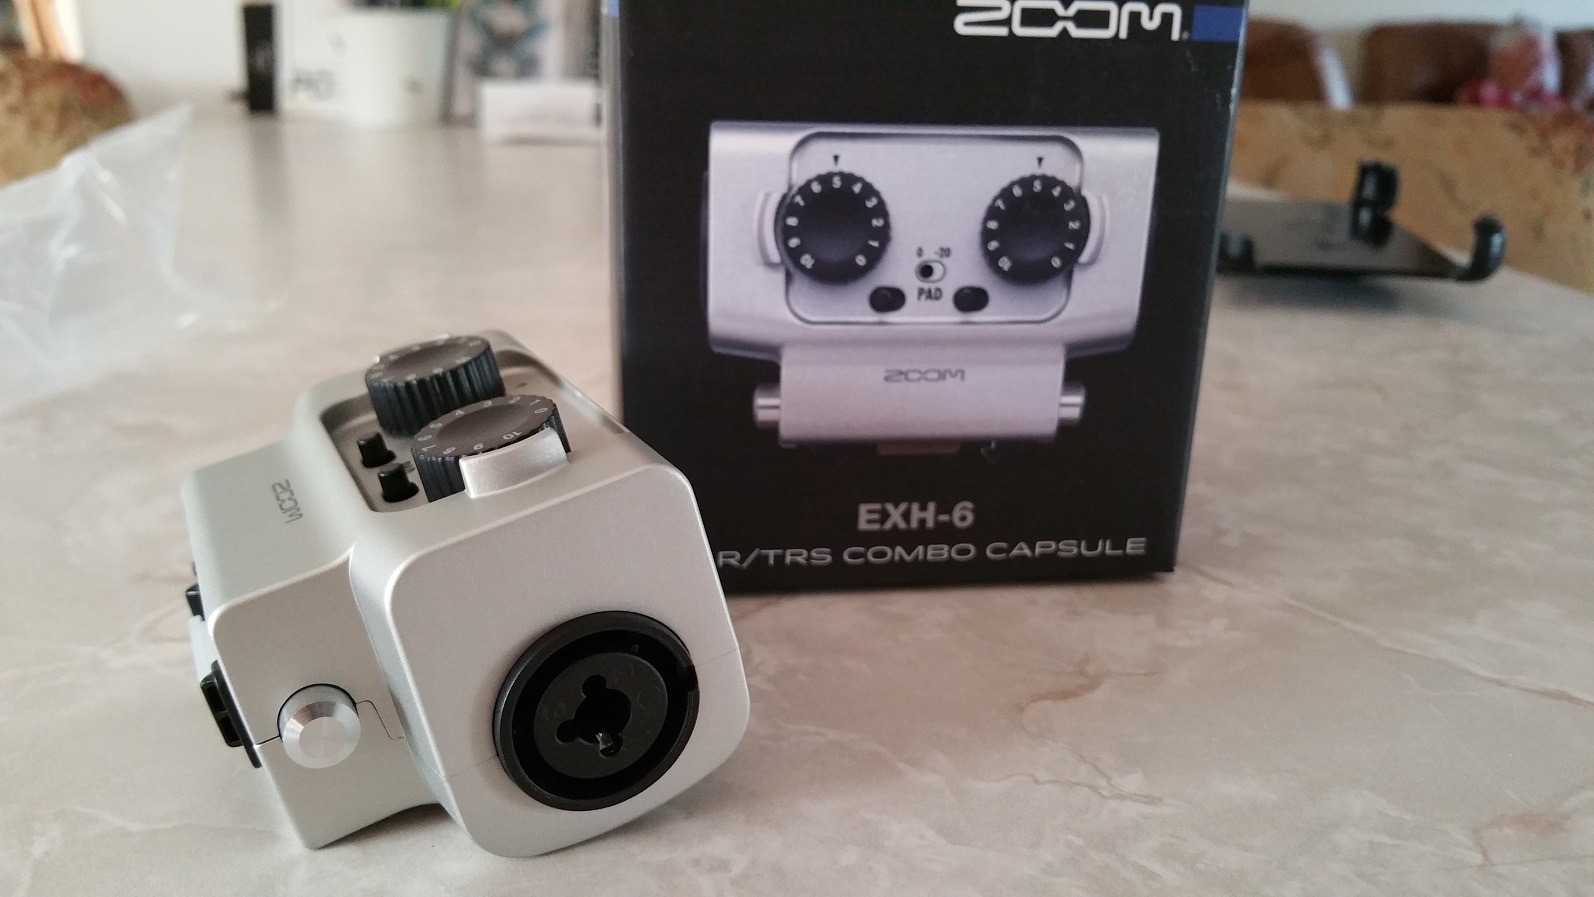
The missing part of the puzzle was the Zoom EXH-6, a dual XLR mic input adapter capsule that clipped on to the back of the F4 and at 50% volume output of the BK and the volume knobs of the EXH-6 set to 3 out of 10, I was near hitting zero db on the Zoom F4 meters! Since I record things down nearer the -12db range generally speaking, this means bringing the volume knob down closer to 2 out of 10 and with everything dialed down so much, the quality of the inputs of the BK-7m sound would be much improved… in terms of noise, pretty much equal to using the other 4 inputs in this sense… which incidentally are now free to contain up to 4 condenser mics with 48 volt phantom power when I need this.
And that brings us to the only minor downside of using the EXH-6. This adapter does not support phantom power, but that is no biggie for me. In to this capsule I can plug in either a pair of dynamic mics or the output of the Roland BK-7m, (which is what I really wanted these inputs for), freeing up the Zoom F4’s four main internal XLR inputs and there I have the option of using phantom power there if I want!
Here is what this little unit looks like:

In the second article about my new mics, you will see more info about using different multiple mics and different mic techniques with my accordion… enjoy!