March 25, 2018
I had been been looking for a way to record higher quality vocals for my videos that I make, and I finally made a setup that was both very cheap and pretty darn good all things considered!
Like everyone else, I started off by capturing audio from the camcorder, but it was pretty bad, and those who know will tell you that there are very few worse options out there other than letting your camera capture your voice via it’s integrated microphone. Well, the next level was that I used a cheap battery powered boom mic. While this was better, there was a lot of room for improvement. The problem there was that one still heard a lot of room noise and unwanted ambience.
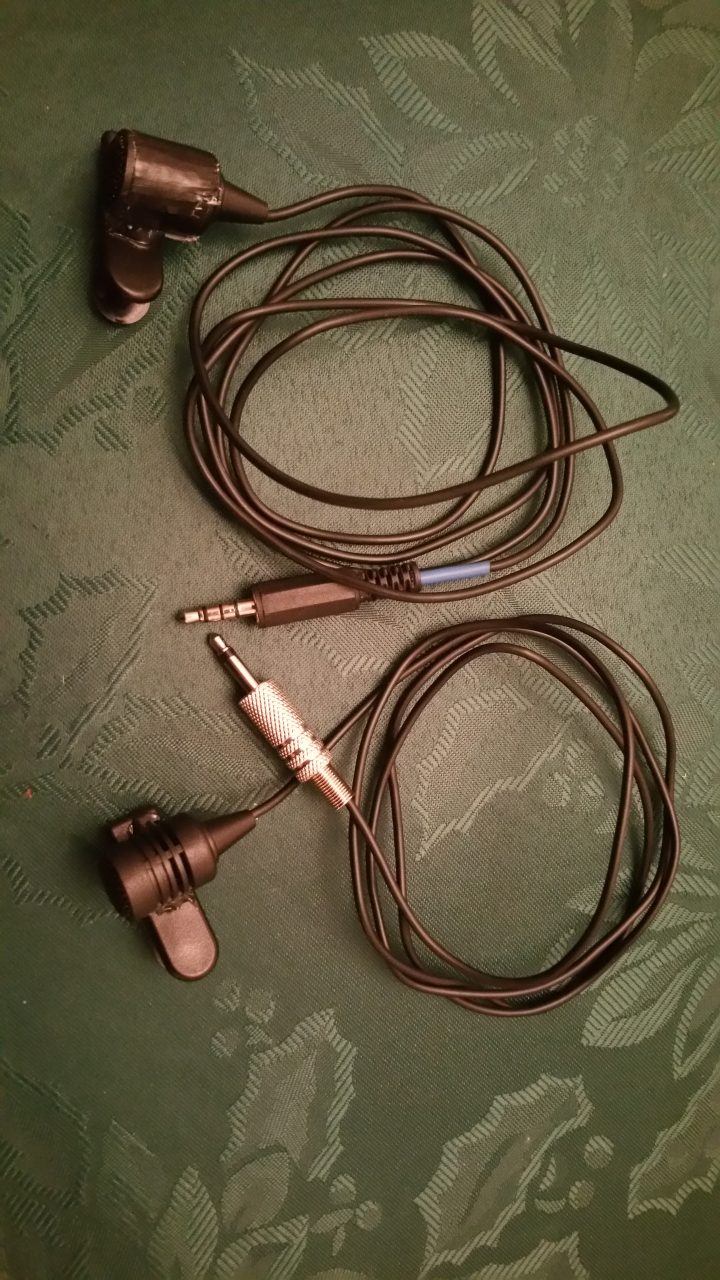
My first real breakthrough was when I found a couple of small lavalier mics that came from an old Tom-Tom GPS unit from my dad that was decommissioned. The wire was fairly long, but the plug was of the wrong type, so for the cost of a new connector ($1.25) and 10 minutes of time with a soldering iron, I was able to change it to a TRS connector and plug the lavalier mic in to my camcorder, and life was good as sound was very improved… but things were not perfect. It was a big jump up, as long as I didn’t need to move too far, or in fact, not move at all. The wires were hanging around ready to trip over and the limitation of the length of the wire with the promise of pulling the camera off the tripod showed that there was room for improvement, but the quality of the audio was better. The biggest issue was the low volume from the mic. It necessitated the volume to be raised to maximum and this also raised the noise floor quite a bit and this came through the recordings as an audible hiss. Not good!
I started looking at digital recorders like ones from the Zoom, Roland and Tascam lines, but for the kinds of sporadic projects that I was doing, there was no way I could justify spending even a couple hundred bucks (for a Zoom H1) and up for a proper recorder, so in my head that was out. That did not mean I could not make high-end recordings… don’t forget I had my Mackie mixer with FireWire and dedicated DAW to capture my audio, but though this was great for capturing music, it was far from idea for my video audio tracks.
Then on YouTube I saw that one guy was using a smartphone and a specific lavalier mic. I needed to look in to that!
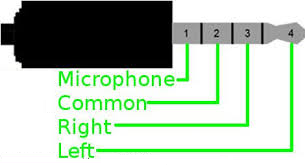
Getting a smartphone to capture audio was no harder than installing RecForge II on it and using this proprietary lavalier with a TRRS plug on it that this guy was promoting. Well, that lavalier mic looked good, but went for like $80US, which I thought was WAY too expensive for what it was, but it did give me an idea… so I took the 2nd “free” lavalier mic that I had and for another $1.25 bought a TRRS plug. The next challenge was to find the pin-out of the Samsung phone that I had. Google made that a really easy challenge, as I had that answered in less than 30 seconds
Another 10 minutes with my soldering iron, and I was ready to test. Well, that also turned out to not be much of a challenge, as the mic worked REALLY well and by this point, I only spent about $2.50 for 2 connectors and had 2 ways of recording audio.
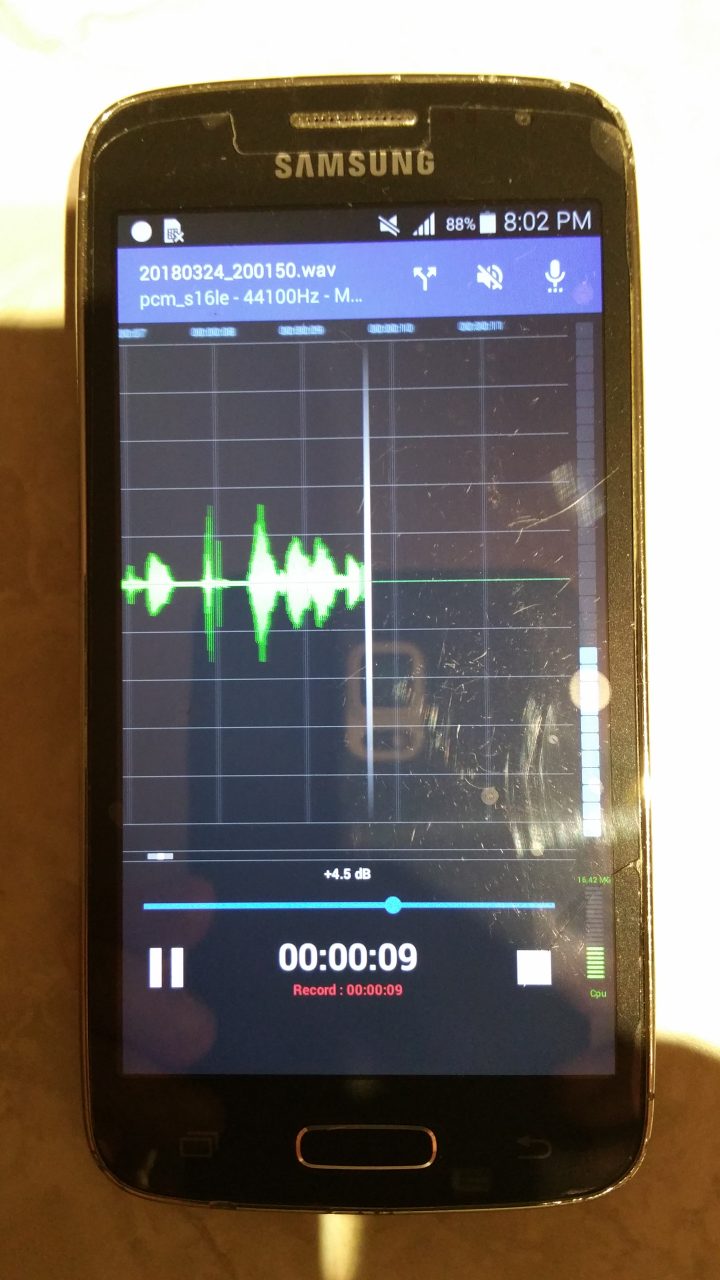
In particular, I liked the smartphone/Recforge II way of recording, as it made capturing nice audio a breeze, but I did have 2 audio sources now and I did have to sync them. This proved to not by much of a challenge with Pinnacle Studio Ultimate, and I then also learned the big secret of having even nicer and more improved vocal audio in my videos (well, basically two secrets that are not all that big a secret)!
- Leave lots of headroom in the recording and set it to all the good options. This means setting the recording levels low enough that they never clip. This is done by turning off the AGC (Auto Gain Control), and playing with the manual gain so that it records at around -12 to -16 db at the loudest levels that you might hit for best results. It also means to set the app’s settings to prevent the phone from sleeping and finally use the highest quality settings which are 16-bit, 48khz mono settings in WAV format in RecForge. Though not really needed in my case (the phone has near 10gb of available room to record on to), I suggest getting a micro SD card of at least 32-64 gig to give you dozens of hours of recording capability (that 9.8gb gives me about 6-8 hours of recording time, more than I ever might need in one session).
- Do some intelligent post processing with Reaper and export a nice high quality file. This means to do several things… first I do some minor noise removal, second, I normalize to around -1db. Third I do some minor equalization, fourth is some gentle compression and finally, when I do export, I have a limiter in place to make sure it outputs to specific levels that change based on what the use or upload location are, so that it never clips and is not modified or processed by some unknown source/manner when uploading to YouTube or other streaming media. On top of that, I will sometimes lower the volume slightly in my video editing software to specific levels to make it more comfortable for me… so I might set vocals to -7 on the volume settings and -5 on the music in Pinnacle, so music is gently louder than my voice, but the music is not overbearing. All of this sounds like a lot, but by using a feature called an FX Chain in Reaper, all I do is create a noise sample (3-4 seconds to do that) and all the other modifications to the file are instantly applied and I just render (export) the file in perfect “ready to use” format. I prefer to stay with 48k WAV files on exporting.
- Note above that I suggest to record in 48k format… this is important because my video cameras record their audio at the 48k format. By recording in different formats, you are very likely going to make your life miserable and introduce voice drift. This means that the length of your external recorded audio will be of different length than the audio track recorded with the camera recorded audio. By making sure everything is as close as possible, the drift will be likely reduced or completely eliminated. In my case, even a 20 minute long monologue synched up perfectly, so I know that I am doing something right! Don’t forget to look at the specs of your setup and match them up for best final results too.
Then I simply sync this improved audio track and mute out the audio from the video track. The result? Some VERY nice quality audio of my vocals!
So why the 2nd phone? Well, when I used my Samsung Note 4, I learned that this setup will add crackles every time the phone reaches out to the provider, and that’s a PITA. I can go in to flight mode, but then no one can contact me and I then lose the ability to use the phone as a phone.
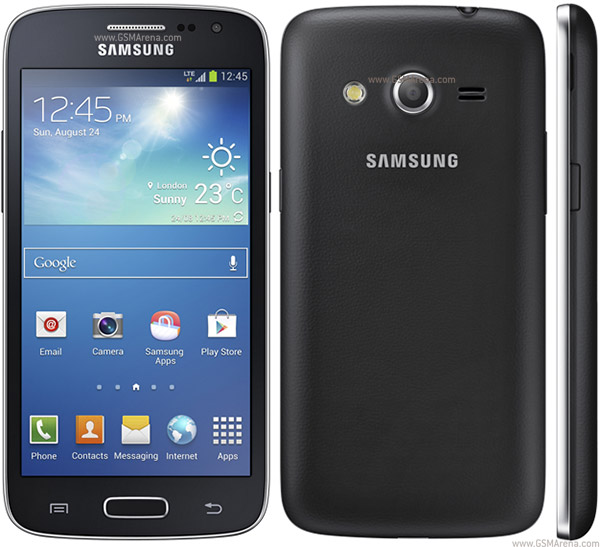
The perfect answer lay no further away than my sister. She was upgrading her phone because her current Samsung Galaxy Core LTE G386 had fallen several times over the years and had a cracked glass faceplate in one corner, and she was about to throw it away as it was already replaced by her new and better cell phone. Removing the SIM and resetting it to factory settings, then removing everything that I could and only adding back Recforge made it a far better candidate as my voice recorder! It was smaller, still had reasonably good battery life and without adding a SIM could offer me about 6-8 hours of recording times at the highest quality levels it could capture sound at.
Thanks sis! 🙂
Now, the audio portion of my videos where I am speaking is vastly improved thanks to this system! If you want to hear the results, you can visit my YouTube video and hear how it sounds because this is the setup that I used on this video! :