April 3, 2019
You know, making a video recording is not all that hard. One can do an acceptable job using almost anything, even using a smartphone. However, to make a high quality video with great audio takes a little more, and in this post, I am going to share a few of my hints to help you get to that next level.
The Beginning
Before we start, let’s define things a bit. Our goal is to make a home video recording. This can mean to be anywhere from your living room, bedroom, a room in your basement or even outside. I’m not discounting a full-out professional sound studio, but if you could afford that, you can afford several other helpers and super high-end equipment, but that’s not where I am going. Most people reading this cannot permit themselves that level of luxury. Here is another small restriction… we are doing this all alone without the help of anyone else.
That is our goal.
Another small difference concerning recording while playing live at a venue vs recording at home… this is also completely possible, but recording setups and techniques differ vastly between live performance and studio recording. For example, let’s look at the most basic of items to consider, gain staging or setting up the volume control.
When playing live, one wants to maximize volume output without distortion in every channel to get maximum quality volume for the venue without distortion or unwanted sounds like hiss or channel overload. One equalizes for the room’s acoustics to eliminate the conditions that create feedback. In a studio one records at much lower volumes to maximize headroom, totally eliminate any chance of even coming close to clipping, has the ability to create multiple audio and video tracks, do as many takes as you want and things can go as easy or as complex as you want under those way more controlled conditions. This is something that one cannot do while playing live.
When recording with the goal of making a quality recording, it is absolutely important to set maximum recording levels much lower. One also has much greater control over the lighting, with the only restrictions being space and available equipment. Here, our goals are not maximum clean sound (well, not at this beginning part of the process, anyway), but rather totally avoiding even coming close to clipping while maximizing headroom without loss of dynamic range. This is the most important goal to attain, and so while playing live, we want levels to be just under the red (0db) output for most volume, while for recording music files or the soundtrack for videos, we must record at much lower or quieter levels and never record higher than a -12db setting. I myself prefer to be somewhere slightly lower in the -18 to -12 db range. Here we maximize the dynamic range and have zero chance of even coming near clipping so that we can maximize headroom and hence, maximize the final sound quality.
The goal is to be able to capture the highest quality sound and at least initially, this happens at the expense of maximum volume. But, just to let you know, we do not leave the results at -18 to -12 db levels, that would make the track too quiet, and so here is one of the first hints I offer. At some point in the post processing workflow, we normalize to a much higher level, AFTER the audio has been captured and edited. Where one normalizes I will discuss later, once I am displaying the techniques in action. But let me be clear, mine is certainly not the only way to do things, I am just sharing how I do it, and you can decide on your own what you want to do.
Your studio area
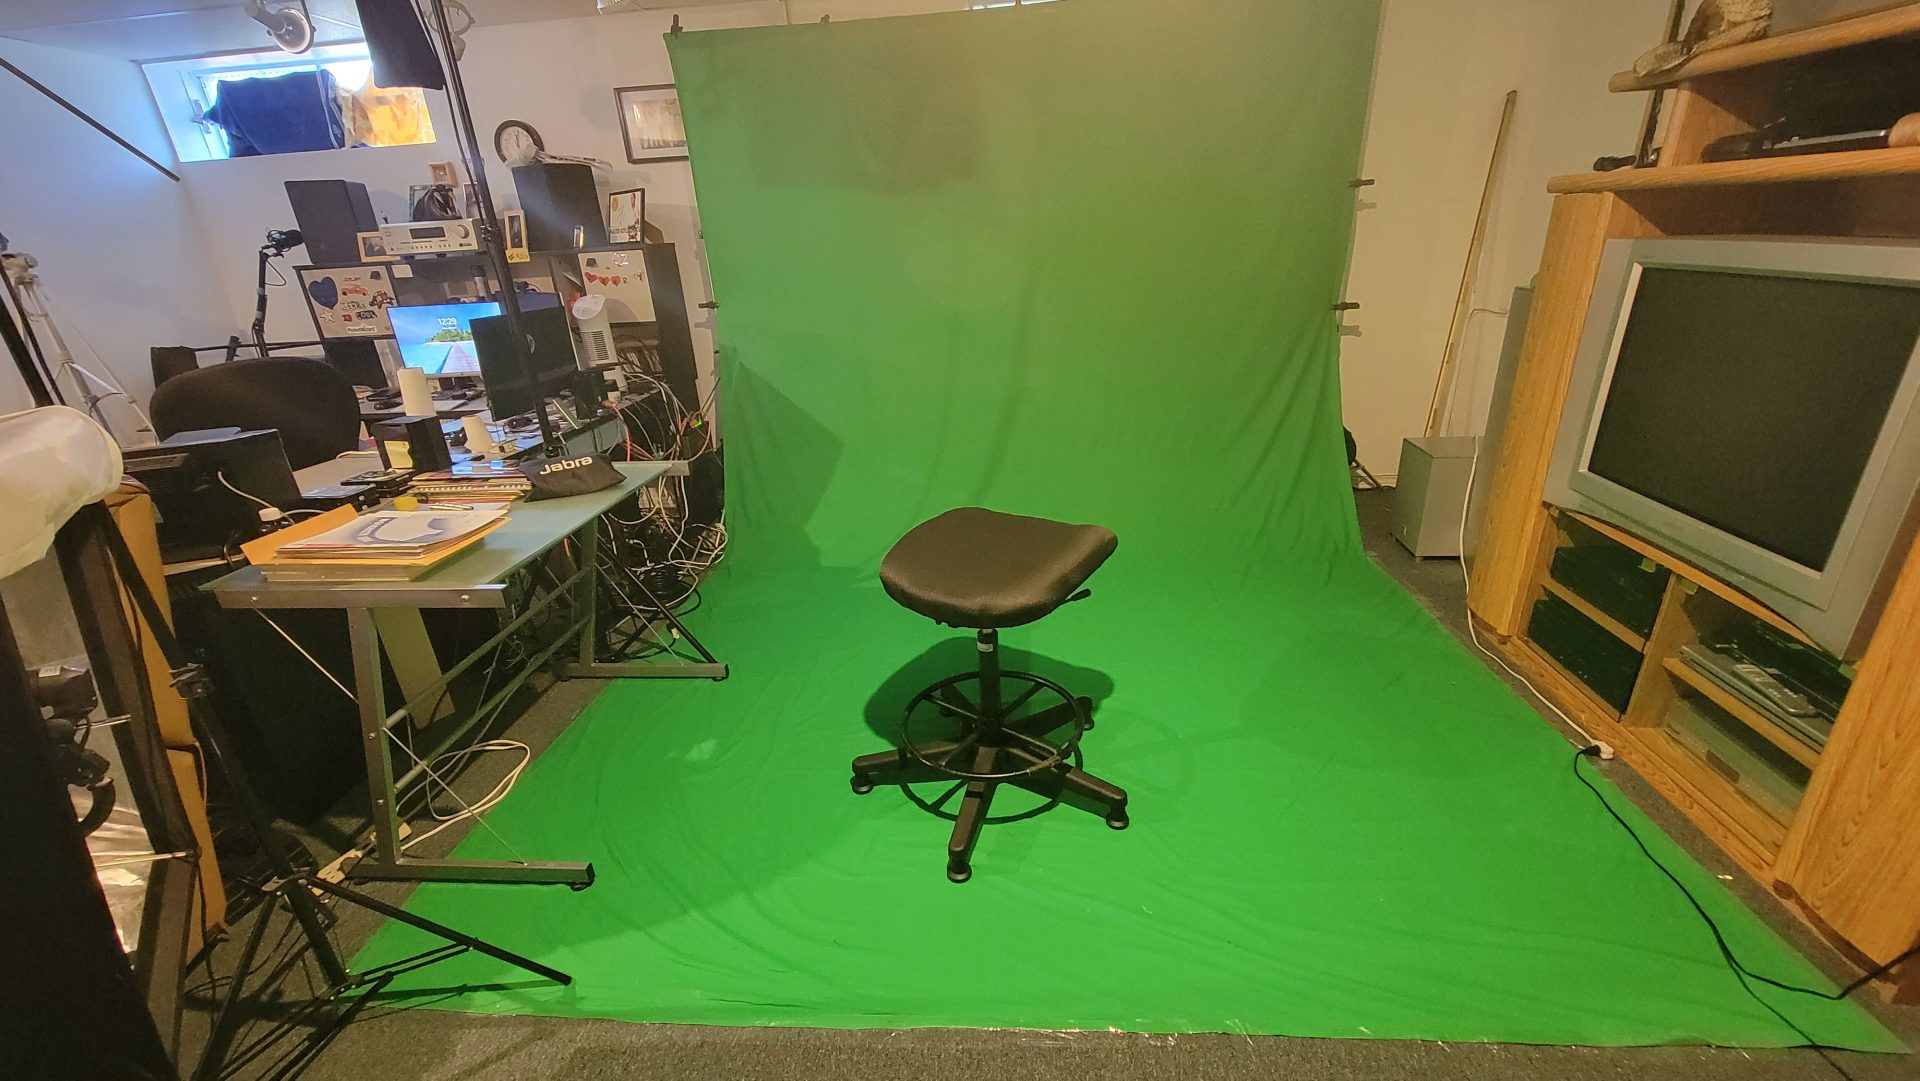
This area should be “ideally” in the quietest part of your location. It’s hard to make good recordings when you are in a noisy environment. Not only can the noise be transmitted to the recordings when using microphones for acoustic capture, but noise can be distracting I am lucky in that I have a finished basement at my disposal, but that said, I do not want the whole basement to be dedicated to this one function, so it is divided in to 3 areas: My “gym” area, working area and washroom/shower area. The working area is where I am during work hours, but it is also where I do my audio and video recordings. It takes over half of this area, but here I have my computer desk, music equipment, couches, green screen and TV/multimedia center.
My “studio” is basically an area that can hold my backdrop and has room for my lighting and audio recording equipment. Basically, I have an approximate 10 feet wide by 17 feet long area and with this I manage to do all the videos that you see on my site.
The basis of my videos start with one of two backdrops, a mottled medium green-grey muslin or a green chroma screen muslin for my green screen work. These are held up by 2 of my many available lightstands held in place with 20lb home-made sandbags and an expandable cross-bar. The backdrops are held on with several plastic clamps.
Lighting
This is probably one of the most important aspects of creating a good video. Good lighting = higher quality footage. If the light level is low, this forces the camera to use a higher ISO setting and the higher the ISO, the more grain and artifacts are going to appear in your video footage. Good lighting, however, does not have to be expensive! My own setup total is very affordable, and the results are (in my humble opinion), pretty darn good. Basements are inherently poorly lit areas but my own kit (the basis of which you see below) does a good job. The kit below was an amazon purchase and if I remember correctly, was under $120US.
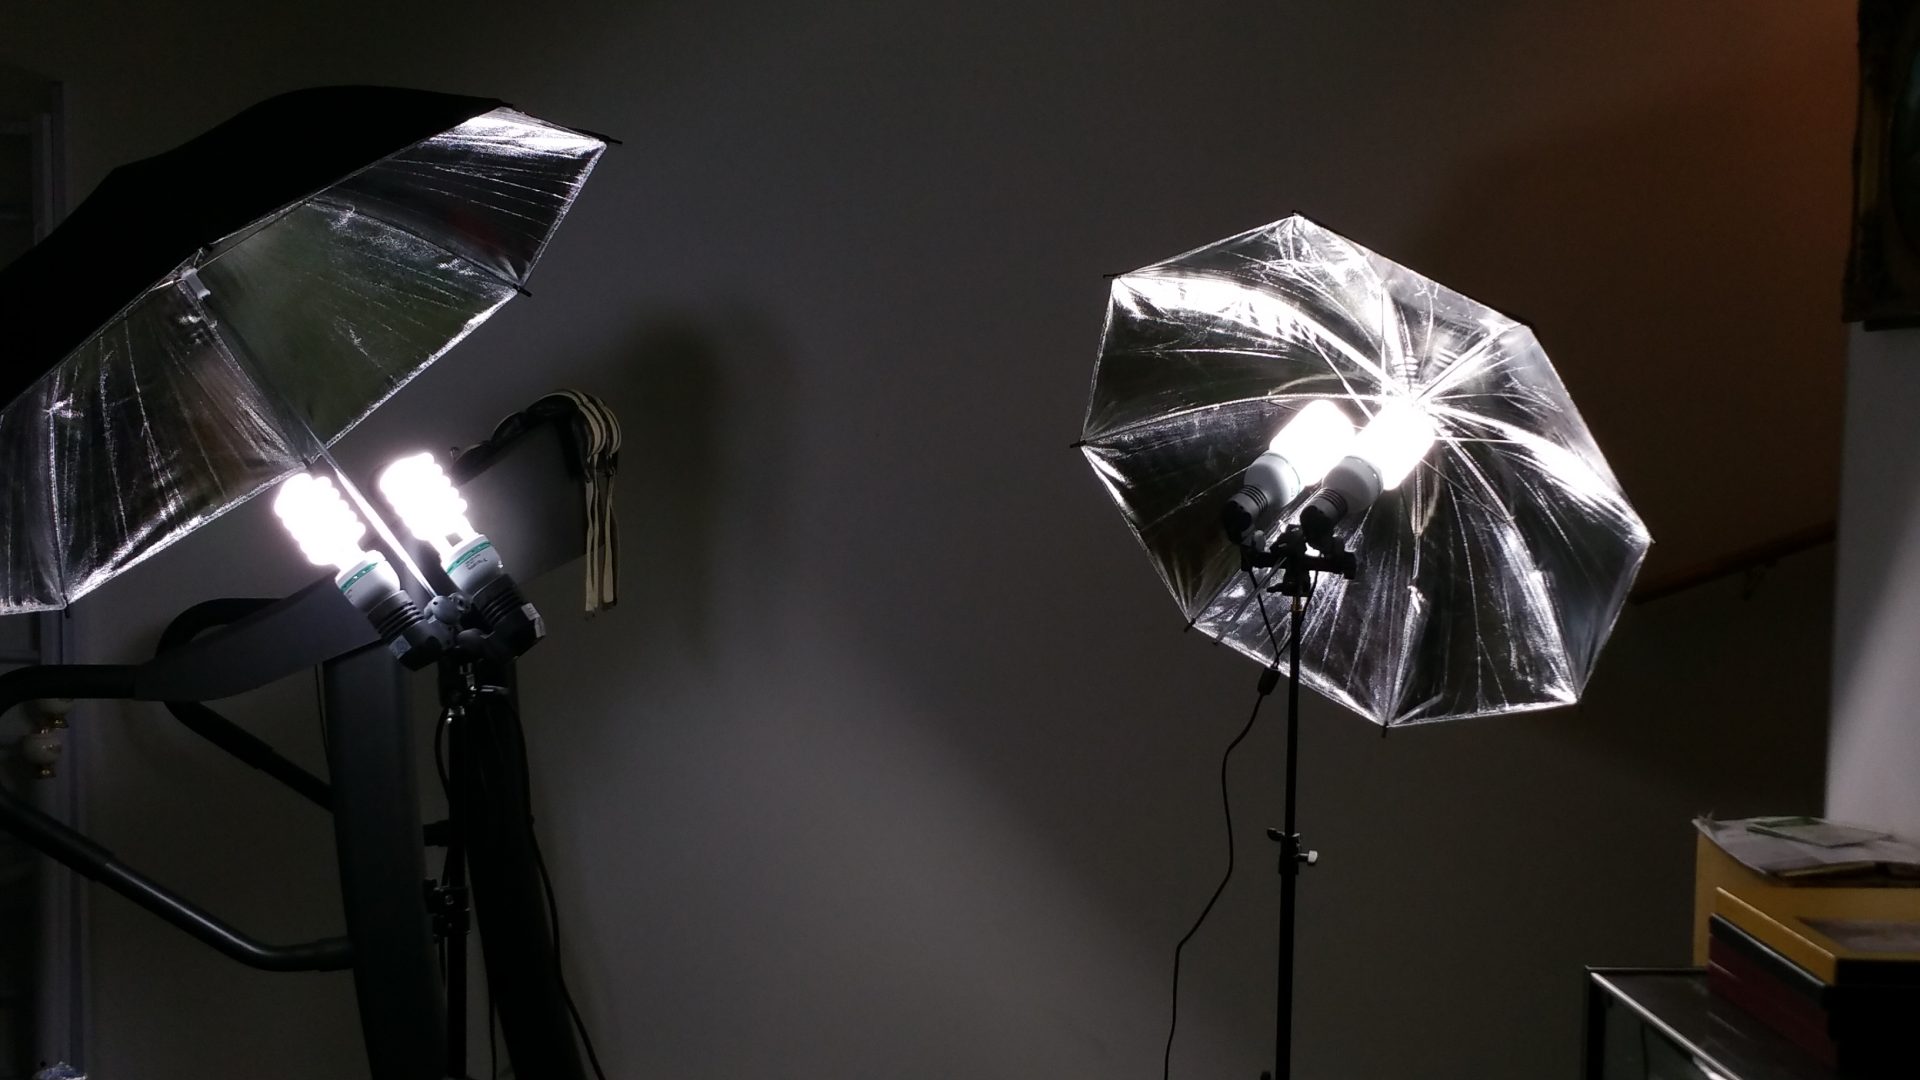
Now that said, I have made a couple of changes/additions to the above kit… I have gone from 60 watt bulbs to 85 watts. I then use the 60 watt bulbs to light the darker parts of the greenscreen using $10 clamp lights attached to another pair of light stands.
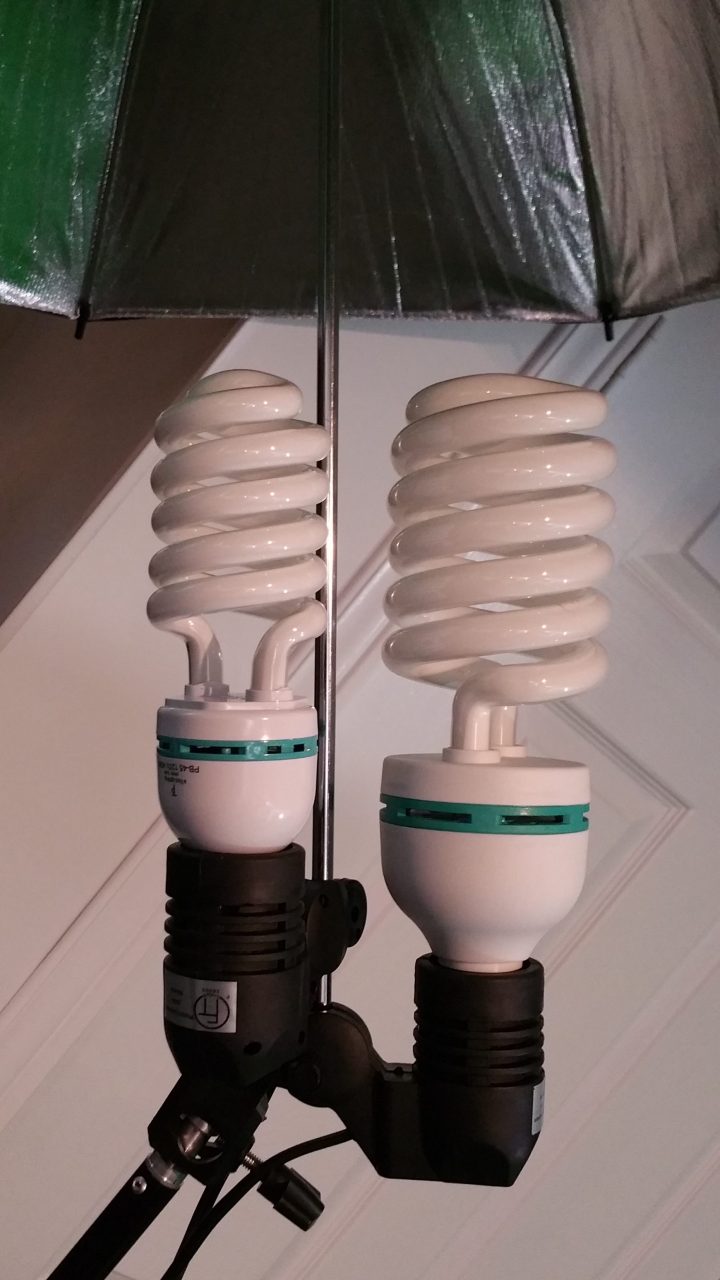
I also went to a larger 42″ reflective umbrella on my accordion right side since it is the predominant side of this instrument. Just a small FYI, in these cases, a reflective umbrella is slightly harsher but more effective in transmitting more light than “shoot-through” styles of umbrellas, they also are more directional and don’t bounce light backwards like “shoot-through” lighting does. All this makes for properly lit videos and that results in better quality footage.
The Tools and Software
As far as tools, obviously you are going to need and accordion and some kind of mic. For acoustic accordions, nice quality internal mics can do an amazing job and stereo internal mics can do a little more, but the best quality can be achieved with high quality external mics, but these are not as easy to use because of their potential invasiveness while making a video recording as they will appear in the video, but there are ways to minimize their appearance or impact in the video up to the point of them being invisible… and since we are in a controlled environment, this is less of an issue.
In terms of mics, you may choose what you wish, but I have chosen for the time being to use high quality large condenser microphones, specifically sE Electronics sE4400a, and I use a matched pair (mics chosen and “tuned” to be sonically as close as possible), when recording the acoustic accordion. When recording digital, I use the wired outputs of the accordion to capture it’s sounds. These mics are quite expensive and offer incredible results, but they are not mandatory. I have used some uber-cheap $20 condenser mics and had surprisingly positive results, and of course there are all the various options in between the $20 and $1000+ range. Each one of us needs to do our own research and make our own choices here.
Next one needs a recording device. I have two main options for myself… first for mobile needs use I have a Zoom F4 field recorder and the Zoom EXH-6 module for 2 additional inputs. This unit has superb high gain quality preamps, very quiet and professional quality. With it, in total, this unit gives me a small portable 6 input setup that captures at some excellent quality files and can save the output to dual 64gb SD cards or be used as an audio interface that can send it’s 6 channels to a small computer and I’ve used this setup with a small Toshiba laptop very successfully!
For more complex setups, I have my 16-channel Mackie 1640i mixer that feeds my dedicated DAW computer via FireWire. This setup can also be used for very high quality sound capture while at a live performance or in the home studio. The results with this mixer are just spectacular.
To capture the audio and post process it, I really like Reaper as my DAW (Digital Audio Workstation) software. It basically does everything that much more expensive software does, but for a very reasonable price, though to be honest, any DAW software here will do the job well enough for anything but high-end professional use, even a free application like Audacity.
I still like to edit my audio and video separately using Adobe Premiere Pro CC for the video and Reaper for the audio and then sync the audio file to the video in Premiere Pro. Before that Pinnacle Studio was my video editor, but once I started using 4K files and complex multicam setups and green screening, this application became pretty much unusable and I spent more time rebooting the computer or dealing with frozen apps that caused me to lose all my work. For less complex videos, though, it does really well, and at under $150, is very affordable.
More on my video editing software a bit later.
The Planning
Ok, so let’s go in to some details. Before we start pulling out the cameras and audio recorders, we need to have a bit of a plan. Depending on what you want to accomplish, this can be as simple as a single idea (“I want to make a music video”), to something very well planned and outlined all with a story line (I want to make a high quality music video with 3 cameras per take for 3 different angles, I want to have multiple accordions and other instruments in there as well and I want it all to tell some poignant story about something from my life all while using green screen techniques and multiple locations indoor and out) . Don’t just wing it without any kind of plan, because it won’t be near as good as if you take at least some paper and a pen and jot down the story that you want to show. Think about:
- the musical theme and song you want to record
- location(s) to shoot the video
- the story you want to tell visually and musically
- camera angles
- the secondary sound tracks and instruments
- think out the lighting setup(s)
- the background… real or “fake” (via green screen)
- the overall look you want the video to have
Video Setup
First off, I made another big change in the software that I used. Back when I was using Pinnacle Studio, I was happy making the simple, basic videos and Pinnacle worked. The day I started playing with multiple cameras, it slowed down tremendously, but I persevered. The day that I started using 4K footage… Pinnacle became totally unusable. A rip of a 3 minute song took 48 hours to rip… and failed in the last minute before becoming complete! I was fed up and it was time to move on fast!
I spent a good several weeks asking around researching, reading and comparing. I found that Adobe Premiere Pro was very popular and subscribed on a monthly basis, learned it, got all comfy with it, and then made a couple of awesome videos with it… then I started using two 4K cameras, and though it was functional and usable, it was slow on my computer, and it was also pretty expensive for $25US per month… so I went back to the web and found another software.
More research, learning, more practicing, a few tests and I was ready to jump ship away from Premiere Pro as the replacement I found was faster, had tons of advantages and had one unbeatable advantage… it is available for FREE. The software is called Davinci Resolve, and I am starting out with v.15. It’s a very complex program but wonderful once you learn it. The performance of this software on the same laptop that really slowed down Premiere Pro was very usable, even using many effects on dual 4K files and a big audio section.
It has superior color grading, and one thing that I like… a fully integrated audio solution along with a wonderful video interface and I love that I can grade my picture clips and video clips in the same ways. It also has Fusion, a powerful graphics creation module… again, all built in to it. It’s kind of like having Adobe’s Premiere Pro, Audition, and After Effects all in one… and all completely for free. Sign me up and if I get really in to it, I won’t mind spending the $405Cdn to get the full version. It is now my main software for video, but I am still using Reaper for the Audio, though once I master Davinci Resolve, I may move my audio workflow in to that software too!
But I digress… back to the main focus of this post.
When one wants to make an advanced video using multiple cameras, one has to know kind of in advance what the story will be to better place the cameras and to capture the angles that you want. Remember, I am all alone, so have to be able to do this by myself. Preparation here is important.
When speaking of basic “looks” you want from each camera, it is important to try to match things up, and unless you are using two identical cameras and lenses, using the same identical settings, this can be a challenge. The most important place to start is to make sure that the color balance of all the cameras is matched up to the same levels under the same lighting. Now if all you are doing is one instrument, that is one “take” and you could be done.
However, if you are doing a multi-track setup with multiple instruments in the video, this could mean a whole lot more work recording the video and audio of the basic track and listening to this while playing along adding another 2 or more video tracks and one or more audio tracks. A very important tool to help match up the colour science of two different cameras is an X-rite colour checker. I have the classic Color Checker Passport back from my photography days… a GREAT tool to get not only perfect white balance, but colour matching.
This tiny tool can go for $175US, so not cheap but it does make a visible and positive impact on the video.
Audio Setup
Yes, above we already briefly discussed capturing the audio and video at the same time, but we didn’t talk about setting up the audio and what to do. For me, I have setups available to me that really can go from mild to wild… from recording directly to the camera for a single take or pulling out 3 cameras, multiple accordions, multiple digital sounds on multiple digital tracks all sent to a computer with DAW software. I really like the idea of using my Zoom F4 or the Mackie mixer and using either as an audio interface, capturing the audio to a computer of some kind and from there, transferring the files to the main computer for pulling it all together. The concept of creating multiple tracks and mixing them all down to one, and then synchronizing it all to the video is an auditory game changer and can take an ordinary video to the next level.
Again, how complex or how easy you want to make things… this is all 100% completely up to you!
Real Life Example
Ok, so let’s walk through something a bit simpler, but something that will still sound and look really good and give you an overview of my style of working. This is not a video that I made, but was made for my friend.
When I went to Florida to visit with my friend Ed, I had the opportunity to bring my Sony camera and Zoom F4 and do some audio and video capturing of this very talented man. Let’s use this scenario to show how I like to work.
The setup was very easy. We made a little room in his dining area, he set up his playing space in a location that was very attractive and we lit the area he was going to be sitting with a 2 light setup using umbrellas, stands and 60 watt fluorescent bulbs, a very basic setup that minimized shadows and gave a very good even quality of light.
The camera was about 10-12 feet back on a tripod and I framed the shot making sure that Ed and his lovely Borsini accordion were the star of the show. By having the camera a bit further back and zooming in slightly, I was able to compress the background just a touch. I had the camera audio set to full automatic and was totally unconcerned about if the audio it captured was too loud or soft or whatever, as this audio track was there only to sync with the quality audio track later and then mute or remove it altogether.
The quality audio was being recorded straight from Ed’s internal mics to the Zoom F4 and out from there to his little amp. I was totally not concerned about ambient sound as the accordion mics were very close to the sound source and I was recording at a fairly low level, maxing out the meters at around a -12db range at the loudest parts of the song, and I found this setting by asking Ed to play very loud for a few seconds as I adjusted the inputs on the F4. There was very little chance of his internal mics capturing the sound from his external amp and polluting the recording, and things sounded very good straight out of his accordion.
After that I simply turned on the F4 and video camera, left them both recording, and let Ed play. He played a quick warm-up piece and then went straight on to playing 3 pieces. My only advice to Ed was to give me about 5 seconds of minimal movement at the start and end of each piece. Right after that, off he went and played wonderfully!
Off to the dining room studio!
Seating myself at Ed’s dining room table with my laptop and headphones, I started off with the audio from the Zoom F4. I copied the files from the F4’s SD cards to a project folder on the computer to create a work area. I basically divided the audio from the 3 songs, to individual sections each on it’s own track. Then it was simply a matter of applying the right amounts of EQ, reverb and compression settings to each track. The second last step was to normalize each track to -1db and then on the main output, added a limiter that set track volume to not pass anything higher than at a -1 db level at the loudest part of the song and the last step was a simple export of each song as it’s own high quality WAV file. Ed’s accordion is an incredible instrument with a fantastic sound, so it did not need very much work to make it sound like it was all recorded in a professional studio!
The next part is that I copied the video clip from the Sony camera and did something similar to what I did with the audio from the F4, meaning that from within my video editing software, I created 3 files, one from each song so that I could better export them in their own sequences, making it easier to work on each song individually.
Normally I work with one song at a time, not three, but in this scenario, my time was limited as I had Ed and his lovely wife Lorraine very curious to see the results… so I rushed things along just a little. I knew that Ed wanted to make the final video himself, meaning he wanted to practice adding an intro and exit to his files before exporting his versions and then uploaded them to his YouTube channel, so all I had to do, was to give him the completed musical part of the video.
The post processing part of the video was not very difficult. The camera had a proper white balance calibration before starting the video, we auto-focused once and then locked that down, so the picture was nice and sharp. The lighting was very good so the colours were very rich. We exposed perfectly for how we wanted and so all I had to do was do some minor tweaking here and there, then I added the mastered WAV audio file to the timeline and sync it with the camera’s video. Once that was done, I trimmed it for best effects, leaving him room to add his intro and exit on each video file… and exported. I did that 3 times, once for each song.
The Final Result
Let me show you a modified file of one of the songs that Ed already has on YouTube with minor modifications to the video to give you an idea of the impact each set of modifications did to the overall effect. This is basically how I would do it now, using my latest software choice, Davinci Resolve. A small note… I exported in 720P, so watching it full screen on a huge monitor is not going look it’s best. This is not the fault of the file, it is made like that as an example of the way I edit and is in a format that is easily viewable from my server.
Here are the results:
These results here are slightly different to what I gave Ed, which is understandable, as I now have better software and also improved my editing skills a good amount, plus I had more time to futz with the video. By the way, if you enjoy Ed’s playing as much as I do, he has several awesome videos on YouTube, click HERE to visit his page!
Well, that’s it for this post. I hope you enjoyed this foray into my head as a budding videographer.
Enjoy!!